
My restoration project - Rusty 89
- Thread starter adampecush
- Start date
You are using an out of date browser. It may not display this or other websites correctly.
You should upgrade or use an alternative browser.
You should upgrade or use an alternative browser.
Just an update, not a lot of progress has happened recently, as I got married a couple weeks ago, which more or less prevented me from working on the car. With that said, the only thing that is really preventing me from finishing the interior is making a set of mounting rings for the rear speakers...which I hope to have done this weekend. For the engine, I then have to deal with mounting the oil cooler, thermostat, and filter relocation mount (which is F'ing massive, and only fits in one possible location).
Intercooler:

General car shot

Intercooler:
General car shot
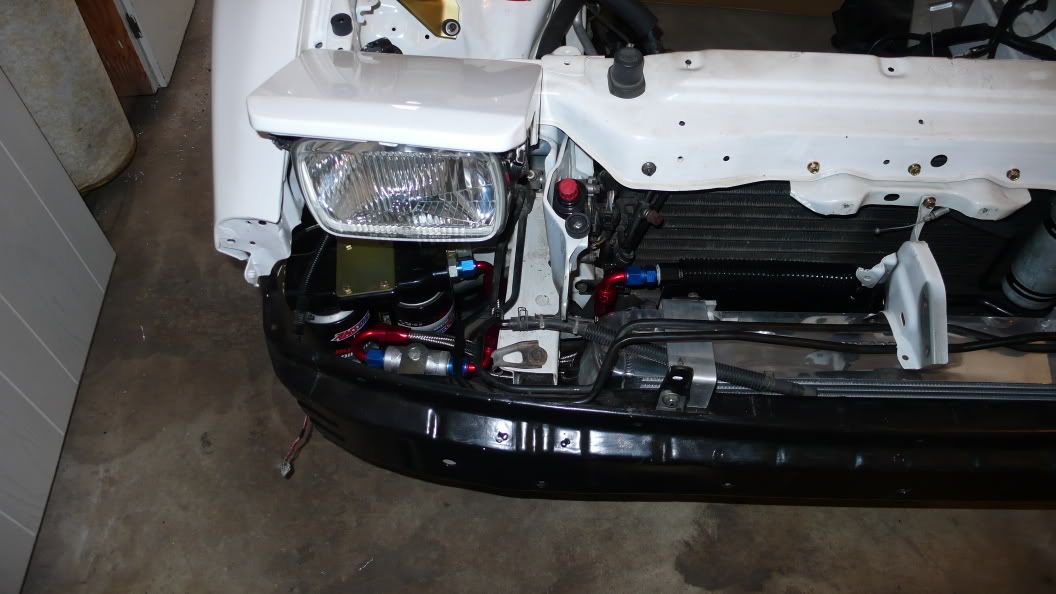
The cooler has to go behind the intercooler on the passenger side, with the ports facing toward the passenger side of the car. (I probably have the exact same B&M cooler as you) I have to punch a hole through the headlight mount to run the line to the thermostat, which will be mounted on the frame rail. The size of the dual filter mount and the filters requires the filter mount to be positioned diagonally (filters pointing down) below the passenger headlight. For this, i need to weld a bracket to the bumper support, and modify the fog light mount.
adampecush;1125591 said:The cooler has to go behind the intercooler on the passenger side, with the ports facing toward the passenger side of the car. (I probably have the exact same B&M cooler as you) I have to punch a hole through the headlight mount to run the line to the thermostat, which will be mounted on the frame rail. The size of the dual filter mount and the filters requires the filter mount to be positioned diagonally (filters pointing down) below the passenger headlight. For this, i need to weld a bracket to the bumper support, and modify the fog light mount.
That's exactly how I mounted mine. Except I managed to avoid cutting any holes, I think I drilled one extra hole for the filter mount but the rest used factory holes. I managed to avoid making the filter mount diagonal, but the way you are doing things will probably allow you to run shorter lines back to the block
Here are some pictures of how I did mine, maybe it will give you some ideas (not that there's anything wrong with yours! Horizontal filter mount may be easier to change filters):
http://www.supramania.com/forums/showpost.php?p=1040898&postcount=402
http://www.supramania.com/forums/showpost.php?p=1050309&postcount=418
For the drain hole in the side of the pan, 2002 Prius oil drain plug
")
I ran mine on the driver side instead of the passenger. I figured there was more of a chance of needing that space for something else, like intercooler pipes or something. I put the thermostat where the old oil cooler was and the oil cooler in between the nose and the radiator support. Top passenger side. It turned out very clean looking and oil filters are pretty easy to access and change. Click on my old build thread and look on page 16 and 17 to see mine.
Your work looks great by the way!
Your work looks great by the way!
I solved one of the major issues with my filter relocation...it previously had a #10 ORB to a -10 AN fitting, which required me to use a -10 to -8 adapter, and then a -8 elbow as I thought I couldn't get a #10 ORB to a -8...well, it turns out they're readily available, and as a result, I gained over an inch of clearance to mount the filters. Depending on the fit, I may still have to go with a #10 ORB to a -8 swivel (which I also just found out are available). Damn hose ends start to get expensive in the bigger sizes...
a couple of pictures from this weekend.
rear panels and subwoofer installed - all thats left back there is to cut the carpet around the sub. (If anybody had a good set of rear interior panels, PLEASE let me know. As you can see, those panels are in horrible shape...I'm almost ashamed of them)
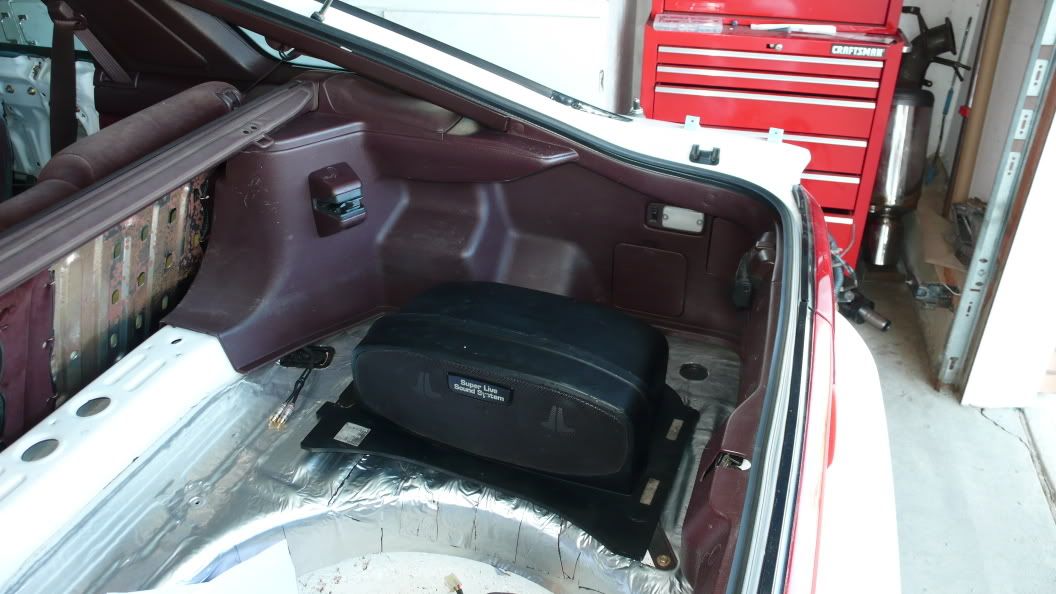
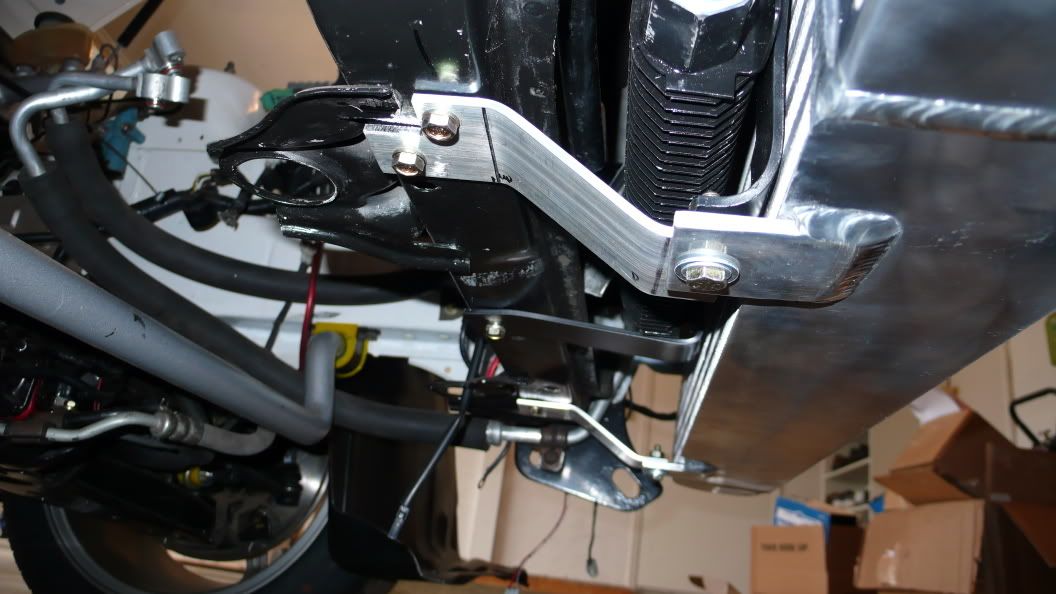
Heres the oil cooler and intercooler mounted (mostly finished - just need to make a couple more brackets). I still need to mount the oil filter bracket and thermostat, which will likely suck.
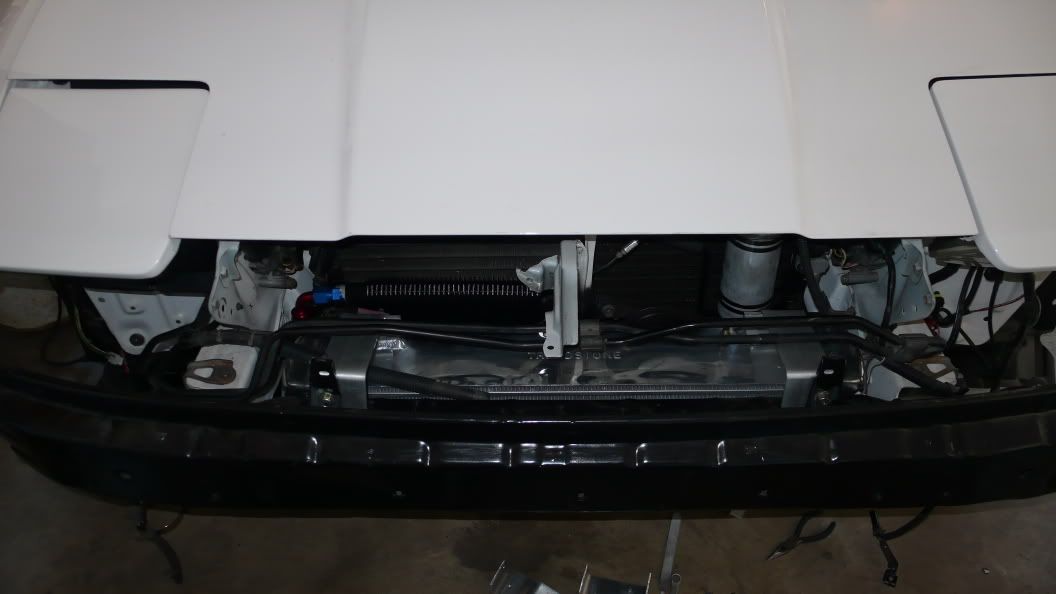
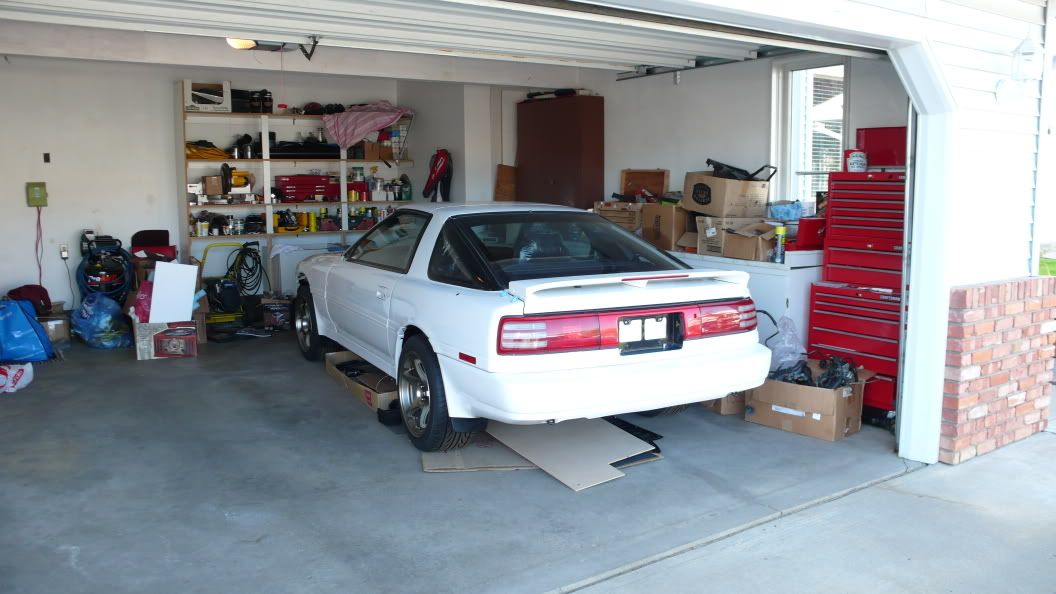
Overall shot of the car as it sits:
rear panels and subwoofer installed - all thats left back there is to cut the carpet around the sub. (If anybody had a good set of rear interior panels, PLEASE let me know. As you can see, those panels are in horrible shape...I'm almost ashamed of them)
Heres the oil cooler and intercooler mounted (mostly finished - just need to make a couple more brackets). I still need to mount the oil filter bracket and thermostat, which will likely suck.
Overall shot of the car as it sits:
wow that is looking awesome. I wouldnt want to get it dirty after all that time and hard work invested.
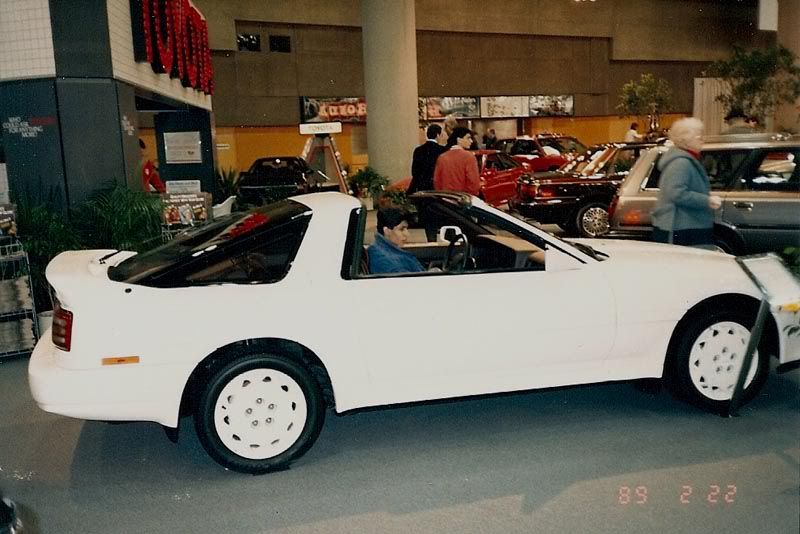
Everytime i read through this build the more i think of this photo that was taken at the Canadian Internation Car Show in Toronto.
Check the date 1989 makes me wonder if you have this very same supra
(Interior is burgandy its just the lighting makes the interior look gray)
Check the date 1989 makes me wonder if you have this very same supra
(Interior is burgandy its just the lighting makes the interior look gray)
theres a chance, but the targa white package/burgandy velour interior was a pretty popular colour in '89. There has to be at least 8-10 that I've seen in Edmonton alone...
by the way, did you happen to notice the orange rear side marker lamp in that picture?
by the way, did you happen to notice the orange rear side marker lamp in that picture?
WOW!!!
Dont know why I hadn't stumbled on to your build thread earlier, but AWESOME work. I just went thru the whole thread this morning. I cant wait to see that thing running, its always so rewarding going on your first drive and then your first road trip. I know you will have weeks (maybe months) of little stuff to do once its running, but Im sure you can see the end. CONGRATS!!! again.
Make sure to read my thread on bedding your new brakes. If you don't have all the bugs shaken out right away that cool but make sure to bed them in as soon as possible. If it takes a while just be very easy on the brakes until you can do it properly.
Heres the link.
http://www.supramania.com/forums/showthread.php?t=78287
thanks for the link and the kind words. If all goes right (which it never, ever, ever does) I should have the car together and running within a month. Once my expanded oil pan arrives, I'll have the engine ready to drop in, so things should move pretty quickly from there.
I cannot wait to get back behind the wheel...this car is going to feel 100% different from when I drove it last.
I cannot wait to get back behind the wheel...this car is going to feel 100% different from when I drove it last.
This is the best build up thread that I have read so far, Awesomes progress and That is Great that u saved a rusty supra from the grave. Cant wait to see it finished.
adampecush;1135003 said:I cannot wait to get back behind the wheel...this car is going to feel 100% different from when I drove it last.
Because it will brand new again!:icon_bigg
oil cooler, intercooler, and filters are finally mounted. Next step is to R&R the engine oil seals, install the new pan (thanks dr.j) and drop the engine in.
Pan (wrapped up to keep the dust out)
Pan (wrapped up to keep the dust out)