
Damn, I thought I remembered seeing the R154 in this thread. Now I feel stupid. The way you jokingly quoted it made me think for some reason you were going A340E or something.
My restoration project - Rusty 89
- Thread starter adampecush
- Start date
You are using an out of date browser. It may not display this or other websites correctly.
You should upgrade or use an alternative browser.
You should upgrade or use an alternative browser.
As of last night, the car now has functioning brakes. Bleeding from dry was not fun...especially without a vacuum bleeder. No, I did not take any pictures of the full reservoir.
For future reference, I recently bled my brakes on my Miata by myself...sort of the wrong way. I pumped my brakes quickly and made sure there was fluid in the system at all times. Granted I still need to get some air out, the pedal feels a bit on the squishy side but still nice and works. I do not recommend this as a final way to bleed your brakes, but as a start. I also have manual brakes in the Miata, so I had a stiff pedal. This way I improperly compensated for the lack of working brake booster.
yeah, when doing the brake pump method, it isn't possible to do it by yourself. I was on the brake pedal, and my dad was on the bleeder screw. open screw-push pedal-close screw-release pedal. Any other way (aside from a vacuum bleeder) and you get air in the system.
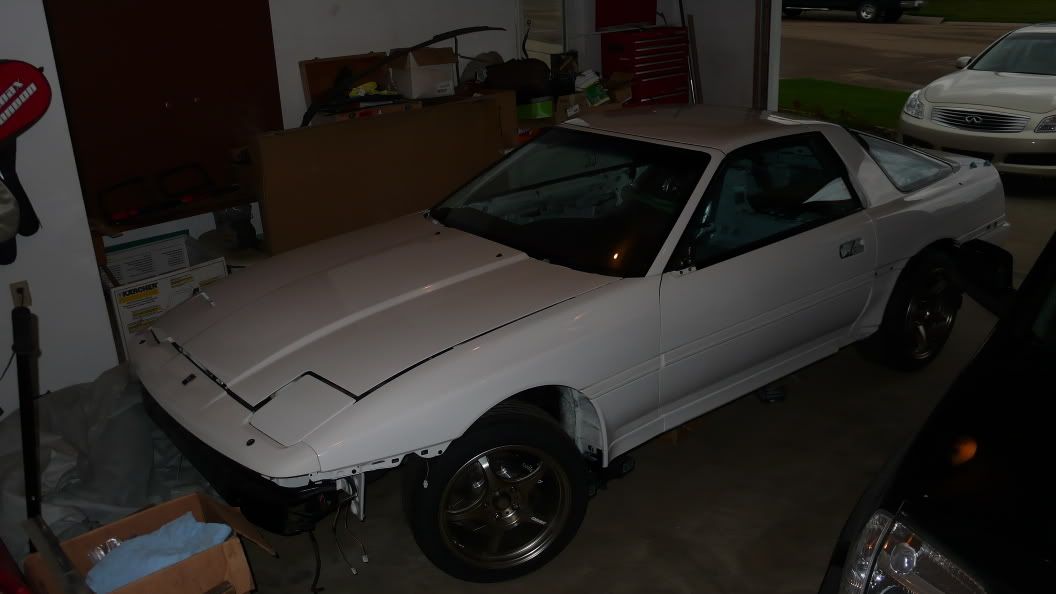
well, I'm back in the windshield club....all of the glass is back in for that matter, just need a new passenger side window motor now (doesn't quite get the glass all the way up)
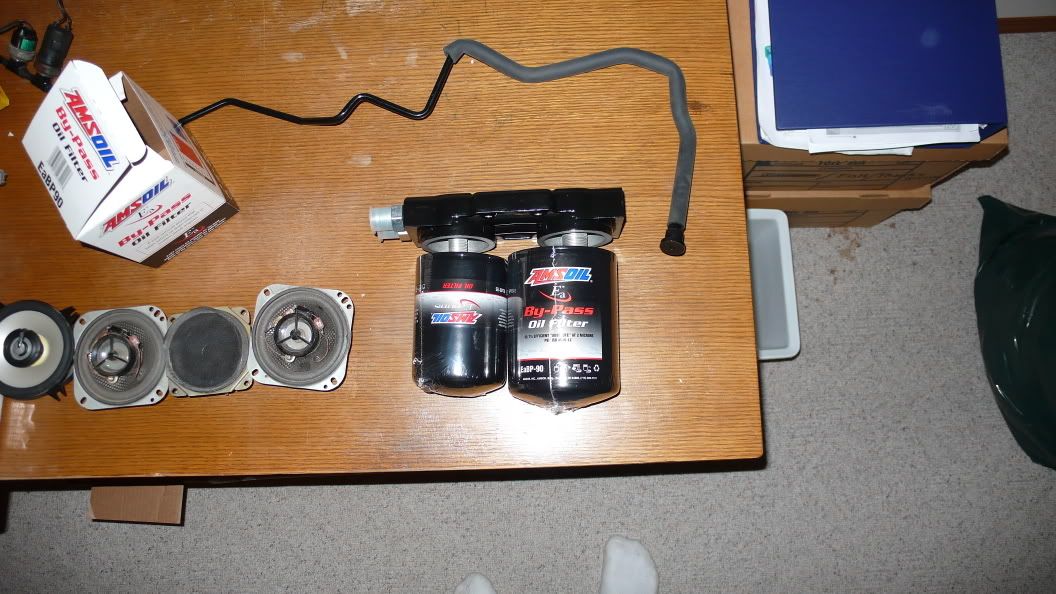
Oil system has arrived:
Supposedly good brake fluid (we'll see)

Oil system has arrived:
Supposedly good brake fluid (we'll see)
nice now i know what to use for the rust where my spare goes =D Good Job man I give you much props!
Amsoil is awsome.Real nice work on the car.I remember when it was a rusty 89.Can't wait to see it when it's all done
thanks for the comments guys.
the parts are starting to roll in pretty fast....I've got to start assembling things quicker...
Things that have recently arrived/will be here shortly:
~20 2.75" mandrel bends for ic piping (got a wicked deal buying bulk...)
-silicone IC couplers with t-bolt clamps
-new(er) centre console with lid
-new(er) power steering lines
-got my ffim back from the welder with q45 tb flange welded on
-various interior panels (by the end of this I'll probably have 3 incomplete sets of burgundy interior panels)
Next up is the installation of the intercooler and oil cooler as well as finishing off some more interior crap. Waiting on lock cylinders is a bummer, as it prevents me from assembling the doors and the hatch area.
gtsfirefighter
SM Expert on White trash
Well, just went back through your entire thread and doing so makes me want to go out and slap my car, and myself.
You made a mention of SILV last year. Do you plan to be there with a completed 89 restoration???
You made a mention of SILV last year. Do you plan to be there with a completed 89 restoration???
gtsfirefighter;1062539 said:Well, just went back through your entire thread and doing so makes me want to go out and slap my car, and myself.
You made a mention of SILV last year. Do you plan to be there with a completed 89 restoration???
haha, that was a deadline I set for the car last year that I missed by a long shot...I'd like to make it there this year with the car for sure assuming everything is together.
Wow this rebuild is amazing! Too bad i wouldnt have the money to do something like this for a long time. Because i just bought a supra and she's hurtin with rot. What did you use to undercoat yours with?
adampecush;998294 said:On all of the suspension components I used two coats of the rust preventative paint, followed by two coats of chassis coat black. (all por-15) While I did completely sandblast each part before painting, I went with the rust preventative paint base layers as added protection.
The paint actually ends up quite smooth despite how it appears when you brush it on. I'm very impressed with the paint. If you are using the paint, make sure you apply it at room temperature. I painted my bumper supports at ~5C and the surface finish ended up looking like shit. Good thing they are hidden by the bumpers. (I'm almost embarrassed to say that)
Says he used www.por15.com for everything. I have heard nothing but good reviews about that stuff and plan to use it myself.
Adam, I am right there with ya man as I am currently doing this exact same stuff on my car. Man does it take time! Does not seem like a lot but it all just adds up. My car was rusted almost exactly as yours was, although i havnt gotten to rip the front seats out yet to check the floor so thanks for the heads up! Do you have any way to find out where he got the rear outer quarters from? I just need the r/r outer and having a hell of a time finding a clean, unbent, unrusted one. Thanks so much for the inspiration and fixing the rusted supra! (As I read from page 1, I must admit I was a tad dissapointed seeing the supra stripped and moving on to a new shell but then I realized you were fixing it! awesome!)
casgallo;1066684 said:Do you have any way to find out where he got the rear outer quarters from? I just need the r/r outer and having a hell of a time finding a clean, unbent, unrusted one.
A member on this board that goes by the name of tubbie has a pile of parts cars in georgia (hint: rust free) and he cut me out two rear quarters. Aside from that, you can buy new replacements from Champion Toyota for around $625 per side.
Some recent progress I've made.
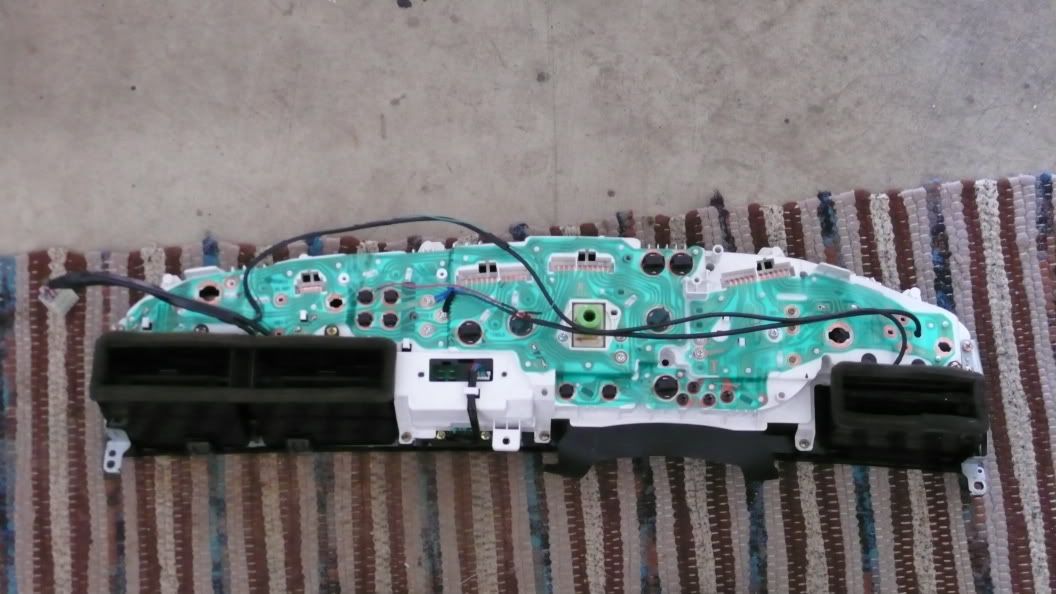
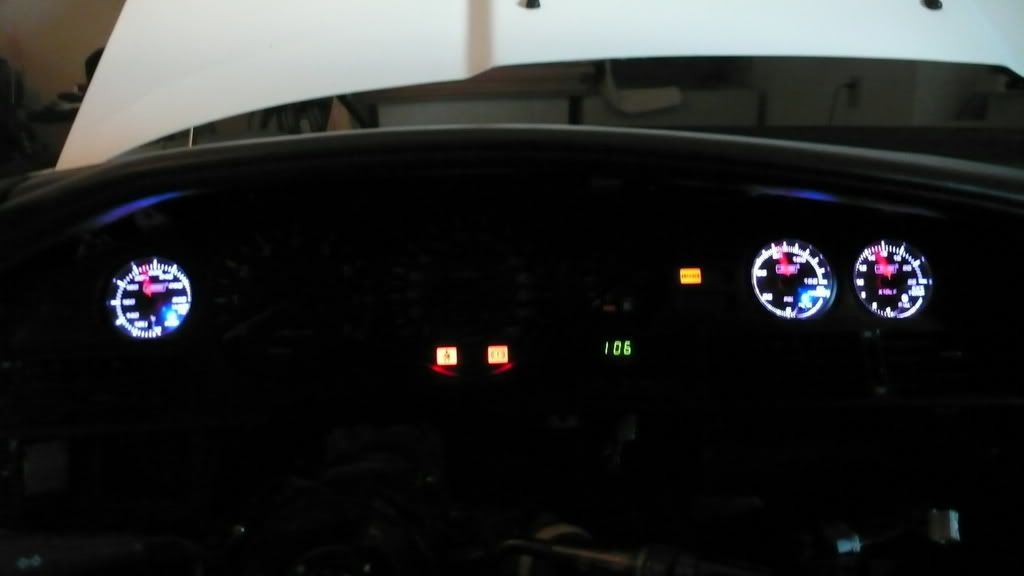
I finally got the gauge cluster together with prosport water, oil pressure, and egt gauges. It didn't go nearly as well as I had hoped...Upon taking the brand f'ing new gauge glass I ordered out of its package, I realized it had a 3" crack across the glass. Wonderful. Luckily, I had an old piece that will suffice for the time being. You'll notice in the pics that the gauge glass is pretty scratched up. This will be fixed.

I decided to make the wiring as stock as possible...so I grabbed a few connectors out of my parts car and went to town.
here is the cluster in the car:

looks like i managed to wire them correctly:
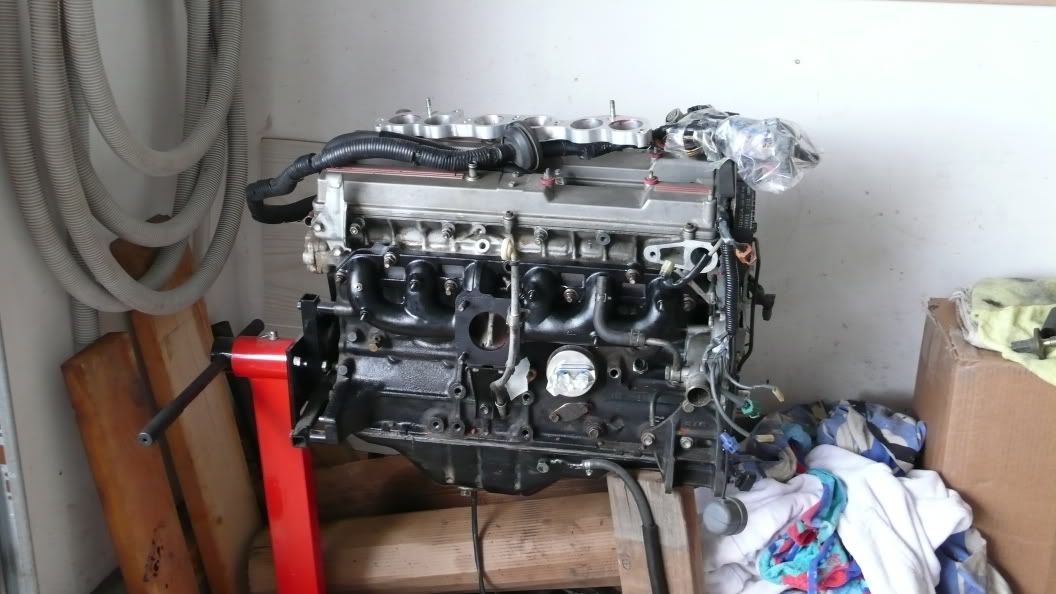
heres the engine as it currently sits - with its newly coated exhaust manifold
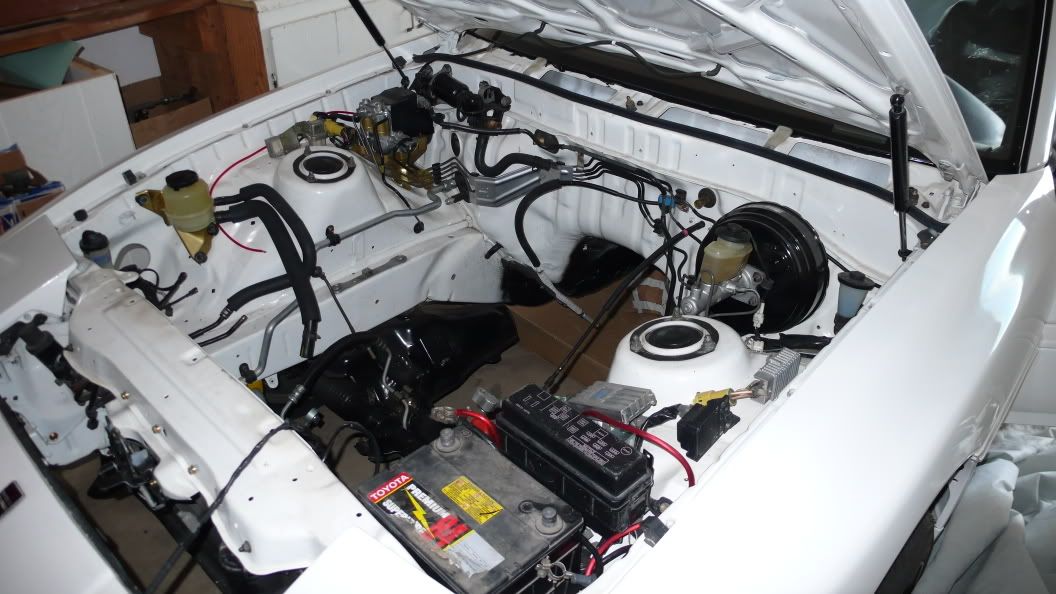
current engine bay shot:
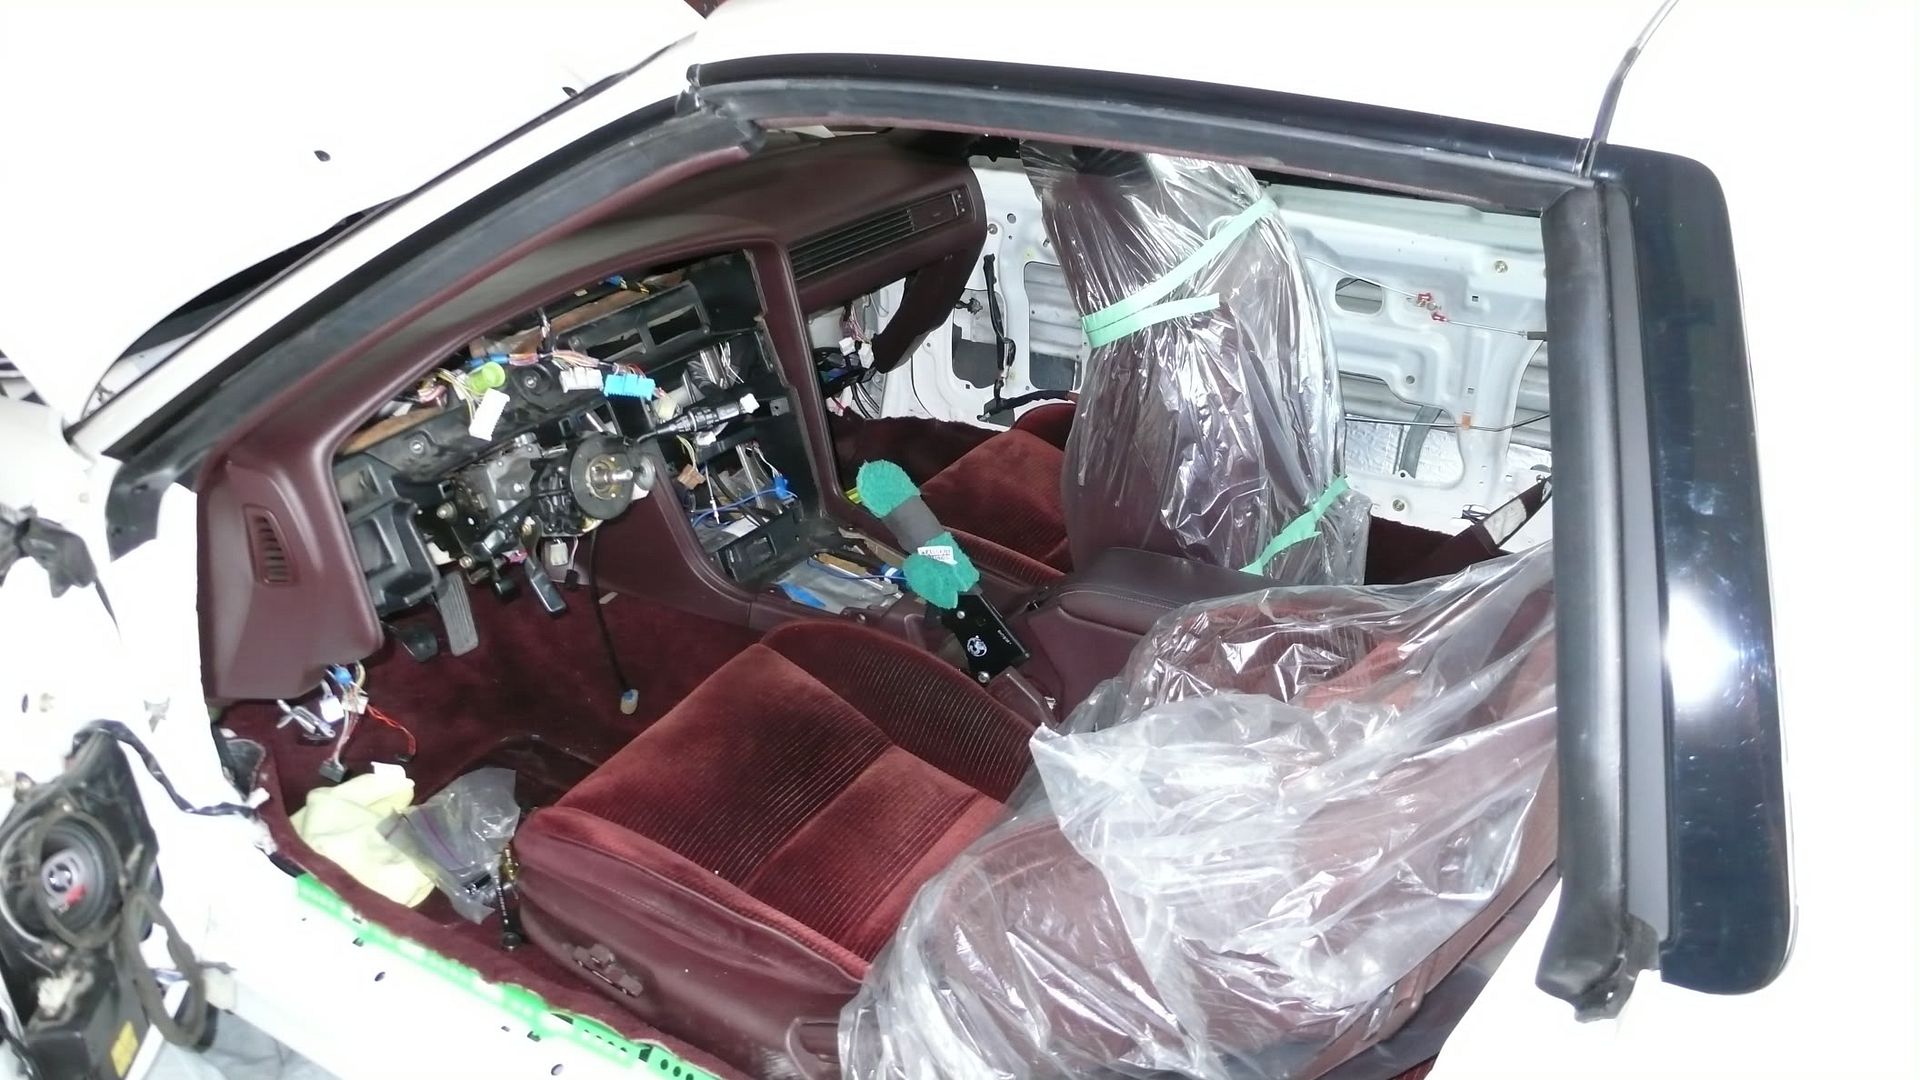
interior:
I finally got the gauge cluster together with prosport water, oil pressure, and egt gauges. It didn't go nearly as well as I had hoped...Upon taking the brand f'ing new gauge glass I ordered out of its package, I realized it had a 3" crack across the glass. Wonderful. Luckily, I had an old piece that will suffice for the time being. You'll notice in the pics that the gauge glass is pretty scratched up. This will be fixed.
I decided to make the wiring as stock as possible...so I grabbed a few connectors out of my parts car and went to town.
here is the cluster in the car:
looks like i managed to wire them correctly:
heres the engine as it currently sits - with its newly coated exhaust manifold
current engine bay shot:
interior: