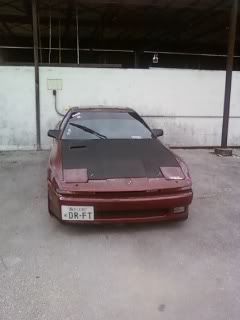
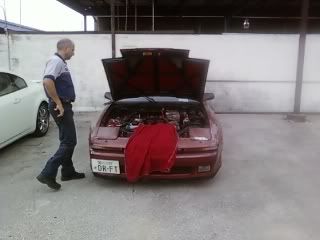
i feel ya on the shims. it was one of the more frustrating parts of my build getting the right ones i needed. luckily someone came through on here and sold me a bag of them. only had to buy three new from toyota. good luck with the rest of it.
Unleashing The Beast... (56K Beware!)
- Thread starter MA70witBoost
- Start date
You are using an out of date browser. It may not display this or other websites correctly.
You should upgrade or use an alternative browser.
You should upgrade or use an alternative browser.
yeah, i hate numbers so i get easily irritated w/ them. found myself rethinking things several times so yeah. still hoping to get this finished some time while there is still some cold weather about. Love cold nights and boost.
ok... ordered the right shims on the 31's. Need seven 3.05mm's, five 3.10mm's and three 3.15mm's. Waiting to reassemble the head, road test for a couple of days to make sure the smoking has stopped. Then going to take the car to work after isolating my knocking rod by disconnecting spark plug wires to make the knock go away thus finding my bad rod bearing, dropping the subframe and seeing how bad the damage really is after dropping the oil pan.
I dropped the subframe and replaced a rod knock on my 87. I caught it very early and the repair was 100%. 1.5 years later and still no knock.
Despite the overwhelming mob of folks that told me to pull the motor rather than drop the subframe, I found dropping the subframe to be easier. The hardest part of the whole thing was changing the bearings on the rods that are closest to the oil pump.
Good luck man!
Despite the overwhelming mob of folks that told me to pull the motor rather than drop the subframe, I found dropping the subframe to be easier. The hardest part of the whole thing was changing the bearings on the rods that are closest to the oil pump.
Good luck man!
ok... got the shims in today. Sadly its getting kinda late and if it wasn't for the cold weather outside and the fact that I wont actually finish re-assembling and be able to road test today id get to work. Should be doing that saturday afternoon hopefuly.
What joy.. Put the shims in and checked clearances and most of the shims are off on the tight side. There were even a few that I couldn't measure the gap using my feeler gauge. Going to Try to play around later with some of the shims i still have and see If i can't fix the gap issues.
What was supposed to be used/what was used-measured clearance:
I1 - 2.942mm/2.93mm-.152mm
I2 - 2.979mm/2.97mm-.127mm
I3 - 3.065mm/3.05mm--.127mm
I4 - 3.026mm/3.00mm-.178mm
I5 - 3.110mm/3.10mm--.127mm
I6 - 3.116mm/3.10mm-.127mm
I7 - 3.086mm/3.10mm--.127mm
I8 - 3.140mm/3.15mm--.127mm
I9 - 3.145mm/3.15mm--.127mm
I10 - 3.035mm/3.05mm--.127mm
I11 - 2.978mm/2.97mm-.152mm
I12 - 3.054mm/3.05mm--.127mm
_________________
E1 - 2.945mm/2.95mm-.178mm
E2 - 2.875mm/2.87mm-.229mm
E3 - 3.046mm/3.05mm-.178mm
E4 - 3.046mm/3.05mm-.152mm
E5 - 3.076mm/3.10mm-.229mm
E6 - 3.166mm/3.15mm--.127mm
E7 - 3.067mm/3.05mm-.178mm
E8 - 3.001mm/3.00mm-.178mm
E9 - 3.036mm/3.05mm-.178mm
E10- 3.106mm/3.10mm-.178mm
E11 - 2.991mm/2.99mm-.229mm
E12 - 2.965mm/2.98mm-.203mm
Ok, managed to get some more work done w/ the 7M. Things are looking better as far as valve clearances are concerned.
What the Shim Size Was/What I Used-measured clearance:
I1 - 2.93mm/2.85mm-.229mm
I2 - 2.97mm/2.90mm-.229mm
I3 - 3.05mm/2.98mm-.229mm
I4 - 2.93mm/2.90mm-.254mm
I5 - 3.10mm/3.05mm-.152mm
I6 - 3.10mm/3.05mm-.203mm
I7 - 3.10mm/3.05mm-.127mm
I8 - 3.15mm/3.10mm-.127mm
I9 - 3.15mm/3.10mm-.152mm
I10 -3.05mm/2.98mm-.178mm
I11 -2.97mm/2.91mm-.203mm
I12 -3.05mm/2.98mm-.178mm
_________________
E1 - 2.95mm/2.90mm-.254mm
E2 - 2.87mm/2.84mm-.254mm
E3 - 3.05mm/2.97mm-.279mm
E4 - 3.05mm/2.99mm-.203mm
E5 - 3.10mm/3.05mm-.279mm
E6 - 3.15mm/3.10mm-.203mm
E7 - 3.05mm/2.98mm-.279mm
E8 - 3.00mm/2.96mm-.254mm
E9 - 3.05mm/3.00mm-.279mm
E10-3.10mm/3.05mm-.254mm
E11 -2.99mm/2.95mm-.305mm
E12 -2.98mm/2.95mm-.330mm
ok... sunday morning... back outside working w/ the supra. Trying to readjust the remainder of the shims to have them all with-in specs. Will post progres later this afternoon.
Ok. Here's the info. Technically the whole thing is within specs but im concidering being a bit more anal about the clearances and try to get the whole intake side at .203 and the exhaust side at .254.
What the Shim Size Was/What I Used-measured clearance:
I1 - 2.85mm/2.88-.178
I2 - 2.90mm/2.93-.178
I3 - 2.98mm/2.98-.229
I4 - 2.90mm/2.95-.178
I5 - 3.05mm/2.98-.203
I6 - 3.05mm/3.05-.203
I7 - 3.05mm/2.98-.254
I8 - 3.10mm/3.05-.203
I9 - 3.10mm/3.05-.203
I10 -2.98mm/2.95-.229
I11 -2.91mm/2.91-.203
I12 -2.98mm/2.95-.203
_________________
E1 - 2.90mm/2.90-.254
E2 - 2.84mm/2.84-.254
E3 - 2.97mm/3.00-.305
E4 - 2.99mm/2.95-.254
E5 - 3.05mm/3.05-.279
E6 - 3.10mm/3.05-.254
E7 - 2.98mm/2.99-.254
E8 - 2.96mm/2.96-.254
E9 - 3.00mm/3.05-.229
E10-3.05mm/3.05-.254
E11 2.95mm/2.99-.254
E12 2.95mm/3.05-.229
ok, got fed up two sundays ago because i was rechecking clearances and a shim that had .254 clearance jumped (for no reason) to .381. Left it alone seeing as i had been working from 7am-6pm. Last week sunday i left the car alone due to rain. Im getting tired of the lack of progress so im probably going to end up taking the car to work so i can have more time to mess with it during the week and maybe get some help from the other techs.
I built a 7M head myself. Make sure you do it at room temperature or close to it. Also, you will have to torque the caps down and then check the clearance. Also, rotate the cams a full turn so all the valves open because sometimes the shims are not in all the way or oil is taking up space, doing this eliminates those problems.
I did this after grinding my valves with the permatex valve grinding paste, which is the "fine" grade and makes the job a whole lot longer, and I measured everything meticulously. When we started my engine, and reved and it let come back to idle, no rattling noises. Trust me, it is very easy to get frustrated when doing this but when you start it up and have no noise, you will realize that it was all worth it. PM me for any questions.
I did this after grinding my valves with the permatex valve grinding paste, which is the "fine" grade and makes the job a whole lot longer, and I measured everything meticulously. When we started my engine, and reved and it let come back to idle, no rattling noises. Trust me, it is very easy to get frustrated when doing this but when you start it up and have no noise, you will realize that it was all worth it. PM me for any questions.
ok, have the car at work. gotta see if i can get around to continuing w/ the valve clearance adjustments.. try to keep you guys posted.
Last edited:
ok, managed to measure the clearances and jot them down. have 21 within specs. Got ta thinking... since cold metal shrinks allowing more clearances between the shim and cam and hot metal expands tightening the clearances, part of me can't help but wonder if i shouldn't wait till the summer to check clearances. Motor is in the car and i dont have plans at the moment on removing the head for any reason so all the work has to be done out side. This makes checking measurements at a steady temperature a bit of a task. But anywho...
What the Shim Size Was/What I Used-measured clearance:
I1 - 2.88mm/2.85-.229
I2 - 2.93mm/2.90-.203
I3 - 2.98mm/2.98-.229
I4 - 2.95mm/2.93-.203
I5 - 2.98mm/2.98-.203
I6 - 3.05mm/3.05-.203
I7 - 2.98mm/2.98-.229
I8 - 3.05mm/3.05-.178
I9 - 3.05mm/3.05-.203
I10 - 2.95mm/2.95-.229
I11 - 2.91mm/2.91-.203
I12 - 2.95mm/2.95-.203
_________________
E1 - 2.90mm/2.90-.254
E2 - 2.84mm/2.84-.279
E3 - 3.00mm/2.95-.279
E4 - 2.95mm/2.95-.254
E5 - 3.05mm/3.05-.279
E6 - 3.05mm/3.05-.254
E7 - 2.99mm/2.99-.330
E8 - 2.96mm/2.96-.254
E9 - 3.05mm/3.00-.305
E10 - 3.05mm/3.05-.254
E11 - 2.95mm/2.99-.254
E12 - 3.05mm/3.10-.152
Within Specs: On Point/Within Specs
Learned after the first attempt to check clearances that the cams had to be torqued to specs to get proper clearances. Used a 3/8th ratchet befor and tightened the cams down tight and was wondering why i was having so much trouble turning the cam.. Accidently snapped the dowel off the intake cam because of this (in an incorrect attempt to turn the cam) but had a spare so no harm no foul. Also made sure to tap the shims on the buckets w/ the back end of a screw driver a few times around the radius of the shim to make sure it sat properly befor putting the cams back on. If the valve ticking is all I'll benefit from by adjusting valve clearances I'll never see the difference because my motor never made any noise. Adjusting because clearances were on the tight side and because im more than sure the motor has 60k+ and its simply due for that part of its maintenenace.
What the Shim Size Was/What I Used-measured clearance:
I1 - 2.88mm/2.85-.229
I2 - 2.93mm/2.90-.203
I3 - 2.98mm/2.98-.229
I4 - 2.95mm/2.93-.203
I5 - 2.98mm/2.98-.203
I6 - 3.05mm/3.05-.203
I7 - 2.98mm/2.98-.229
I8 - 3.05mm/3.05-.178
I9 - 3.05mm/3.05-.203
I10 - 2.95mm/2.95-.229
I11 - 2.91mm/2.91-.203
I12 - 2.95mm/2.95-.203
_________________
E1 - 2.90mm/2.90-.254
E2 - 2.84mm/2.84-.279
E3 - 3.00mm/2.95-.279
E4 - 2.95mm/2.95-.254
E5 - 3.05mm/3.05-.279
E6 - 3.05mm/3.05-.254
E7 - 2.99mm/2.99-.330
E8 - 2.96mm/2.96-.254
E9 - 3.05mm/3.00-.305
E10 - 3.05mm/3.05-.254
E11 - 2.95mm/2.99-.254
E12 - 3.05mm/3.10-.152
Within Specs: On Point/Within Specs
IBoughtASupra;1509550 said:I built a 7M head myself. Make sure you do it at room temperature or close to it. Also, you will have to torque the caps down and then check the clearance. Also, rotate the cams a full turn so all the valves open because sometimes the shims are not in all the way or oil is taking up space, doing this eliminates those problems.
I did this after grinding my valves with the permatex valve grinding paste, which is the "fine" grade and makes the job a whole lot longer, and I measured everything meticulously. When we started my engine, and reved and it let come back to idle, no rattling noises. Trust me, it is very easy to get frustrated when doing this but when you start it up and have no noise, you will realize that it was all worth it. PM me for any questions.
Learned after the first attempt to check clearances that the cams had to be torqued to specs to get proper clearances. Used a 3/8th ratchet befor and tightened the cams down tight and was wondering why i was having so much trouble turning the cam.. Accidently snapped the dowel off the intake cam because of this (in an incorrect attempt to turn the cam) but had a spare so no harm no foul. Also made sure to tap the shims on the buckets w/ the back end of a screw driver a few times around the radius of the shim to make sure it sat properly befor putting the cams back on. If the valve ticking is all I'll benefit from by adjusting valve clearances I'll never see the difference because my motor never made any noise. Adjusting because clearances were on the tight side and because im more than sure the motor has 60k+ and its simply due for that part of its maintenenace.
Last edited:
I made the specs on mine in the middle of all the specs. Eight thou on the Intake and Ten Thou on the Exhaust. I have an Excel worksheet that does all the work for you. I can E-Mail the worksheet to you if you want, just PM me your E-Mail. It is avaible on the forums here but just incase if you can't find it. On here it is in thou but I converted it to MM since when I ordered shims from GoodSon Engine Builders, it is easier to find the sizes in MM because that is how they list them.
All my shims were new but I had to grind a few of them still to get them to the exact point where I wanted it. A tip, if you are grinding the shims, drop it in water at room temperature so you can get it close to its original size.
All my shims were new but I had to grind a few of them still to get them to the exact point where I wanted it. A tip, if you are grinding the shims, drop it in water at room temperature so you can get it close to its original size.
IBoughtASupra;1511532 said:I made the specs on mine in the middle of all the specs. Eight thou on the Intake and Ten Thou on the Exhaust. I have an Excel worksheet that does all the work for you. I can E-Mail the worksheet to you if you want, just PM me your E-Mail. It is avaible on the forums here but just incase if you can't find it. On here it is in thou but I converted it to MM since when I ordered shims from GoodSon Engine Builders, it is easier to find the sizes in MM because that is how they list them.
All my shims were new but I had to grind a few of them still to get them to the exact point where I wanted it. A tip, if you are grinding the shims, drop it in water at room temperature so you can get it close to its original size.
Yeah, I already used the shim calculator. Have that here on my PC. Made the mistake the first time because i hadn't changed the numbers from standard to metric, but even then. I got the results and ordered the shims but when i installed and tried to verify propper clearances i was still off. I have 2+ 7M's worth in shims so Im just playing w/ all them (musical chairs) trying to get the right setup.
ok, got the shims done friday. will post final measurements later. Road tested the car but noticed there was still smoke. Noticed today (satuday) in the morning when i went to go get some motor oil to top off the crankcase that i was short 3 almost 4 quarts. Also seemed like the spark plug valey was soaked in motor oil. Turns out the valve cover gasket had gone bad and was leaking oil out everywhere. The whole spark plug valley was under oil.
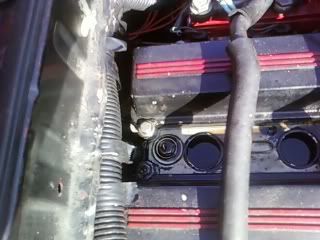
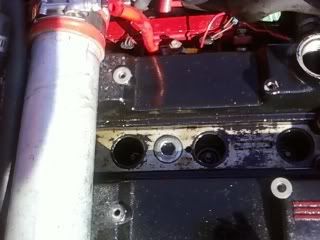
Had to clean all that up, remove the plugs, clean up some more, reseal the valve covers and adjust timing seeing as I couldn't adjust the cps any further than 0 degree's tdc. Pulled it out and adjusted it a tooth forward or so but now its past 15 running advanced. Gonna mess with it some more tommorrow and see if i can't get it to 15. Also noticed a small crack in my Greddy Timing belt. Thinking about investing in another one.
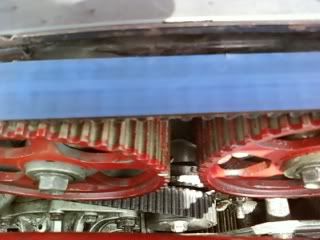


Had to clean all that up, remove the plugs, clean up some more, reseal the valve covers and adjust timing seeing as I couldn't adjust the cps any further than 0 degree's tdc. Pulled it out and adjusted it a tooth forward or so but now its past 15 running advanced. Gonna mess with it some more tommorrow and see if i can't get it to 15. Also noticed a small crack in my Greddy Timing belt. Thinking about investing in another one.

Last edited:
What the Shim Size Was/What I Used-measured clearance:
I1 - 2.88mm/2.85-.229
I2 - 2.93mm/2.90-.203
I3 - 2.98mm/2.98-.229
I4 - 2.95mm/2.93-.203
I5 - 2.98mm/2.98-.203
I6 - 3.05mm/3.05-.203
I7 - 2.98mm/2.98-.229
I8 - 3.05mm/3.05-.178
I9 - 3.05mm/3.05-.203
I10 - 2.95mm/2.95-.229
I11 - 2.91mm/2.91-.203
I12 - 2.95mm/2.95-.203
_________________
E1 - 2.90mm/2.90-.254
E2 - 2.84mm/2.84-.279
E3 - 3.00mm/3.05-.229
E4 - 2.95mm/2.95-.254
E5 - 3.05mm/3.05-.279
E6 - 3.05mm/3.05-.254
E7 - 2.99mm/3.10-.229
E8 - 2.96mm/2.96-.254
E9 - 3.00mm/3.05-.229
E10 - 3.05mm/3.05-.254
E11 - 2.95mm/2.99-.229
E12 - 3.10mm/3.00-.229
Within Specs: On Point/Within Specs
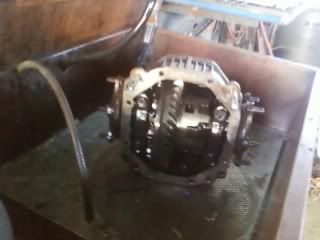
There are the final valve clearances/shim sizes. Had the timing at 20 degree's past 0 so the motor was hesitating while out of boost. researched a bit on here and found that most people are running 12ish so im doing the same and that problem is solved. The valve cover gasket from befor wasn't bad. It honestly looked good. But even the new gasket is leaking so i have to figure out whats wrong. Opened up a A305 2 Way diff at work. Mine has play (as previously stated) and the replacement diff is looking in good shape. Already been cleaned out in the parts wash tank at work.
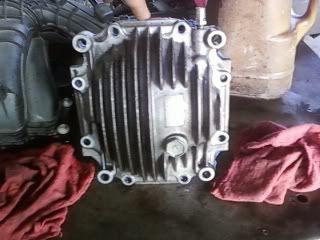
Used a Angel Grinder and a gasket removal add-on to clean up the diff cover.
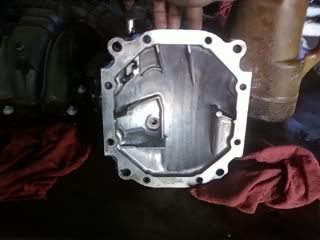
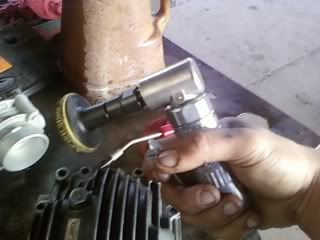
Gonna seal it tommorrow when i go back and make sure its dry then lube and install on saturday (service manager permitting). Only thing left after that should be the bottom end wich i might attempt through out the week. Keep you guys posted.
I1 - 2.88mm/2.85-.229
I2 - 2.93mm/2.90-.203
I3 - 2.98mm/2.98-.229
I4 - 2.95mm/2.93-.203
I5 - 2.98mm/2.98-.203
I6 - 3.05mm/3.05-.203
I7 - 2.98mm/2.98-.229
I8 - 3.05mm/3.05-.178
I9 - 3.05mm/3.05-.203
I10 - 2.95mm/2.95-.229
I11 - 2.91mm/2.91-.203
I12 - 2.95mm/2.95-.203
_________________
E1 - 2.90mm/2.90-.254
E2 - 2.84mm/2.84-.279
E3 - 3.00mm/3.05-.229
E4 - 2.95mm/2.95-.254
E5 - 3.05mm/3.05-.279
E6 - 3.05mm/3.05-.254
E7 - 2.99mm/3.10-.229
E8 - 2.96mm/2.96-.254
E9 - 3.00mm/3.05-.229
E10 - 3.05mm/3.05-.254
E11 - 2.95mm/2.99-.229
E12 - 3.10mm/3.00-.229
Within Specs: On Point/Within Specs
There are the final valve clearances/shim sizes. Had the timing at 20 degree's past 0 so the motor was hesitating while out of boost. researched a bit on here and found that most people are running 12ish so im doing the same and that problem is solved. The valve cover gasket from befor wasn't bad. It honestly looked good. But even the new gasket is leaking so i have to figure out whats wrong. Opened up a A305 2 Way diff at work. Mine has play (as previously stated) and the replacement diff is looking in good shape. Already been cleaned out in the parts wash tank at work.


Used a Angel Grinder and a gasket removal add-on to clean up the diff cover.


Gonna seal it tommorrow when i go back and make sure its dry then lube and install on saturday (service manager permitting). Only thing left after that should be the bottom end wich i might attempt through out the week. Keep you guys posted.
Last edited:
Ok... They are being difficult at work. Things are slow and they dont want to pay me out of their pocket to be working on my car so they've said i have to make a minimum of 20 hours by thursdays to see if i can work on the supra. Its saturday and I haven't gotten to touch my car. My service manager says he's gonna see if he can't work with me on monday so i can swap rear-ends.
Brought some tools and some black silicone to see if i can't fix the valve cover gasket leak.
A new developement: Went to take ray to go pick up a welded diff for his 180SX and whne we go to leave the supra wouldn't start. No tools in the car, realized the fuel pumpt wasn't turnning on so i removed the relay at the pump adn fed the pump 12v and fired up the car but then the wiper blades wouldn't work and it was raining. made it home ok but now have a bit more work than i had originally intended for tommorrow. Hopefuly it'll be easily solved and I'll be able to have everything working properly by monday.
Ok, seems like the valve cover job is good. Driven it around for a bit and not noticing any oil on the spark plug valley cover. Still have to debug the no power to the fuel pump problem. I think the wire for the jumper harness i had installed for the 12v walbro mod came loose. hopefuly thats my issue and i can have the car working properly again. also, going to be trying to get the diff up and installed today during work so we'll see how things go.

