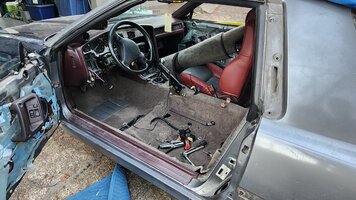
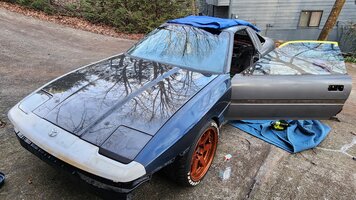
Project Git 'er done!: Stages 1, 2…now 3.
- Thread starter supraguy@aol
- Start date
You are using an out of date browser. It may not display this or other websites correctly.
You should upgrade or use an alternative browser.
You should upgrade or use an alternative browser.
supraguy@aol;2095434 said:PS- Replacing all of the dead links sucks.
Why don't you just put all the pics in the first post so that you don't have to change each and every individual post?
Nah. That would make the first post a nightmareish long thing, plus it would still make every post after that somewhat senseless, since there would be no pics to associate with what I was describing.
supraguy@aol;2095463 said:Nah. That would make the first post a nightmareish long thing, plus it would still make every post after that somewhat senseless, since there would be no pics to associate with what I was describing.
true, I hadn't considered the posts about pics that are no longer there. I like having the first post as the complete build thread (like mine), but if you didn't start it that way it wouldn't make sense to change it to that setup
Progress...
Man, It's easy to get delayed, distracted, demoralized, or just plain lazy, when it comes to a project.
I think my problem has always been, that I bite off more than I can chew, in terms of scope.
I have a hundred different ideas for a hundred different parts of the car, and when you get pulled equally in 12 different directions, you end up getting nowhere.
My '89 Supra has been a bit of a distraction; upgrading it, and making it nicer, has taken my time and focus away from my '88.
And since it is a car I can drive everday, it's been getting what little attention I can spare. I still have 3 or 4 small chores to finish with that car.
but in an effort to get back to this one, I decided to get a different set of wheels for it. The FR500's went on the '89 daily, and I wanted something a little
bit more 'boy racer' for this car. So I picked up a set of Varrstoen ES2's, and had them powder coated a custom color:
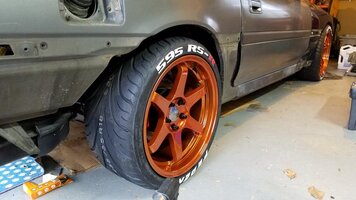
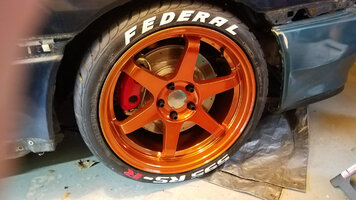
These are a square setup: 18x9.5, +30. The tires I chose are Federal 595 RS-R's, in 255/35/18.
Wheels should be nearly the last item one gets for a project, but I needed the visual stimulation, in order to continue the project.
This week, I hope to get good(warm) weather, so that I can finish the strip-down for paint. In the mean time, I'll continue to go back and replace the broken picture links.
Man, It's easy to get delayed, distracted, demoralized, or just plain lazy, when it comes to a project.
I think my problem has always been, that I bite off more than I can chew, in terms of scope.
I have a hundred different ideas for a hundred different parts of the car, and when you get pulled equally in 12 different directions, you end up getting nowhere.
My '89 Supra has been a bit of a distraction; upgrading it, and making it nicer, has taken my time and focus away from my '88.
And since it is a car I can drive everday, it's been getting what little attention I can spare. I still have 3 or 4 small chores to finish with that car.
but in an effort to get back to this one, I decided to get a different set of wheels for it. The FR500's went on the '89 daily, and I wanted something a little
bit more 'boy racer' for this car. So I picked up a set of Varrstoen ES2's, and had them powder coated a custom color:


These are a square setup: 18x9.5, +30. The tires I chose are Federal 595 RS-R's, in 255/35/18.
Wheels should be nearly the last item one gets for a project, but I needed the visual stimulation, in order to continue the project.
This week, I hope to get good(warm) weather, so that I can finish the strip-down for paint. In the mean time, I'll continue to go back and replace the broken picture links.
Last edited:
Welcome back everybody!
A few years have passed, and not a lot has happened with my project, but the good news is, I didn’t get rid of it.
I MUST finish this car. If for nothing else, I have to have closure. Since the last update, I’ve simply been collecting a few things here and there; euro folding mirrors, Kevin M hatch visor, stereo equipment, etc.
one thing I HAVE done, is reinstall tighter window regulators, and the new door glass. Also, the carpet kit I bought had been accidentally cut too tight on the passenger door sill, and having to patch it would have pissed me off. So I bought a replacement to the replacement carpeting, and have begun to fit it. For those of you that don’t know, I also have an ‘89 turbo, same color, and targa/ 5spd as well. I just sent it through PDR, and am now looking for a paint shop to make it perfect. She will be a Guinea pig: If the shop does a good job, this car will be going there as well.
This is the year. TENS YEARS IS LONG ENOUGH. Project git ‘er done will be done this year.
FINALLY.
I have replaced every single dead link.
....what?
Oh, progress? You expect progess on this project after- what....a decade??
Don't rush me!!!
Well, as far as what's happened lately: I moved across town, and brought both cars with me. The 89 car has taken almost all of my time up, trying not only to keep it on the road, but also complete a restoration/ mild upgrade. But now that the 89 has new factory grey paint on it, I'm almost completely done with it; Just trying to install an HKS 1 EVC, to match the TEMS controller and the Twinspark ignition module.
But on the 88, I have been fitting a replacement to the replacement carpet. The one I had first bought has mass backing, and it made it a bit too difficult to fit to the floorpan contours. So I bought a new carpet without the added backing. I will have new pics up in the next couple of weeks.
Yes,
As with all my resurrection posts, I will simply state that I do still have the car, and I do plan on finishing it.
Actually, a slight bit of progress has been made. I bought a set of BC cams 3 years ago, and after replacing all of the valve stem seals the other day, I decided to actually install those cams.
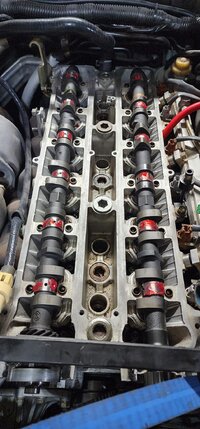
Next will be to reassemble what I've taken apart. Once running again, I will finish the drivers side carpet install, and then the front interior(door panels, seats, center console) will all go back in.
The rear interior will remain out until the car is painted.
As with all my resurrection posts, I will simply state that I do still have the car, and I do plan on finishing it.
Actually, a slight bit of progress has been made. I bought a set of BC cams 3 years ago, and after replacing all of the valve stem seals the other day, I decided to actually install those cams.

Next will be to reassemble what I've taken apart. Once running again, I will finish the drivers side carpet install, and then the front interior(door panels, seats, center console) will all go back in.
The rear interior will remain out until the car is painted.
The latest thing I've been playing around with, is the new hood.
I had begun installing an MR2 side vent, into an oem steel hood, but wasn't liking it as
much as I thought I would. So, I just said screw it- I'll get a carbon fiber hood instead.
I found that the oem hood struts are WAY too strong for the much lighter hood, so I bought a pair of 28lb-force struts, and
they plugged right in and work great. After lining the inside of the hood with some heat resistant shielding, I got these small hood latches installed, to back up the oem latch.
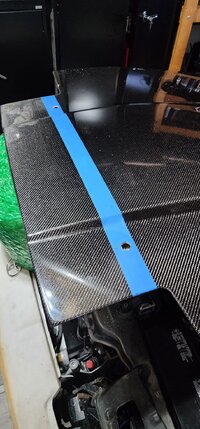
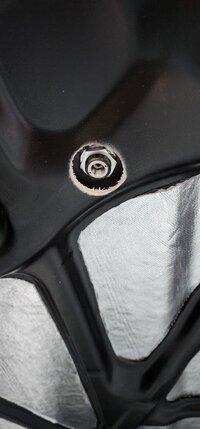
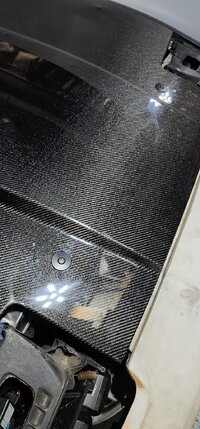
I also have matching headlight covers to install, once the fasteners get here.
I had begun installing an MR2 side vent, into an oem steel hood, but wasn't liking it as
much as I thought I would. So, I just said screw it- I'll get a carbon fiber hood instead.
I found that the oem hood struts are WAY too strong for the much lighter hood, so I bought a pair of 28lb-force struts, and
they plugged right in and work great. After lining the inside of the hood with some heat resistant shielding, I got these small hood latches installed, to back up the oem latch.


I also have matching headlight covers to install, once the fasteners get here.
So a little update; more like, 1 step forward, 8 steps back...
Ever since I rebuilt the engine back in 2012, I've always had an issue with oil burning. I thought that maybe it was a drain backup on the turbo, so I bought a better one- no luck. Then I thought, maybe I idled it too much, without putting a proper load on it, causing a poor seating of the rings. Perhaps it is. But I also thought that maybe it was that I didn't seat the valve stem seals in place properly, so recently, I tried replacing those with the head in the car, since I also had a new pair of BC cams and springs to install. After putting it all together, she still burned oil, and made the usual smoke screen. So a few months ago, I decided to pull the head, and check the head gasket, because after using a borescope, it seemed that there was a trail of burned oil coming from the mating surface on most of the cylinders.
Well, after pulling the machined, 0-mile head, I measure it and discovered that although the mating surface was dead-straight, the cam surface was .025" warped. Basically 3 times the limit. Apparently when I sent it to the shop, they decked it without ever checking it for straightness. So.... after finding a good used head, I sent it to the machine shop to have it checked, and got a three-angle valve job. I ordered a fresh set of valves for it from an online seller, but when I tried to install them, I found that most of them were going to require a shim thickness of 3.3-4.2mm!! WAY over the norm. Looking at the valves more closely, I finally realized none of them were fully seating; They're oversize valves; .5mm larger than stock, lol.
SO....I took the head to a different shop, had them cut the seats to accommodate the new valves, and ordered a fresh 2mm head gasket.
Finally time to reinstall the head, right?
Well, just before I tried to lay the head back on the block, I decided to reach down and verify that the oil pump driveshaft wasn't doing anything weird, since a number of people on FB lately have had issues there... Sure enough, my driveshaft pulley moves in and out by over 3mm. So now, the entire block has to come back out, to check for oil pump/ driveshaft damage, and do the necessary upgrades. So this weekend, I'll be pulling the motor and starting a full tear-down of the zero-mile block. I'll post pics soon, wish me luck.

