SupraRon's Refreshment

SupraRon

Supramania Contributor
Jan 2, 2008
595
0
0
Canada
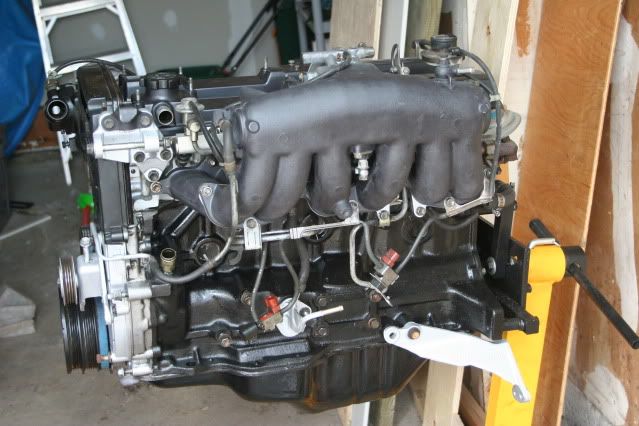
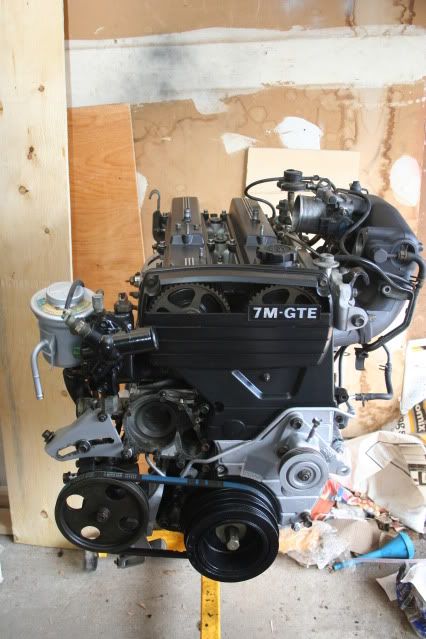
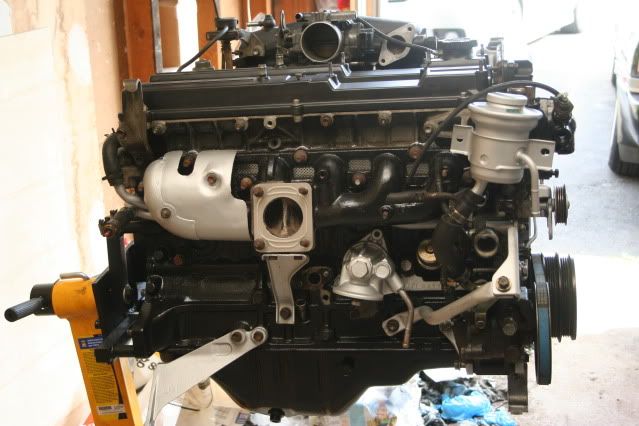
Just a bit more cleaning and painting of parts Ken. Nothing really exciting that's why I haven't posted in a while. Got my DM CSI line. I've been taking an inventory of the parts and connectors that I will need from the current engine and once I get the garage cleared out I will be able to swap them.

As for the POR-15, I'm not sure what the rating is. I realize that it will probably flake off the exhaust manifold, but I just wanted it to look better and if anything it may prevent rust.

Pics:

p1555344_1.jpg

p1555344_2.jpg

p1555344_3.jpg
 
Last edited:

SupraRon

Supramania Contributor
Jan 2, 2008
595
0
0
Canada
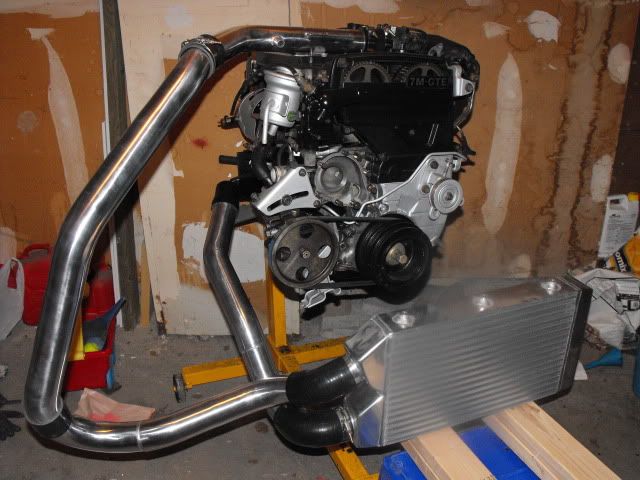
UPDATE:

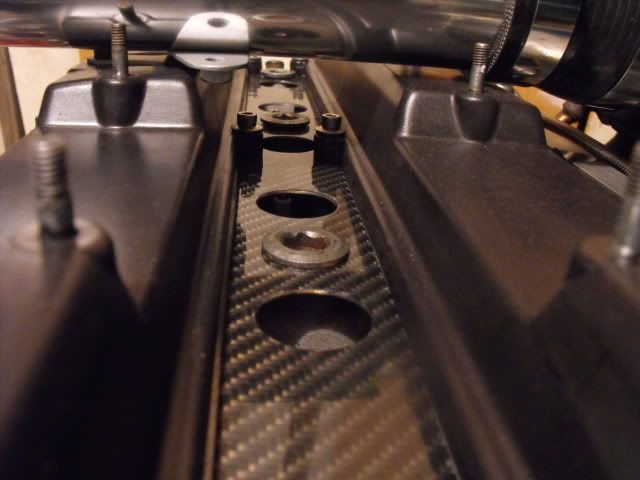
Finally received my ic kit and spark plug galley cover. Here are some pics:

p1563242_1.jpg


p1563242_2.jpg


Took a week off work near the end of this month in order to do the swap. Wish me luck.
 

SupraRon

Supramania Contributor
Jan 2, 2008
595
0
0
Canada
So far I've got the following done (excerpt from Dave's (GrimJack) article):

1. Roll ALL windows up. You will be removing your battery and the windows won't go up once the battery is out.

2. Attach a 19mm 6-point socket with a breaker bar onto crank pulley bolt- click engine over to bust the bolt loose (works like a charm).

3. Disconnect the hood struts where they attach to the hood. You can use a cord tied between the hood latch and the spoiler (or something else behind the car) to secure the hood in a near vertical orientation. If you are doing this project outside, just remove the hood. You won't like the outcome when a stiff breeze blows your hood backwards onto the windshield. If you remove the hood, mark or scribe the hood location on the brackets prior to removal - this will aid reinstalling the hood later. JJ: 5 more minutes and the hood is off. MUCH easier and safer. Just remember to put a couple towels on the roof of the car. Lift hood off and set it down on the roof.

4. Remove the bottom engine cover if you still have one

5. Drain the tranny fluid, engine oil, and coolant. Do this as you perform other tasks. You might think it not necessary to drain your expensive synthetic transmission oil, but if you don't, it will come out the rear of the transmission while you are pulling the engine out with the hoist, so do it now.

6. Open gas door and remove gas filler cap - leave door open. JJ: Gas filler cap can be left on approx one half turn, but still loose. LEAVE the cap loose. The gas will expand and push out the open fuel line.

7. Remove battery JJ: Just disconnect it.

8. Remove glove box

9. Remove ECU

10. Unplug rest of connectors up there - HAC, ABS

11. Pull main harness grommet the off firewall from the outside w/ small flatblade screwdriver. Pull the main harness and connectors through the grommet hole.


12. Remove center console interior piece that radio goes in.

13. Put transmission in neutral.

14. Remove gear shift, but leave in car.

15. Stuff a rag in the gearshift hole of the transmission. This is to prevent dirt, undercoating, foreign objects, etc. from getting in your transmission.

16. Remove turbo heat shield. JJ: Don't need to unless the turbo elbow has to come off.

17. Remove the exhaust. Depending on your exhaust, it may be easy to just remove the downpipe (can take elbow off if you must). If the nuts and bolts between the downpipe and the second cat are impossibly frozen, you can remove the entire exhaust as a unit. Remove the three downpipe to turbo elbow nuts first. Use a 14mm 6-point socket and a universal joint with a long extension

18. Remove driveshaft. Separate the driveshaft from the differential first (14 mm fasteners). You can use the parking brake to keep the driveshaft from rotating as you loosen the fasteners. Drop the carrier bearing assembly and remove the tunnel brace. The driveshaft pulls straight out from the rear of the transmission. Some have successfully pulled the driveshaft from the transmission by lowering the center bearing and the brace in the tunnel, but leaving the driveshaft bolted to the differential. JJ: You're making ALOT of extra work removing it from the diff. You don't need to. Just leave the driveshaft alone, it will slide out of the tranny on it's own. Then when you reinstall you drop the center bearing and the bar across the tunnel. Stick the driveshaft back in the tranny and bolt the center bearing/bar back in.

19. Remove speedo cable from tranny. Stuff a clean rag in this opening also. JJ: There's a joint about 1.5' from the tranny - cable splits in two. It's right next to the cat I believe.
As for the ECU, is it necessary to remove it? Also, what is the trick to removing the speedo cable? I'm currently stuck at this step!
 
Last edited:

CajunKenny

PULL MY FINGER. PLEASE!
Nov 15, 2007
3,255
0
0
Washington
There are two ways to deal with the harness. One is stated in the above write up.

Here's the second way...

Removing the ECU isn't necessary. What I did was unplugged the harness from the sensors (left the sensors on the engine) and laid the harness up on the windshield. Windshield had blankets on it. (if you go this route, you don't have to remove the ecu, abs stuff, glove box, etc...

There are benefits to both ways.

As far as the speedo cable, unscrew it from the transmission. That's all you have to do with that. Don't forget about the two prong reverse light cable on the transmission! It's on top near the shifter. Leaving that plugged in will ruin your day!
 

SupraRon

Supramania Contributor
Jan 2, 2008
595
0
0
Canada
Thanks Ken. I like the way you did it and think it will work better for me.

I guess I will have to remove the transmission support first cuz I couldn't get to the cable very well. There is very little room to work with. Also, every time I turned it, it would turn back! Thanks for the tip about the reverse light.
 

CajunKenny

PULL MY FINGER. PLEASE!
Nov 15, 2007
3,255
0
0
Washington
Yeah, I removed all the bracing and then lowered the tranny down on to a jack stand. This allowed just enough room up top to get the speedo cable out and the reverse light cable unplugged. Be careful not to drop the tranny too far because there is a risk of breaking the motor mounts.
 

SupraRon

Supramania Contributor
Jan 2, 2008
595
0
0
Canada
That worked well. I finally got that stubborn speedo cable out. Man, every time I unscrewed it a little it would wind itself back. I had to hold it with one hand and unscrew with the other. I think it took me about an hour to do! I couldn't quite reach the reverse light cable to unplug it. Think I might have to lower the tranny a little more. Anyhow, thanks again Ken. I'll try to get some pics up of my progress.

I also got this done:

20. Remove clutch slave cylinder and mount that holds the hydraulic line to body. Place the slave cylinder out of the way, but be careful not to kink or stress the lines or hoses.
 

johnd

Supramania Contributor
Dec 4, 2007
278
0
0
Ont. CA.
I used a long needle nose to sqeeze/unplug the reverse light connector, for some reason i couldn't lower my tranny enough to get my hand up there.
 

SupraRon

Supramania Contributor
Jan 2, 2008
595
0
0
Canada
johnd;1572553 said:
I used a long needle nose to sqeeze/unplug the reverse light connector, for some reason i couldn't lower my tranny enough to get my hand up there.

I would have used that if I had one, but don't. I eventually got it unhooked using a flat screwdriver to press down on the release tab while I pulled the wire.
 

SupraRon

Supramania Contributor
Jan 2, 2008
595
0
0
Canada
And this is where I made it to today:

21. Remove fuel line at the union just to left side of slave cylinder (take the little black plastic cover off. - use 2 wrenches (if it wont break free- spray WD40 or equiv. on it and do this later - BUT DON'T FORGET). Gasoline will drip out and down your arms - be prepared. If your tank is full, there is the potential to drip a lot of gasoline here. Be prepared to plug the supply and return lines leading to the rear of the car. A section of rubber hose capped at one end with the right sized screw or bolt works fine. JJ: Also try and secure the hose end up as high as possible. TF: Remove at the joint under intake. Remove from the bottom; more leverage. - DONE!

22. Remove the ground wire/strap between the transmission and body in this area - don't be suprised if it is missing - undo it if you find one

23. Remove the big hose from fender to 3k pipe

24. Remove the accordion hose to turbo intake with air cleaner attached

25. Loosen and pull down the turbo-to-intercooler hose where it attaches to turbo (or spend $$$ later - the hoist will destroy it if you don't)

26. Undo upper and lower radiator hoses - take them off at engine too

27. Unclip the electric fan wire(s) depending on year.

28. Disconnect the coolant reservoir hose at the top of the radiator.

29. Loosen the 4 12mm bolts fan pulley nuts with a wrench (socket won't fit here)

30. Take the fan out with the radiator - hold the fan to radiator and lift all it out. Tighten the radiator drain plug now so you don't have to remember later.

31. Loosen PS adj. bolt and alternator adj., and the a/c belt idler and take all the belts off.

32. Unbolt the AC compressor. There are four long bolts that go through the compressor to the bracket - leave the bracket on the engine. Loosen the 4 long bolts with ratchet for some and you will have to use a 12mm wrench for others. The top two may be hard to get out - it's OK to leave them in the compressor. Make sure the compressor is free from the bracket. JJ: Easier to take the a/c bracket off the motor. It'll have to come of later anyways. Two bolts under intake are easy to take out from the top or the bottom. This will remind you of the ground strap near the motor mount too.

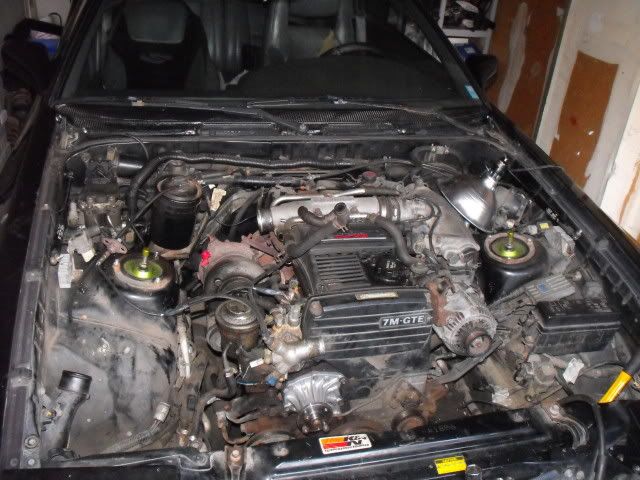
And a pic just for show:

p1572724_1.jpg
 
Last edited:

SupraRon

Supramania Contributor
Jan 2, 2008
595
0
0
Canada
Got a couple more things done today:

33. Remove the PS pump bolt from the PS pump mounting bracket and position the PS pump out of way.

34. Remove groundstrap from rear exhaust side of the engine (goes to throttle bracket). JJ: This ground strap actually goes to the rear engine hook/head.

35. Remove the 2 throttle cables from the throttle bracket and stick out of the way - OR take throttle bracket off and push out of way. JJ: Take the throttle bracket off the motor....no need to adjust the cables later. It will fold over near the cruise control easily, or sit up on your wipers(towel under it of course).

36. Disconnect wires around where the fuse box is - you will see what can stay with the engine to come out. Leave as much hooked to engine as humanly possible - makes reassembly much quicker. - the DIAG block comes out with the harness and engine. JJ: Don't worry about marking them...they are all different.

37. Pull other fuel line off - down bottom on intake side - the one that is a hose with clamp to pipe not the banjo one (its already off).

38. Remove the brake booster line off of manifold and turn upward

39. Take the vacuum line off of back on intake manifold (by EGR) - It is a very good idea here remove the screw in nipple it attaches to - it is easy to break.

40. Take both heater hoses off - one on the right side by the charcoal canister and the other near the brake booster. Position a piece of wood near the one by the brake booster or it may be smashed when you take engine out

And this is how she sits for the night:

p1573163_1.jpg


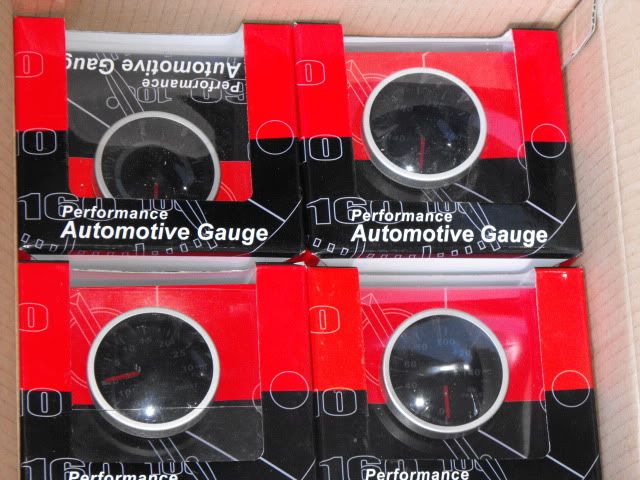
Got a nice package in the mail today:

p1573163_2.jpg


Oil Pressure, Boost, Water Temp and A/F gauges. The Oil Pres gauge comes with a sender. Do I just connect it to the stock location??

Also, when I removed the clutch slave cylinder, I found the boot was ripped. Can the boot itself be replaced or do I have to replace the whole assembly?
 

CajunKenny

PULL MY FINGER. PLEASE!
Nov 15, 2007
3,255
0
0
Washington
You can plumb the new gauge in to the factory spot; but, you'll then have a dead gauge in your instrument cluster. If that's not a big deal, then that's a good place. Or, to keep the stock gauge active, you can use the spot just above the passenger side engine mount. It's right next to the dip stick.

The rubber boot on the slave is to keep dirt and water out. I don't know if you can buy the boot by itself; but, Driftmotion sells new slaves pretty cheap!
 

SupraRon

Supramania Contributor
Jan 2, 2008
595
0
0
Canada
That'll work. I won't be bothered by a dead gauge in the cluster. I'll have to take a look at DM for the slave cylinder.

Got a couple difficult things done today. Finally got the fuel supply hose loose. Man was it ever seized. And because I'm not removing the harness with the engine, I had to remove the starter in order to unplug the knock sensor. What a pain that was. But, alas, perseverance pays off. I think if there is ever a next time, I will just remove the harness with the engine.

Left to do is:

- A seized ground strap connected to the engine mount. I hit it with release-all and will let it sit for a while.
- The crossmember. Already started working on that.
- The engine mounts.

Then I'll be ready to remove the engine/tranny. I won't have much time to spend on it within the next week so I don't think I'll get it done before Friday which is our monthly local meet. :icon_frow

Keep y'all updated.
 

SupraRon

Supramania Contributor
Jan 2, 2008
595
0
0
Canada
Well it was going well Jamie. Until today. I can't for the life of me get the engine out. I'm sure I have everything unhooked, unbolted and removed that needs to be. I have the back of the car about 2 feet in the air. The front is much lower. The drive shaft is detached from the trans. The engine mount nuts are removed for the bottom. Do I need to remove the top ones as well? The only thing I am not able to remove is one of the bolts from the crossmember. When I lift the engine out, it moves a little, it rocks back & forth a lot, but it won't come out. The front of the car starts to lift. I'm assuming something is still attached somewhere, but I can't figure it out. HELP please!!

Perhaps I should mention I have done the following:

41. Put a jack under the tranny, but forward from the mount to the body. Use the jack to take the weight off the transmission mount. Remove the transmission mount

42. Remove the 2 engine mount bolts - on 90 and greater and some 89s you may want to unbolt the fluid mount on both sides (top and bottom) of mount or they may break.

43. Unbolt crossmember under the oil pan.

44. Remove oil cooler lines by the I/C on the right hand side - be prepared to plug both the oil cooler hard lines and the oil cooler hoses if you don't want oil trails and/or puddles on the floor. A sandwich baggie over the end and a rubber band will work

45. Lower jack down and out from under tranny and take it out of the way

46. Set ECU harness and connectors on the engine where they can't get hurt

47. Get an assistant - engine removal can be done solo, but it's better to have another brain and set of hands. SH%#%#*^*G*t happens and if you die with the engine out, no one will even want your car.

48. Jack the hoist all the way to sky and release it - let it bleed all the air out - be prepared that your hoist may be a POS and may rape the front of your car - Scott Mech's 90T got raped by a new hoist that had an air pocket in the ram - even though he had bled it before. Be PREPARED for that thing to drop the engine - just in case. JJ: Actually the real issue is learning how sensitive the release is on the ram.

49. Attach a chain around lift hook by alternator and to back of engine - there is a hook there where the heater hose runs - this will work. Make sure you are working with a good chain and hardware! Don't skimp here. If you aren't sure the chain and fasteners are strong enough, they probably are not. You may want to stuff a bolt through the chain links on either side of the hoist hook to prevent the chain from sliding through the hook at an inconvenient time. If you can get a load leveler, get one - it will be easier. SLOWLY jack this thing up. The engine will barely clear the oil pan over the center support. the rest out - good luck

Reading this over, I think I have to remove the top nuts from the engine mounts. If anyone can confirm, that would be great.
 
Last edited: