Jimi's build update

buckshotglass

I love all your sounds.
thanks.
the speedo is pretty loose to begin with. I'm going to try to not break them in the next day or so, I'll let you know how it goes. My wheels did not come today, actually they just shipped today. I'm not trying to match yours, I had them ordered, saw your thread, and they looked close. This thread has been a great read, and thanks for taking the time. If my camera ever shows up, I may start one.
dave
 

Bigzavs

86.5 1JZ Single Turbo
Apr 21, 2005
2,267
0
0
39
Arlington, TX
hey jimi, if you need any help just let me know, i found my cell so you can get a hold of me on it

just let me know, cuz i def owe you dude
 

jimi87-t

Active Member
Oct 12, 2005
1,126
4
38
Colorado Springs
Dave- Sounds good man, you should get some pics up if you can. It wouldn't bother me if you did get the same rims. Good luck with the needles.

Ben- Thanks, not even sure what I'll try to get done....I really need to just get out and drive it. I may pull the bumper off and start prepping and priming it, but I guess the weather will be the factor with that. But I'll let you know whats up.
 

jimi87-t

Active Member
Oct 12, 2005
1,126
4
38
Colorado Springs
Chris- Yes I would, Is there a meet in the works? I was going to come out to the last one at Grapevine Mills, but I was sick. So yeah I haven't moved yet, the plan is for around the end of Feb.
 

supra90turbo

shaeff is FTMFW!
Mar 30, 2005
6,152
32
48
40
MA, 01440
Damn you Southerners and your February Supra Meets!
When you're at the meet, think of me because I'll have 3' of snow on the ground at that time. :(
lol
 

angrydrone

I'm a real Canadian
Mar 11, 2006
156
0
0
Ft. Worth/College Station
Hey Jimi,

A couple of us are getting together on Saturday to welcome a new mk3 guy. We will look at the cars and stuff and then go eat and possibly some kind of cruise.

Saturday Nov. 18
7pm
Parks mall in Arlington
Parking garage by ice rink
 

jimi87-t

Active Member
Oct 12, 2005
1,126
4
38
Colorado Springs
Chris- I'll do what I can to make it out there, kinda last minute, but I'll do my best (I've got some of the front end off and will have to get it back together).
 

jimi87-t

Active Member
Oct 12, 2005
1,126
4
38
Colorado Springs
Ok I wanted to get a little more in-depth on what I do when fabricating. I wish I would have done this with all my other mods, but oh well ;)
Here is a little fiberglassing 101 for you guys and gals that don't know how to use the stuff.

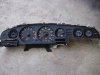
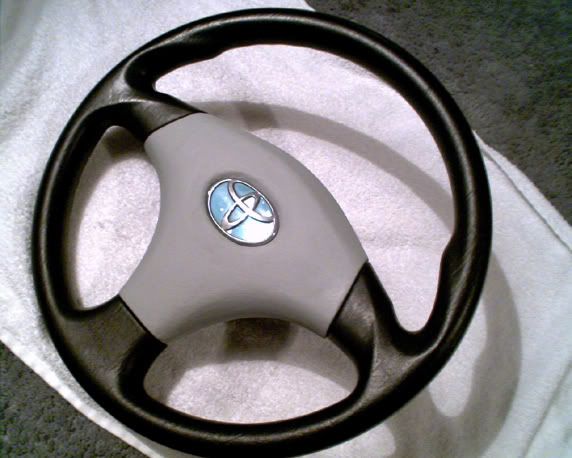
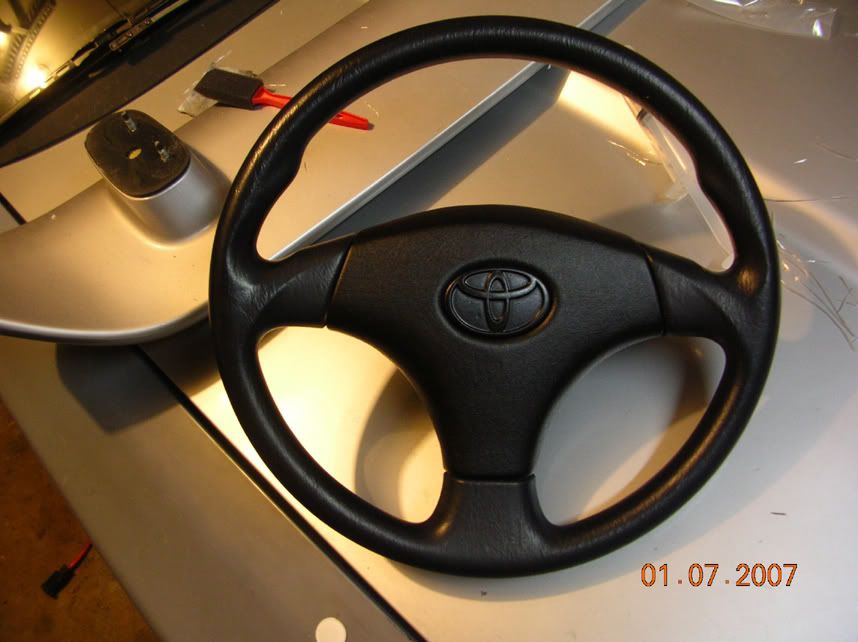
First of all I wanted a new steering wheel and could not find one that would fit, looks wise. That is until I saw a local guy selling a stock wheel from a 00-03 Celica, I loved it for the most part. It was aggressive, yet it didn't look like an aftermarket bolt on :puke: Only thing I didn't really care for was the center toyo emblem, it looked too "cheap" and plasticy.

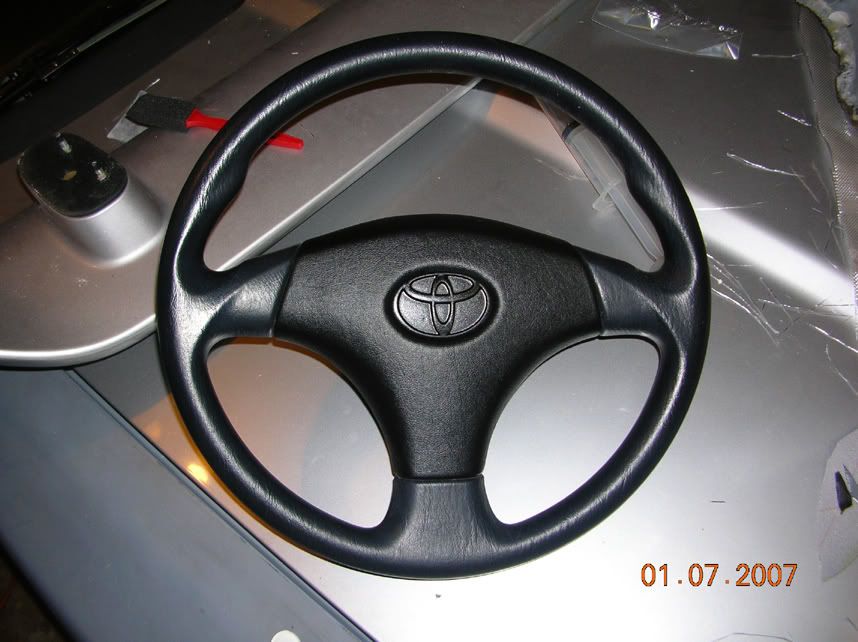
Here is a pic of the 00-03 wheel:
p477684_1.jpg


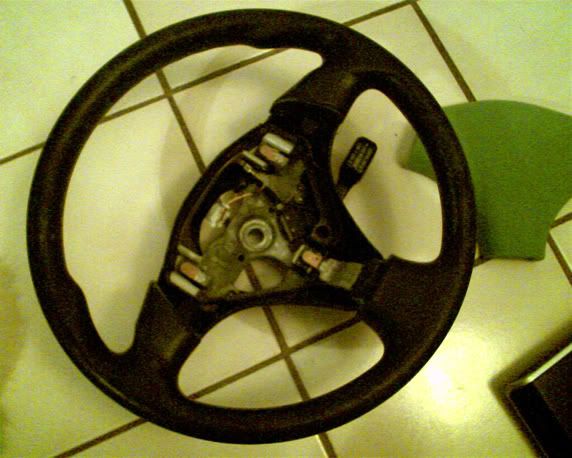
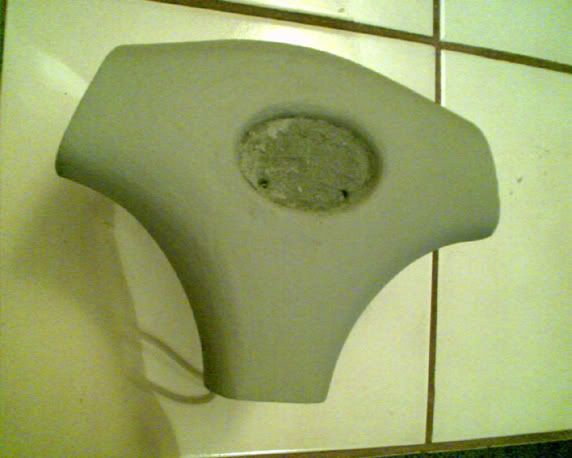
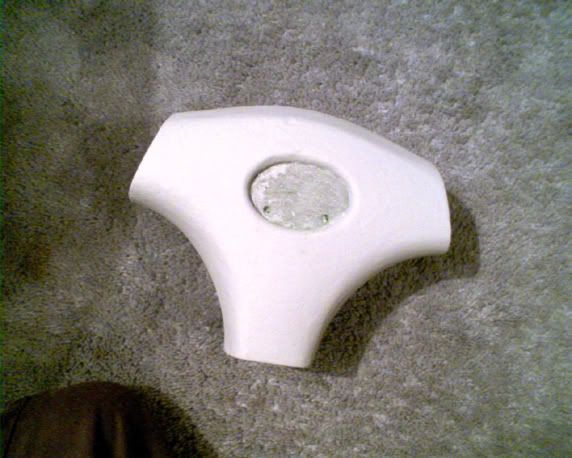
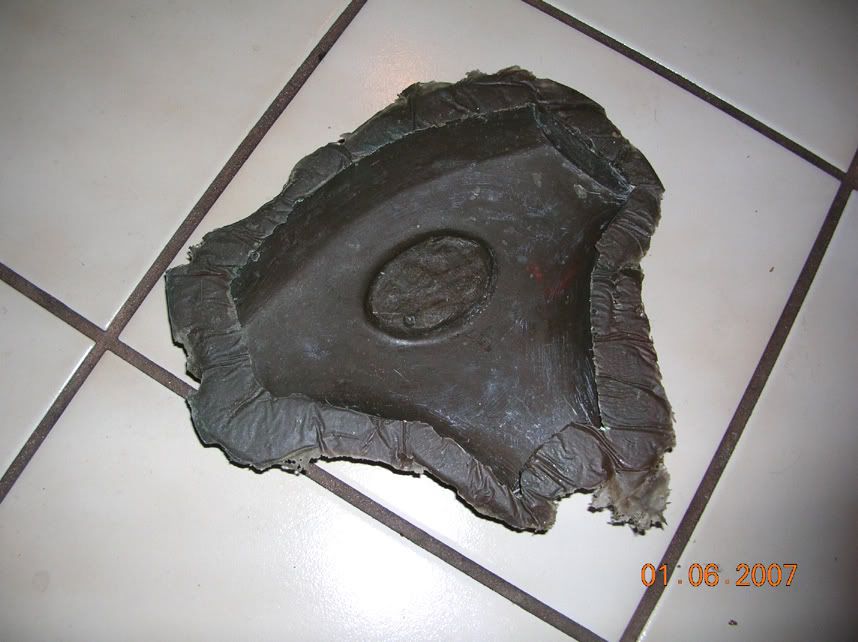
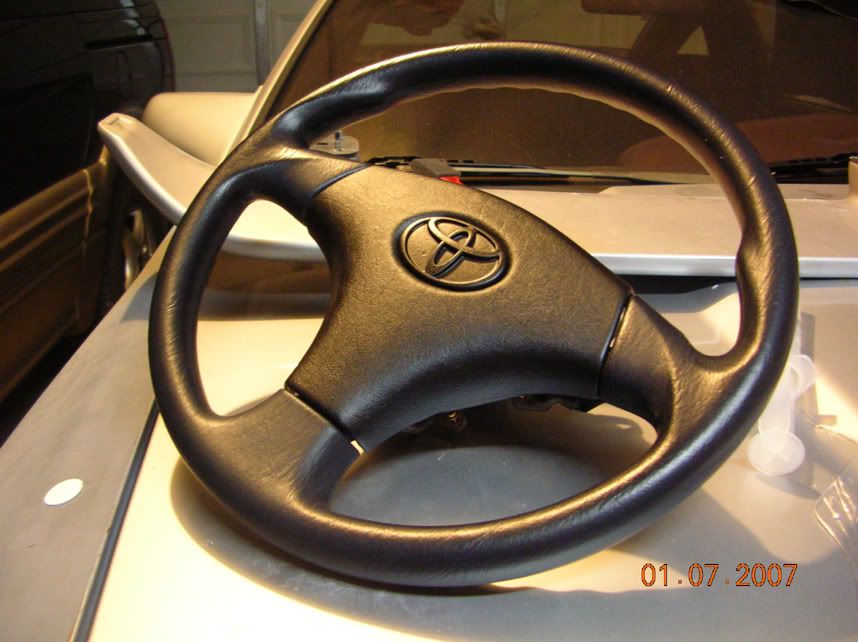
Well he wanted around $400 for it, and all the ones on ebay were $400-$600 (because it has an air bag I guess). Well I found one on Ebay with a blown bag, "Buy it Now" was $39. So I bought it thinking I could repair the center "skin", seeing as my car is a Non-Airbag car. Sadly he did not send the center section with the wheel, so now what? Make my own :icon_razz
This is a good thing as I could do away with that cheap looking emblem.

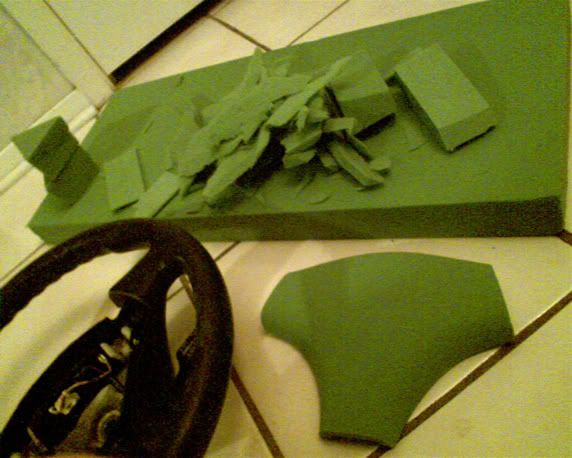
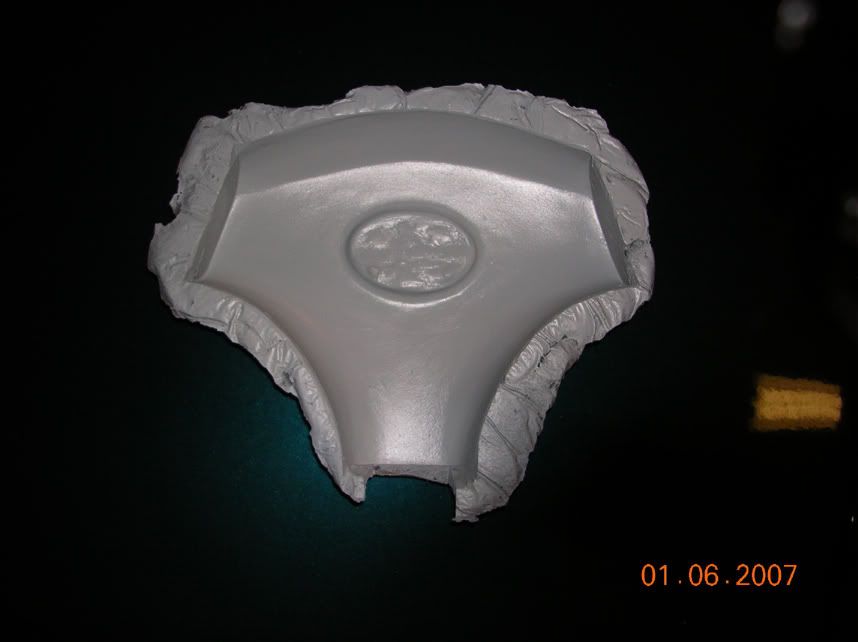
So first thing was to make a 
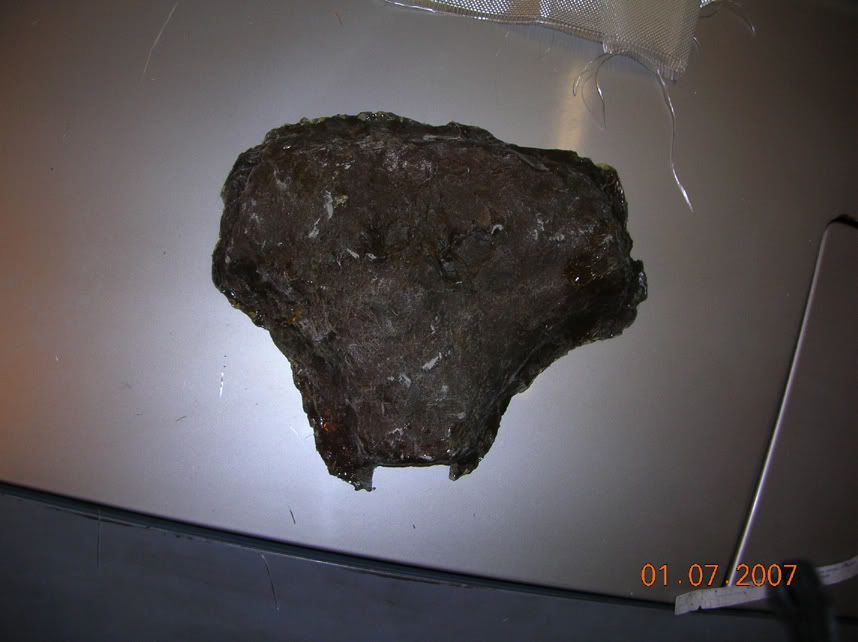
Plug ( a "plug" is formed piece that you want to replicate in fiberglass and what you make the mold off of). In this case I used green florist foam. There are 2 different kinds of florist foam, one hold up to resins the other will NOT. Do not use the stuff labled as "styrofoam", it doesn't look like typical white bead-styrofoam, but it "melts" from resin the same way. What you want is called Dry Foam, it is a dense foam and holds up to resins and fillers. Be careful with it though, it is very "soft" as in, it will indent very easily. It is so soft you can actually sand it with just your finger.

So here is the pics of the proses. Sorry for the first few pics being so poor. I had to take them with a web cam, as my digicam was away from me for a few days. The plug was formed to the shape I wanted and then filed, sanded, and primed. The most important part is the plug, it must be exactly the way you want the fiberglass piece to be.

p477684_2.jpg

p477684_3.jpg

p477684_4.jpg

p477684_5.jpg

p477684_6.jpg

p477684_7.jpg


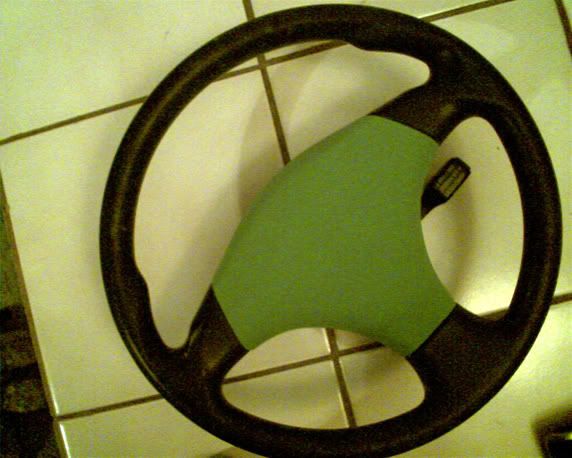
Now that the plug is done it is time to actually make the mold. On this project I used "Bondo Hair", it is not actually bondo, it is a resin jelly with chopped up fiberglass mixed in. It cures very strong and is great for small molds like this one. (larger molds will topically be made with fiberglass and resin). *Fist thing is to coat the plug in a mold release wax, a MUST*
Then I just mixed up the bondo hair and gooped it on the plug, making sure to work out all the air so there are no voids in the mold.

p477684_8.jpg


Once this has set up, just flip it over and break out all the foam and clean off anything left from the plug.

p477684_9.jpg


Now time to prep the mold. Just make sure there are no air pockets or voids, all imperfections are just filled, sanded, and then the mold gets painted.

p477684_10.jpg


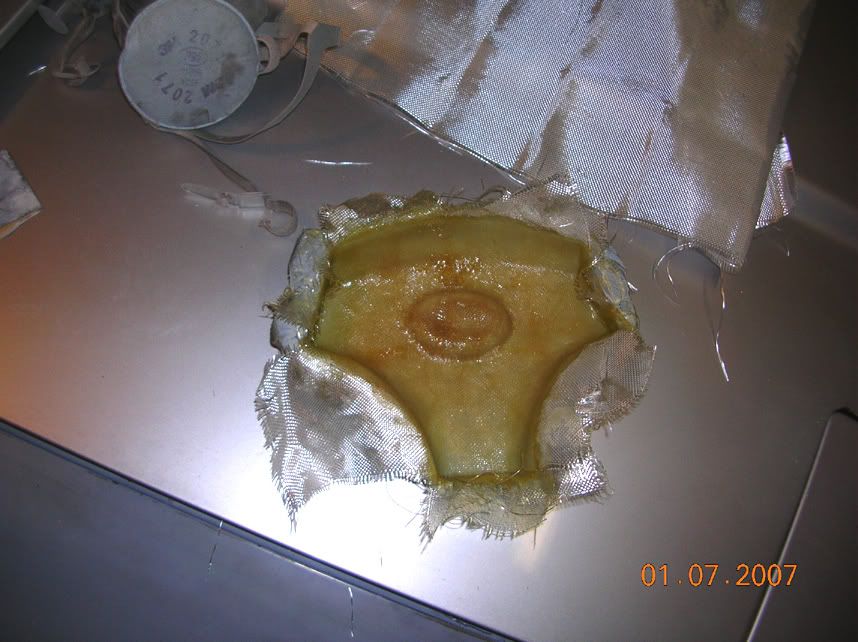
Now just wax the mold the same way as on the plug. Cut the fiberglass down into usable strips and pieces. Mix up the resin, and have fun, again MAKE SURE to work out the air (this is where a vacuum bagging set-up comes in and makes life a little easer,...but I no have one) Don't pass out from the fumes :icon_razz

p477684_11.jpg


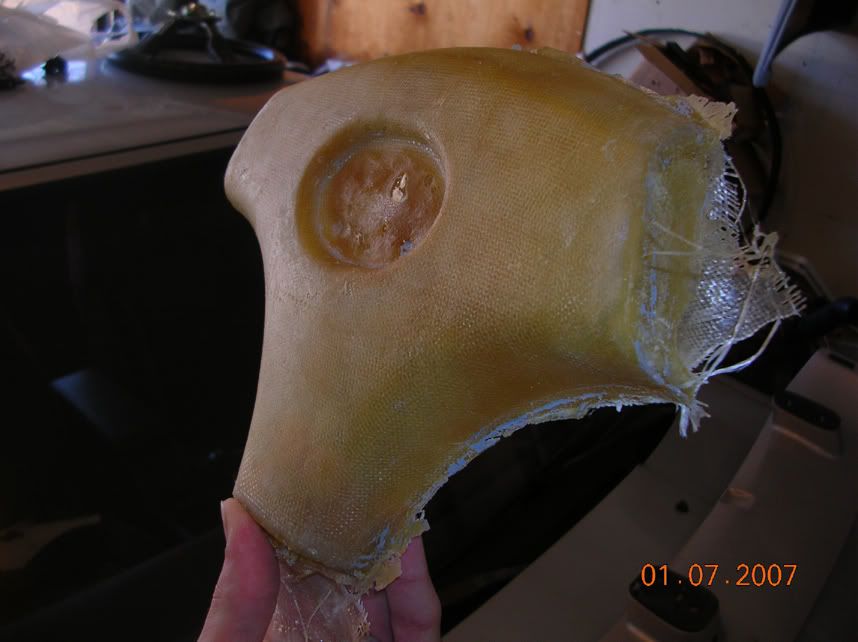
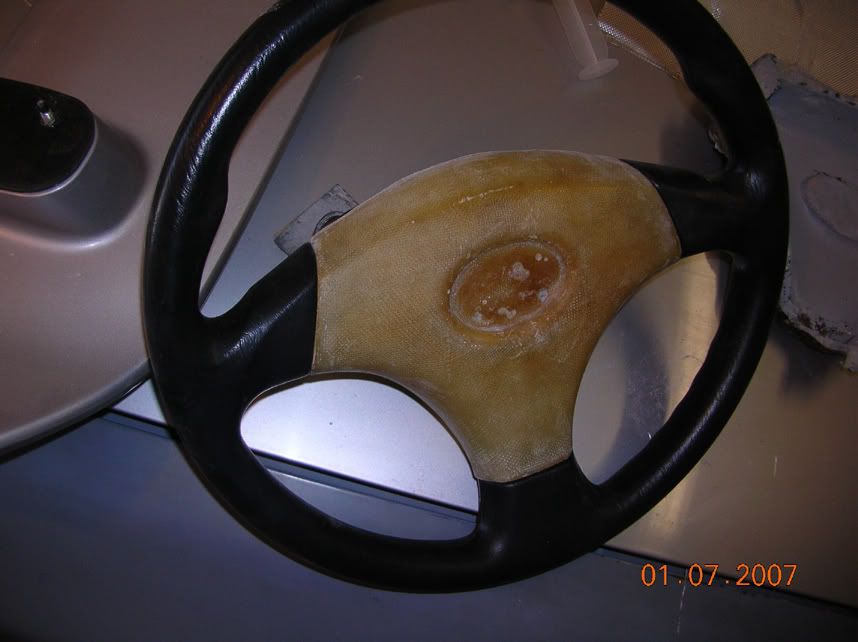
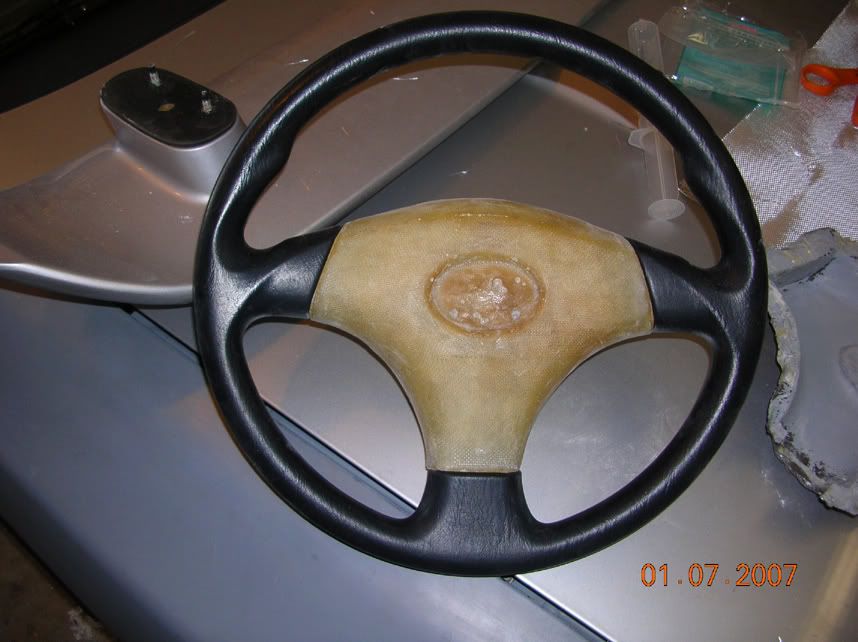
Once this sets up, cut off some of the excess glass to make it easier to get to the edges to pop out the piece. (on this small of a piece I just used a flat head screw driver to "wedge" between the mold and the glass. POP

p477684_12.jpg

p477684_13.jpg


Then just trim off all the rest of the excess.

p477684_14.jpg

p477684_15.jpg
 
Last edited:

jimi87-t

Active Member
Oct 12, 2005
1,126
4
38
Colorado Springs
Now you need to use a de-waxer on the piece or what ever finish you apply to the piece will not bond.

In this case, I finished it buy covering in a vinyl to match the wheel. I also added the mounting tabs and what not to secure it and to utilize the horn contacts.

p477686_1.jpg

p477686_2.jpg

p477686_3.jpg


So hopefully that gives you guys some ideas and some knowledge on how to work with composites. :icon_bigg
 

Bigzavs

86.5 1JZ Single Turbo
Apr 21, 2005
2,267
0
0
39
Arlington, TX
damn that looks good jimi, for a sec i thought that might be the one brian was selling over on the other board.

hey ive still gotta get you those lil clamps for the whaletail, just hit me up sometime soon
 

jimi87-t

Active Member
Oct 12, 2005
1,126
4
38
Colorado Springs
Tom: Thanks! Yes, I like the way it turned out, IMO it looks better than the Celica center ;). The emblem was one I had lying around from one of my trips to the junk yard a few years back, I think it was off a mr2 or a supra nose, it was so long ago I don't remember.

Ben: Thanks dude!, Yeah Brian's post about what wheel he wanted got me turned on to this wheel. No worries on the clamps at the moment, but I'll let ya know if/when I need them.

Noel: Thanks!