The "Hurry Up and Wait" build

sirgeorgee

New Member
Mar 3, 2008
238
0
0
Hungary
Looking good

She is a really nice find -great future plans

Provide us with some pictures if you're done with the engine bay i am curious...
 

thedave925

Since 9/16/05
Nov 9, 2005
626
0
0
East Bay, Cali
There will be pics to come sirgeorgee, you betcha ;)
At the current rate of days passing to the work I put in, there should be bay paint in a week.

mk3design, you are correct.
I'm stripping the engine bay of the larger items and simple things to remove, painting, and reinstalling all the components.
I will be keeping the ABS. There are indeed plans to upgrade the brakes, somewhere after I paint the car and possibly go full stand alone.

I will soon put up a full mod list in my first post so that it isn't a matter of reading every post for the big things

Thanks everyone for checking out my thread, and I very much welcome any insight

-Dave
 

thedave925

Since 9/16/05
Nov 9, 2005
626
0
0
East Bay, Cali
Today I removed the AC lines and condenser after making a trip to the paint shop and get fresh paint and clear since i don't trust the aged stuff I have.
That is all :)
 

thedave925

Since 9/16/05
Nov 9, 2005
626
0
0
East Bay, Cali
Tape and degreasing the engine bay will be done by the end of the day.

I've had cold feet about the machine shop's work for a couple months now, enough so that its hard not to lose sleep over these not-so-mundane details.
To be addressed:
-Inspecting/cleaning the oiling passages of the crankshaft, in the name of Rod Knock prevention
-Verifying the clearances of the main and rod bearings
-Checking oil pump gear lash and drive gear to wall clearance, Also extending the pump pick up screen. Thanks to Zumtizzle for the ideas!
-Placing dabs of "Right Stuff" sealant between the block/timing plate intersection and head, as seen in the first diagram of EM-55 of the TSRM
-Placing small beads of sealant under the intake and exhaust 1st cam caps at the outside of the cradle to cap surfaces

Todos to date:
-Finish engine bay paint
-Re O-ring AC system with nice green ones :)
-Reinstall engine bay factory clutter
-Finish joining Shaeff's KS rewire kit to ECU plug/harness
-Join engine, clutch, and transmission together, install
-Replace heater core o rings
-Chase down why I don't have my intermediate wiper speed settings
-Reinstall dash
-Break-in engine, pass smog
-Start on body trim removal
-Body work
-Get the body painted
-Fix annoyances

Edit:
Today's plans Thwarted, have to pick up a friend from the airport...

^^^ Example why i don't start work on the supra unless i know i have at least 4hrs to myself...
 
Last edited:

thedave925

Since 9/16/05
Nov 9, 2005
626
0
0
East Bay, Cali
Took a couple days to get this far between all the interruptions and work.
My lady friend caught a cold from being up late too much (my bad hehe) so i helped her yesterday evening after taping off the fire wall a couple hours after work.

This morning i was on call for work so I got started getting things to degrease/wash the engine bay and what do you know, soon as I pressurize the hose, I suddenly have a remodel to help along.
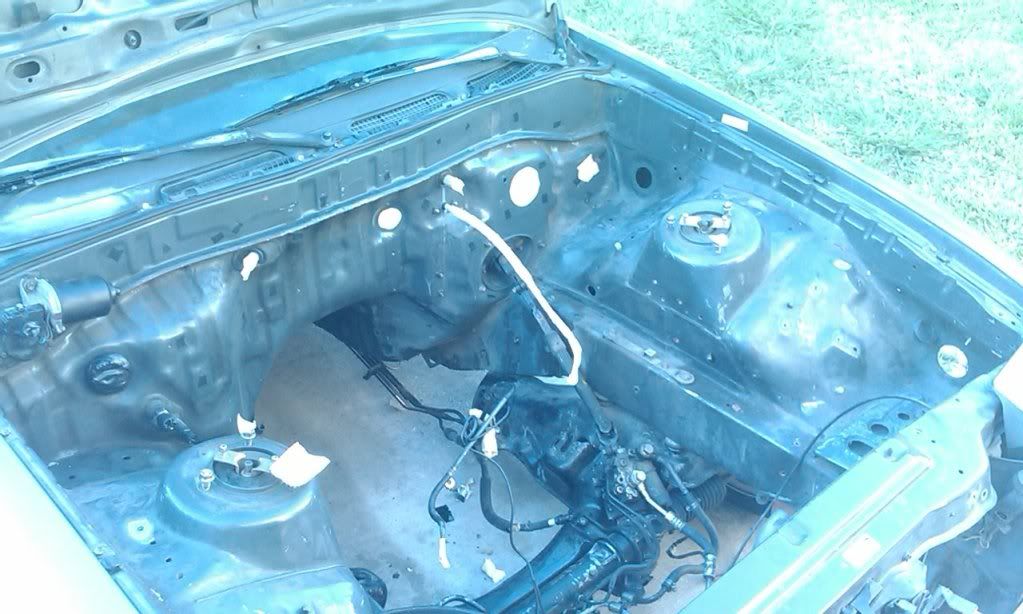
Hours later, I bust out the pressurized 50/50 mix of degreaser, saturate the grease, and go to town with a scrub pad

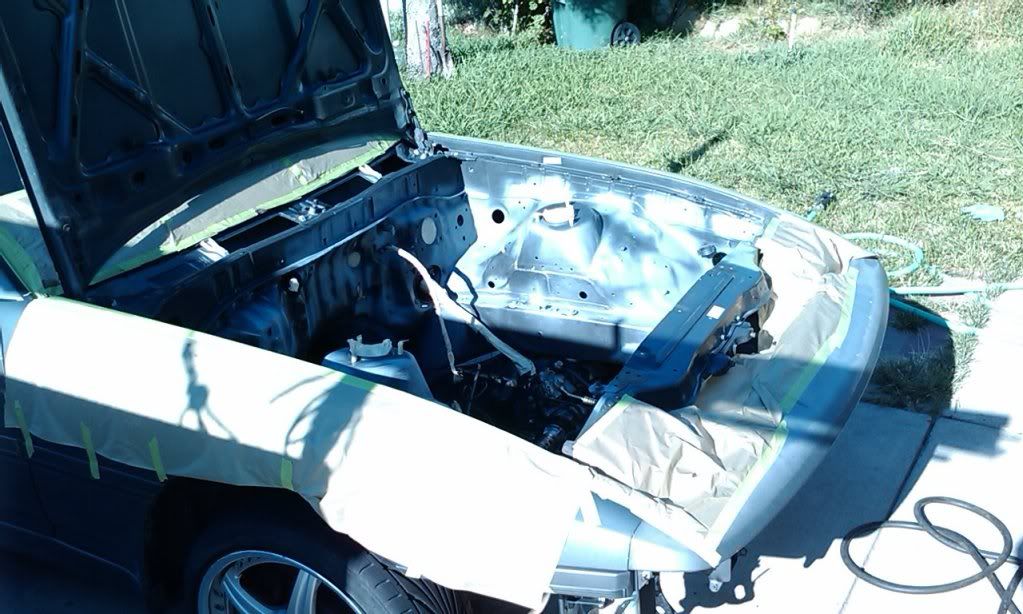
Taped the firewall to keep water out the passenger compartment
p1595309_1.jpg


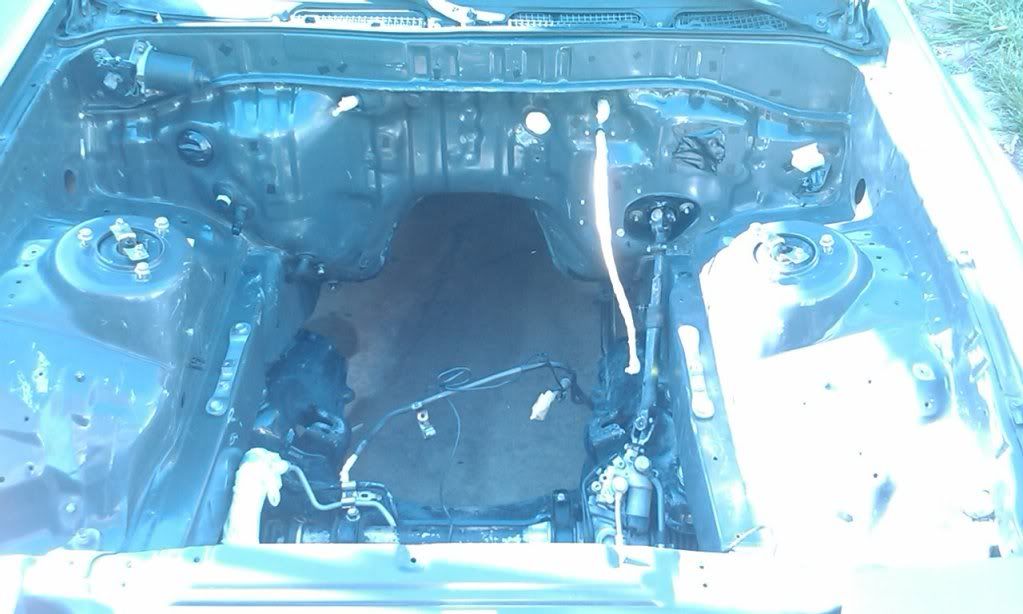
Just like doing a wax job by hand, I started one section at a time, exhaust areas to forward of passenger shock tower, around the rad/condenser area, driver forward shock tower area, driver rear shock tower area, firewall, tranny tunnel.

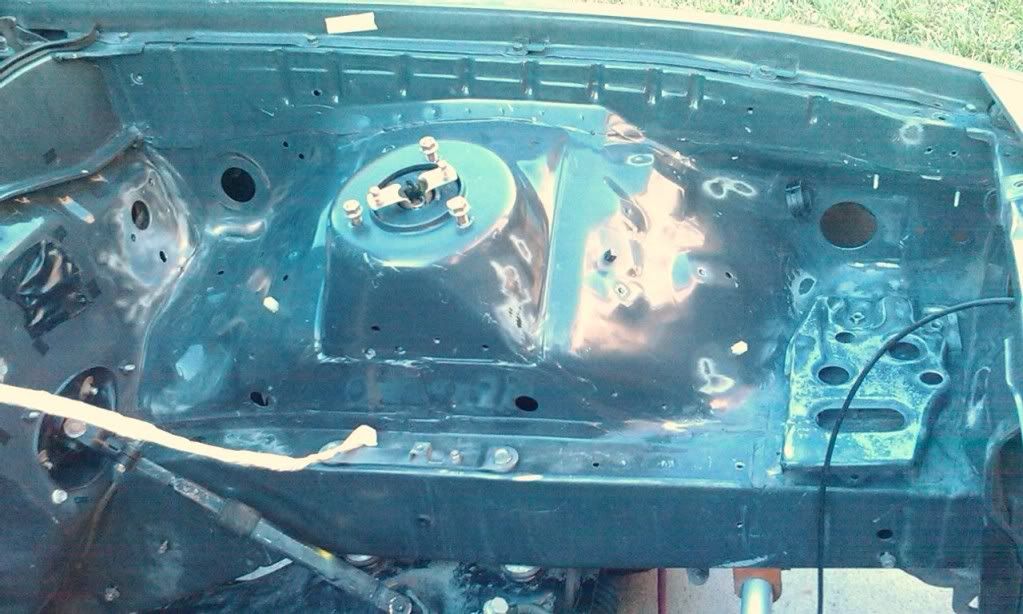
The results is a shinier non greasy engine bay:
p1595309_2.jpg


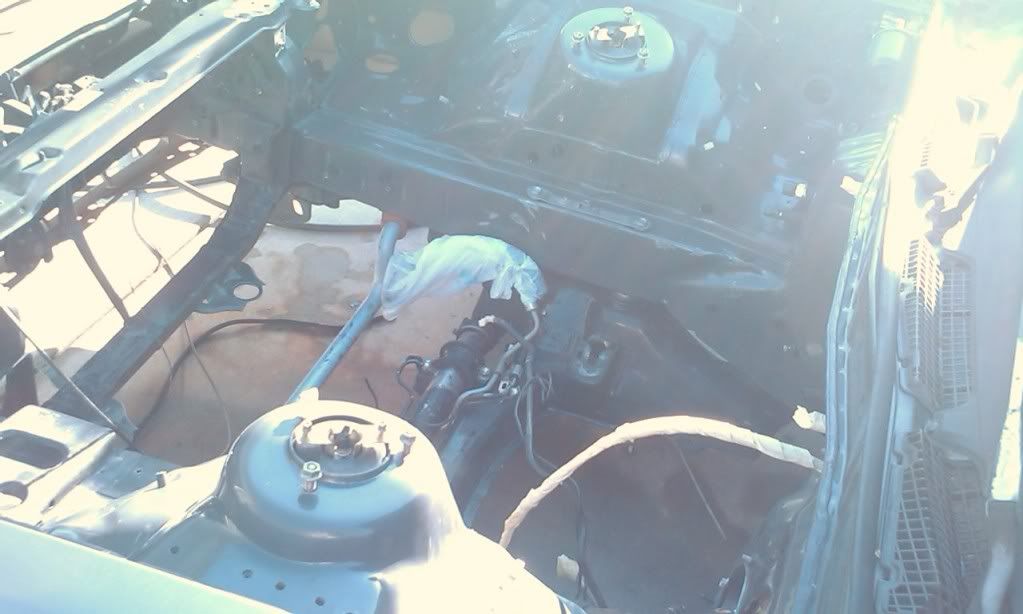
Shot of the condenser area
p1595309_3.jpg


Some time ago, the clutch master cylinder was leaking a good while before I noticed the build up on the dead-pedal under the dash.
Well, that leak made itself a long term issue too, though not obvious until removal of the clutch master

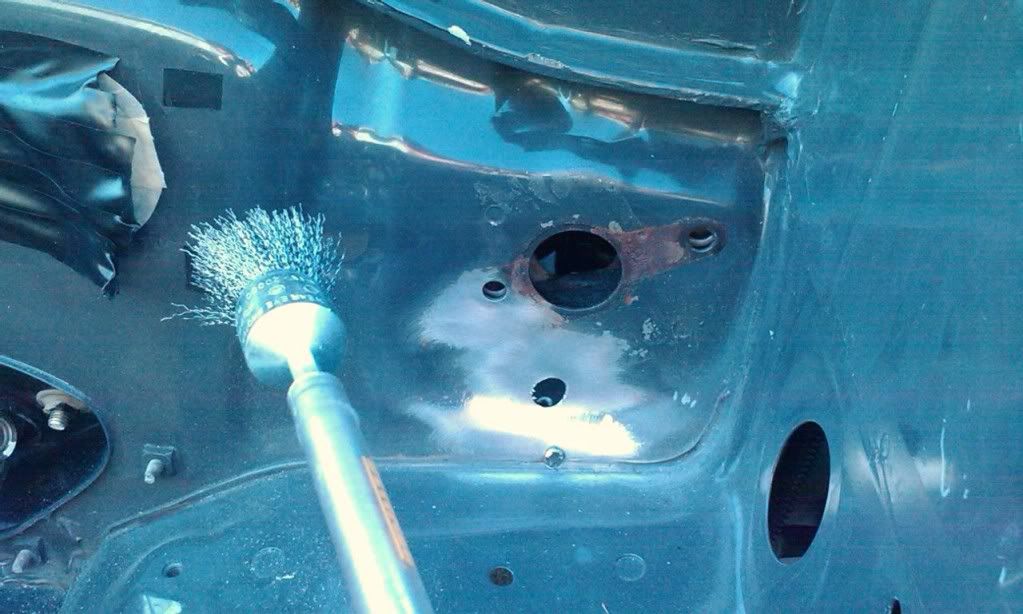
Just a brush on a drill. USE EYE PROTECTION
Before you begin, make sure you have self-etching primer, which bonds to the bare metal surface and prevents rust from forming in the future.
After getting down to the metal, I used compressed air to remove the debris before spraying primer
p1595309_4.jpg


The battery tray, places along the shock tower rubbed down by split wire loom, basically anywhere rusted
p1595309_5.jpg


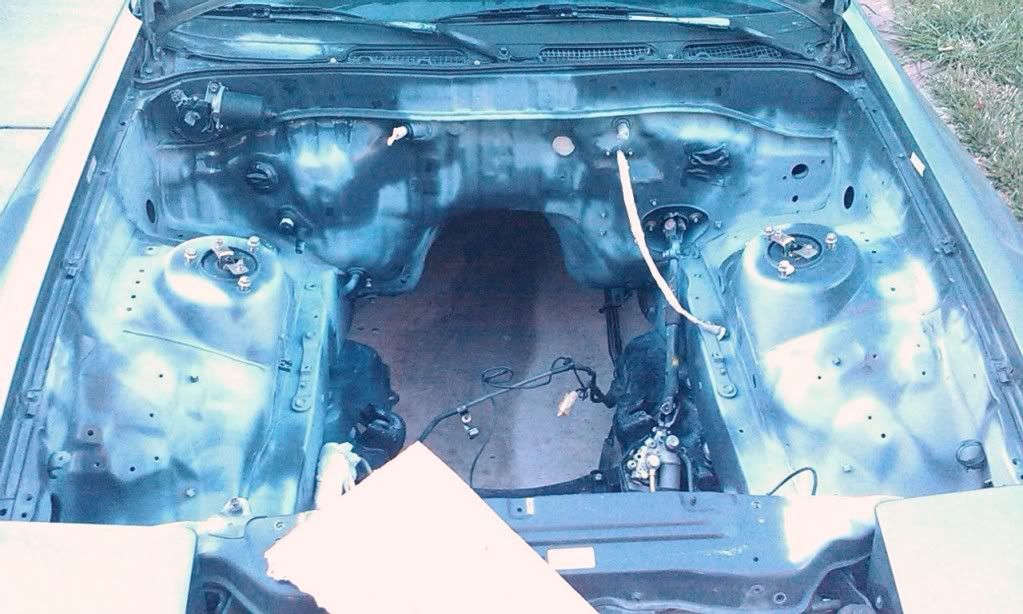
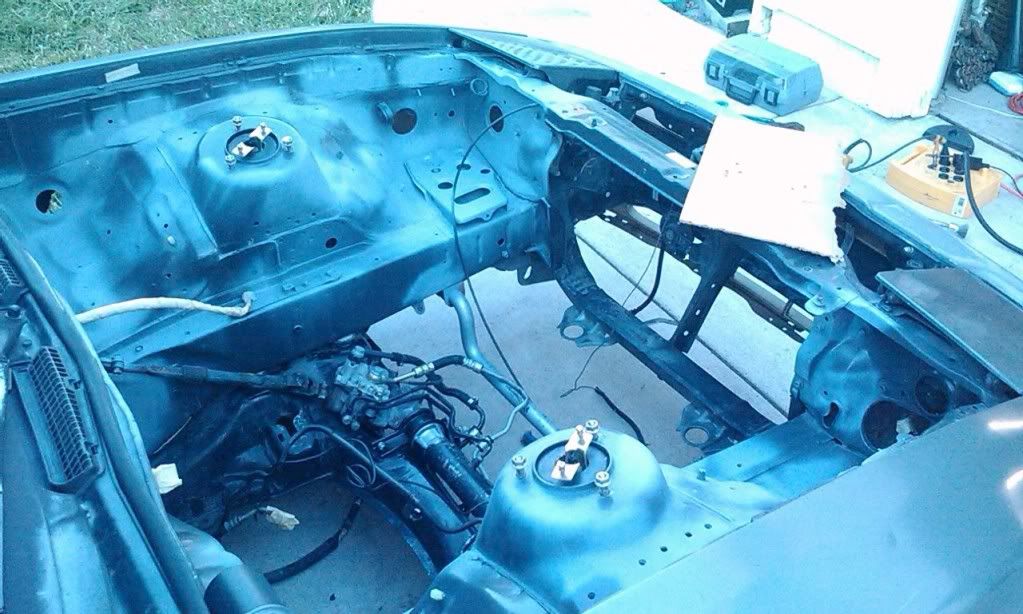
I hit everything that might compromise a good paint job.
Sorry about the over exposure, camera phone is compensating for dim lighting.
Notice the bright thing near the hood latch. Its a sheet of cardboard to control over spray.
p1595309_6.jpg


Better lighting
p1595309_7.jpg


I did manage to remove the wiper motor after the pictures:
-remove wipers
-unbolt wiper motor (4 10mm bolts)
-unbolt 12mm nut securing wiper throw arm to wiper rod, dislodge
In my case, the wiper throw arm pulled from the wiper rod before it pulled from the wiper motor, oh well.

Hopefully in the next couple of days I can paint the bay and begin putting stuff back.
Again, any input is welcome
 

thedave925

Since 9/16/05
Nov 9, 2005
626
0
0
East Bay, Cali
More Prep from yesterday
p1596690_1.jpg


p1596690_2.jpg


I've been waiting for a windless day to paint, to better ensure the flake of the paint makes it to the car in an even coverage.
 

thedave925

Since 9/16/05
Nov 9, 2005
626
0
0
East Bay, Cali
I've waited long enough and the way the wind works round here is calm in the morning and worse in the afternoon.
IDAF anymore, tired of waiting so I sprayed it with my Harbor Freight touch up gun lol
p1596725_1.jpg


if you look closely, you can see some drips from the gun not sealing 100% where the paint holder joins to the gun.
p1596725_2.jpg


I learned today how to operate the gun.
-Bottom most dial is for air pressure. Close it and nothing happens when the trigger is pulled.
-Top rear dial, the one at the position of beaver tail on a 45, is for trigger travel, dictating how much air comes before the paint starts to mix. Opening it prevents the large blob splatters when there isn't enough air to atomize the paint when first pulling the trigger.
-Forward most dial next to paint delivery port, controls speed at which paint flows into air mix. Close it for thinner paint, open it for heavier application. It helps to have it thinner so that runs take longer to happen.

It was easier to climb into the engine bay :)
 

thedave925

Since 9/16/05
Nov 9, 2005
626
0
0
East Bay, Cali
Currently I'm waiting for the base coat to cure a bit before I wet sand it.

Forgive me if I'm rambling, just speaking my mind atm...

If I don't wet sand the base coat, imperfections in the metallic would be more obvious,
i.e. the miniscule peaks that form from metallic stacking up would reflect light differently than areas where the metallic laid flat, and clear coat would only pronounce the effect.
The paint I'm using has a window in which I can work with it. 20 minutes minimum its ready to take on clear coat, 24 hours maximum before its excellent adhesion factor for fresh paint or clear diminishes.

The paint shop hooked me up with a quart of base coat mixed to the desired color code, some reducer for the base coat, clear coat and the hardener for that, a ratio cup, filtered paper funnels, stir sticks.
It helps to have gloves on hand (lol) during any pouring.

I've never handled a true paint gun nor have any previous body experience. Any and all body and paint work on this thread was taken by example from this forum and talking with and watching a professional briefly years ago. I'm just going by what I remember and what feels right.
If something could have been done better, let me know, I have another car in the future (944) that needs body and paint work.

I was very nervous about painting until i nutted up and commited, taking the ratio cup and pouring out a 1:1 ratio of base coat to reducer as recommended on the paint sheet that came with the base coat.
Actually, this turned out to be very fun and relaxing to do the paint myself, solving apprehension and taking pride in my own handy work. Its not the best, but it got done :D

My harbor freight gun, that previously leaked until i fitted an o-ring to the problem joint, has a 4 ounce can.
I was skeptical it was enough volume to do the bay without hopping out for a few refills. Turned out its about right for a light coat all the way around, or one and a half for heavy coverage.
In line to the gun, I added two filter deals that seperate water and oil from air. One was at the tank, the other at the gun.
Before I started all this bay work of degreasing and drying, I ran the compressor up and purged many times to remove the years of water and rust build up from within. Take caution that the rust water stains cement pretty well.
That way when I work I don't have to worry about adding crap to the newly degreased surface or having a failed paint job simply because I didn't clean out the compressor.

Another detail is to have a lot of paint thinner/acetone for cleaning the gun. Paint gets thick and needs thorough attention to prevent contaminating the next job.
Try not to breath it in too much, it has a way of wearing one out prematurely. I do a lot of my work in my well ventilated garage, and it still gets to me...

So, 2 base coats laid and now its time to wet sand, then wash, dry with compressed air, and apply 2-3 layers of clear coat.
And somewhere along the lines i'm ignoring that heart lurch feeling of dear-god-what-did-i-get-myself-into with a deep breath and smile, forging ahead that all is well LOLz
Git'r Done!
 

thedave925

Since 9/16/05
Nov 9, 2005
626
0
0
East Bay, Cali
Zumtizzle;1596778 said:
Dave,

You tube tends to have a few nice how to paint vids. As for clearing the engine bay good luck! ;)

Too late, and I'm not a big fan of youtube, bro lol yeah it turned out okay but I'm sure someone with know-how would've done an outstanding job.
I cleared it, 2 light coats, one heavy.
16 hours at least need to pass before I cut the clear or whatever its called.
I've got a buff drum, and a drill capable of 2400 rpm. The drum would fit the die grinder I have but I don't trust the grinder still...

Pics later, I've got to leave in a hurry
 

thedave925

Since 9/16/05
Nov 9, 2005
626
0
0
East Bay, Cali
Yesterday I was in a hurry to leave or I would've posted up fresh pics.
Also, I fixed the brightness issue on the phone. I forgot to put the brightness setting back, dee dee dee

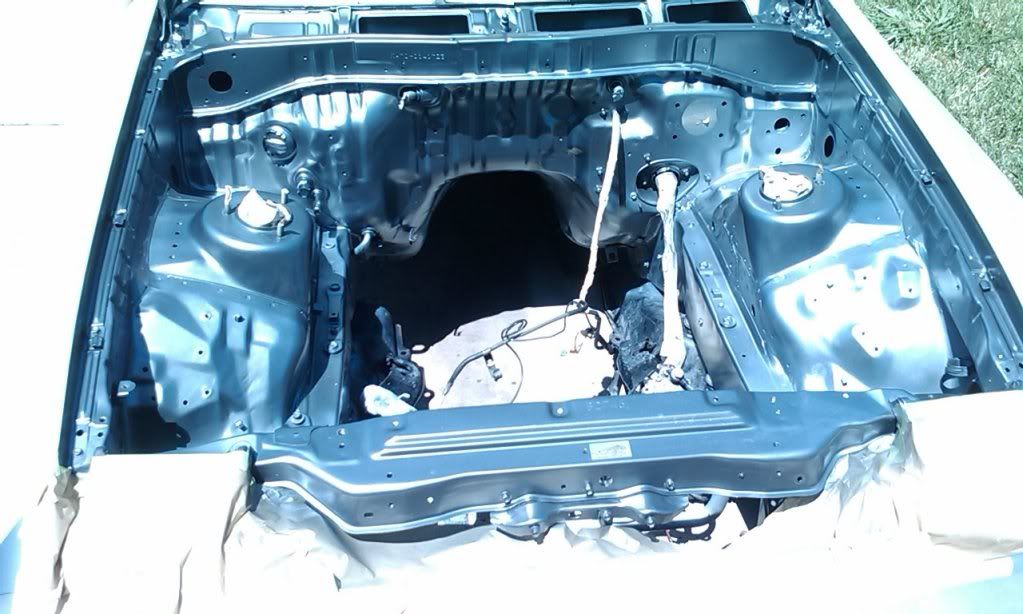
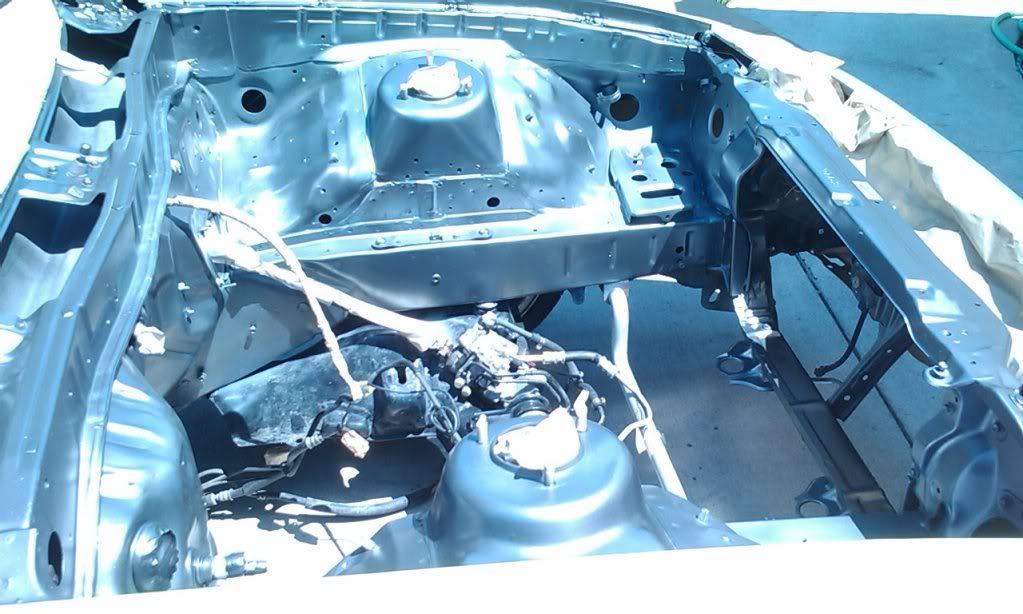
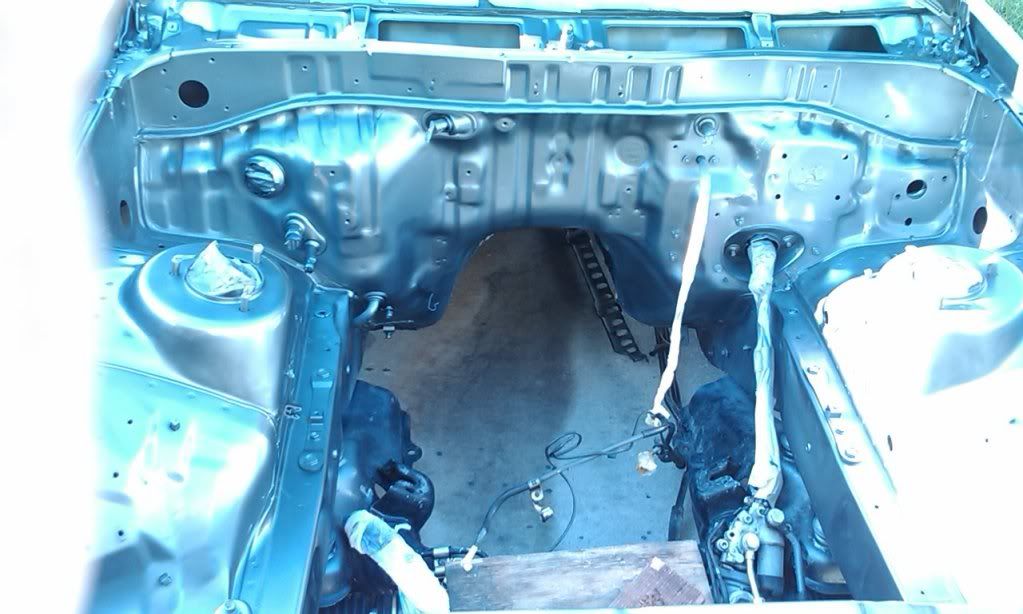
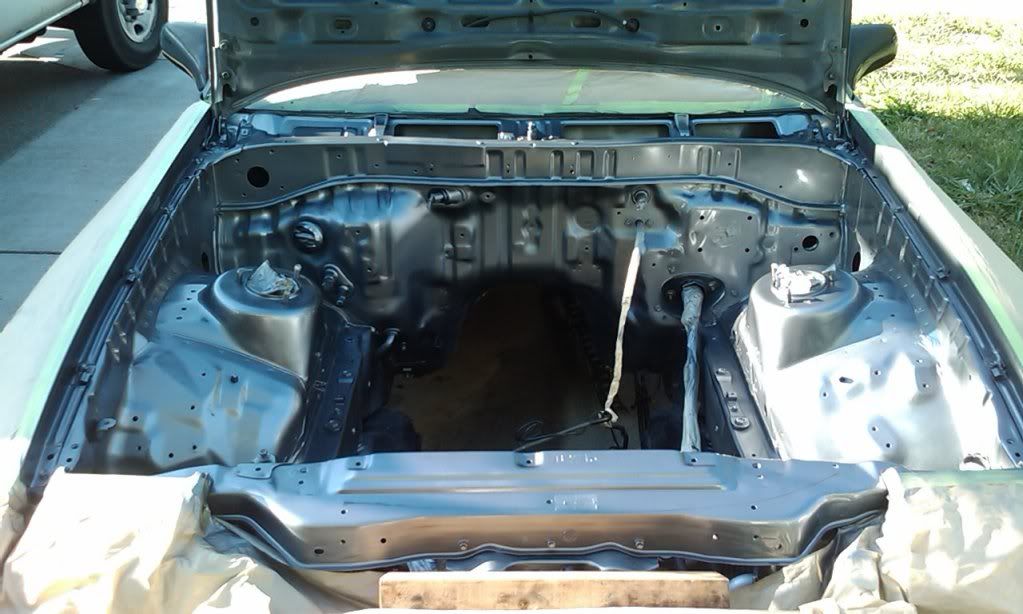
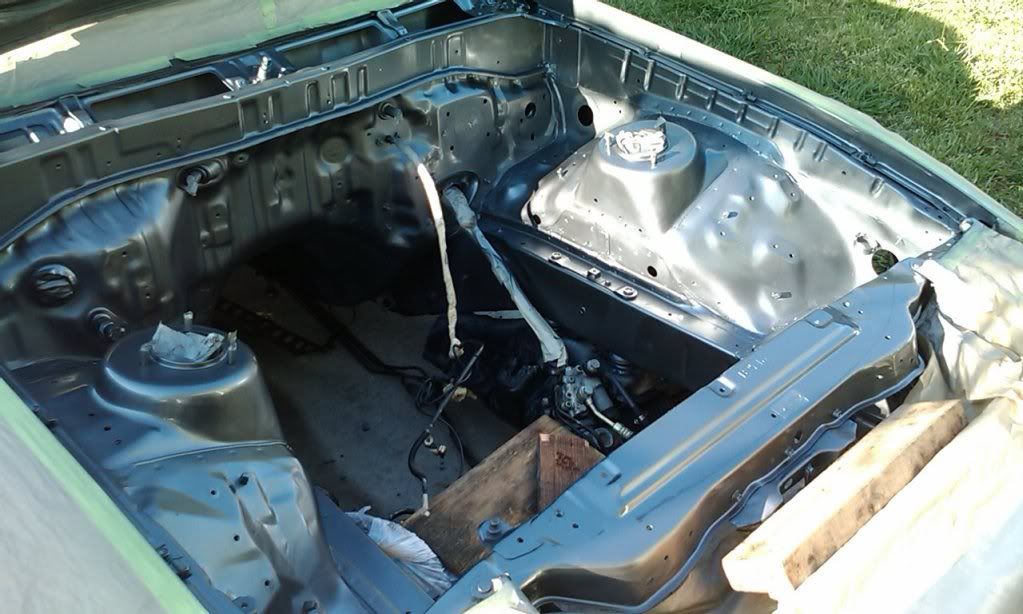
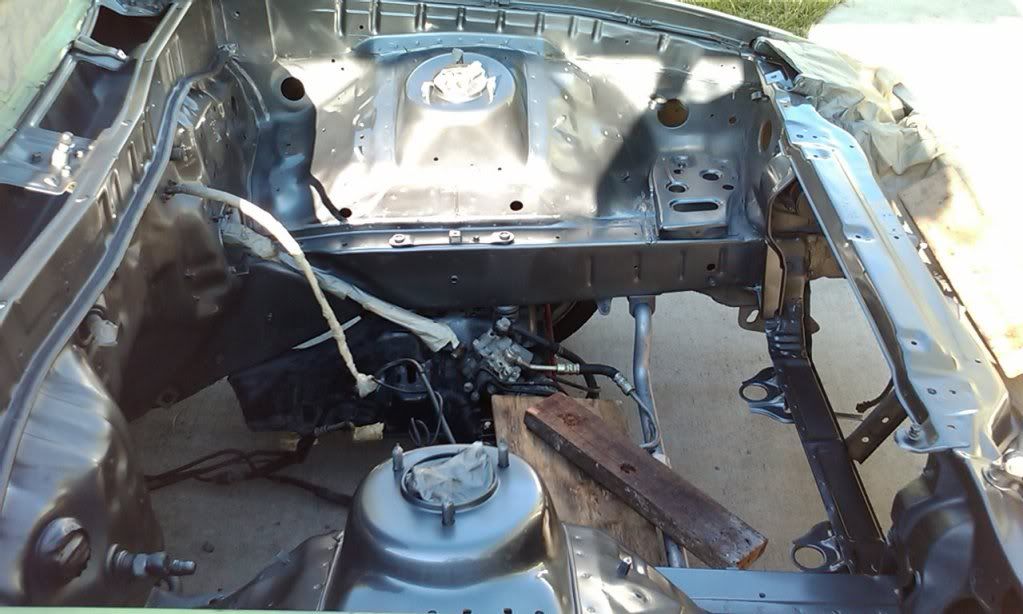
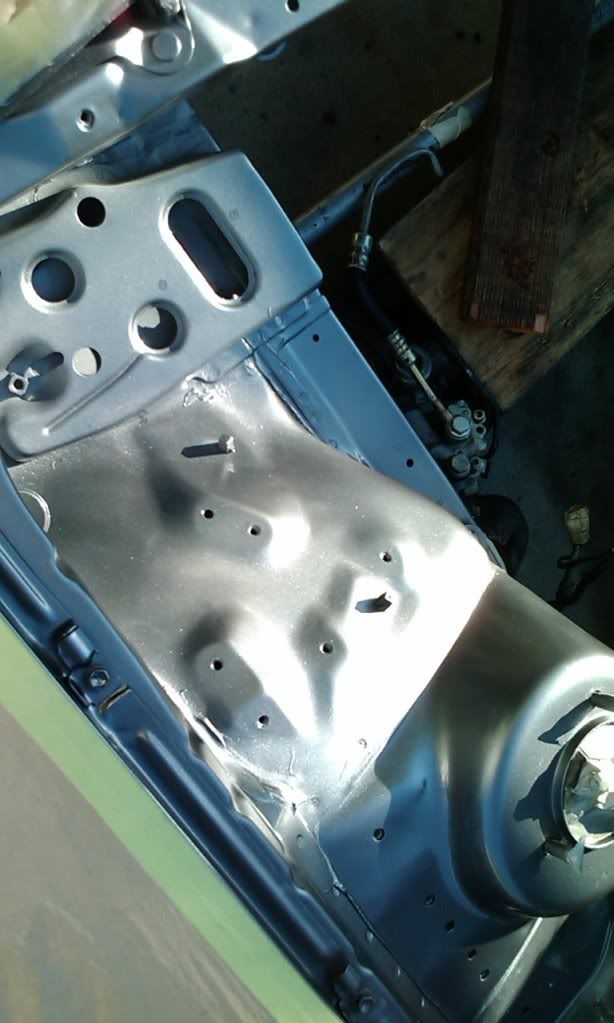
Base coat applied. 2 medium coats
p1597187_1.jpg


It hurts the eyes, Aaahhhh!
p1597187_2.jpg

That was just after clearing it.

It pleases the eyes, ahhh
p1597187_3.jpg

p1597187_4.jpg

p1597187_5.jpg

p1597187_6.jpg


I'll be using Meguir's finishing glaze or whatever the name is for the cutting compound used with the buffing wheel.
Then it'll be obvious if this paint job was decent or so-so :D
 

thedave925

Since 9/16/05
Nov 9, 2005
626
0
0
East Bay, Cali
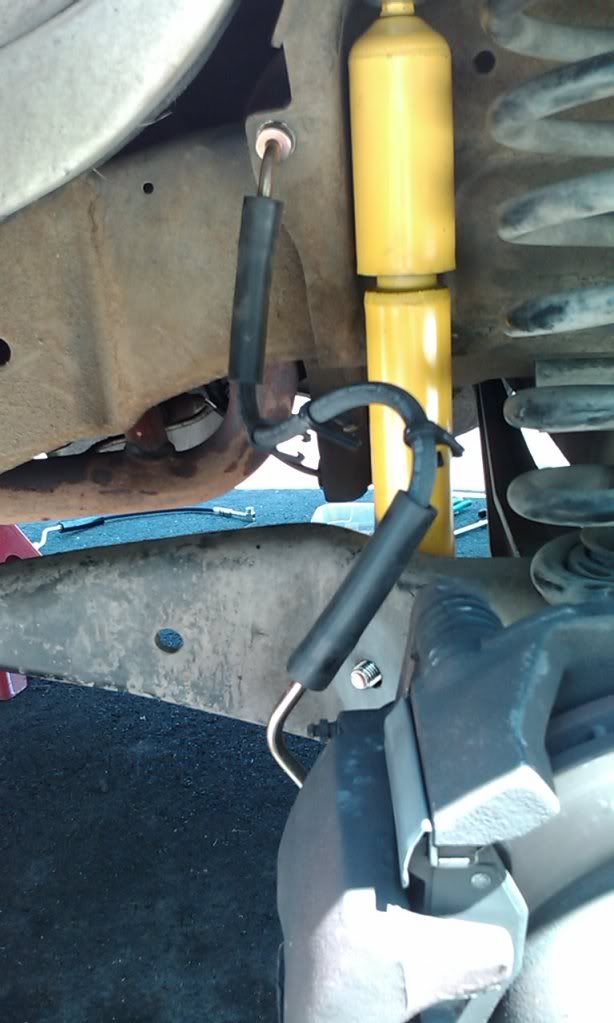
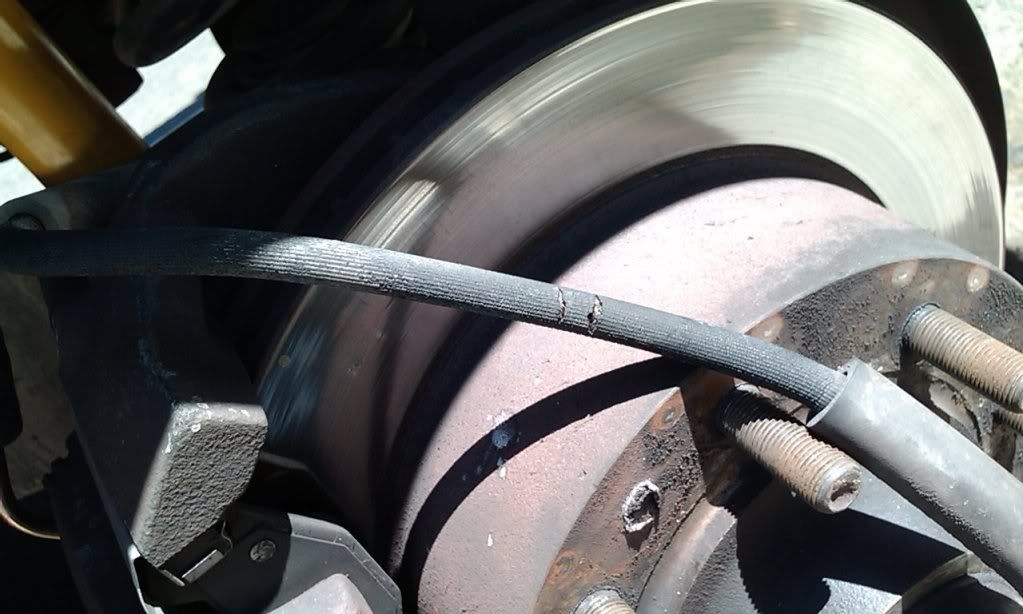
First, I replaced the brake lines on my work van.
It went fassst

New line
p1597876_1.jpg


Why the new line:
p1597876_2.jpg


Its on a 93 E-250, 4.9l I6.
Nothing impressive but it brings in the cash and hauls a lot being the extended version.
Gotta maintain cash flow ;)

Now I did spend yesterday evening on the engine bay.
A halfassed wetsand, then some cutting with Meguir's Diamond Cut 2.0 followed by the medium grade Meguirs. Then quickly waxed it by hand with that orange canned once a year nu-finish or whatever its called.

I learned that spraying paint into a corner creates vortexs that build up orange peel to a nasty degree.
I didn't spend the time wetsanding because 1200 grit clogs fast and i didn't have any 800-1000.
Plus those corners under the brake booster and windshield wiper motor aren't exposed. No care, no problem ;)

But with that bad of orange peel, it was deep enough in the corners that the buffing compounds took a long time to do their thing, or in some cases just stayed there since the pad can't agitate like that.

For buffing the crevices of the bay, I picked up the 3m plastic headlight housing polishing kit for the small padded buffing wheel setup within.
Also, I picked up a cotton buffing drum for the tight spots, only a few dollars at harbor freight.

Anyways, I observed that I should have applied a fourth coat of clear to "bury" the flake better, but overall, it was decent coverage where it counts: shock towers, hood support, upper firewall.
Buffing took care of the majority of orange peel, though i did burn through in a couple places.

First time painting with a gun, no complaints. I reached my goal of a rust preventing clean engine bay.

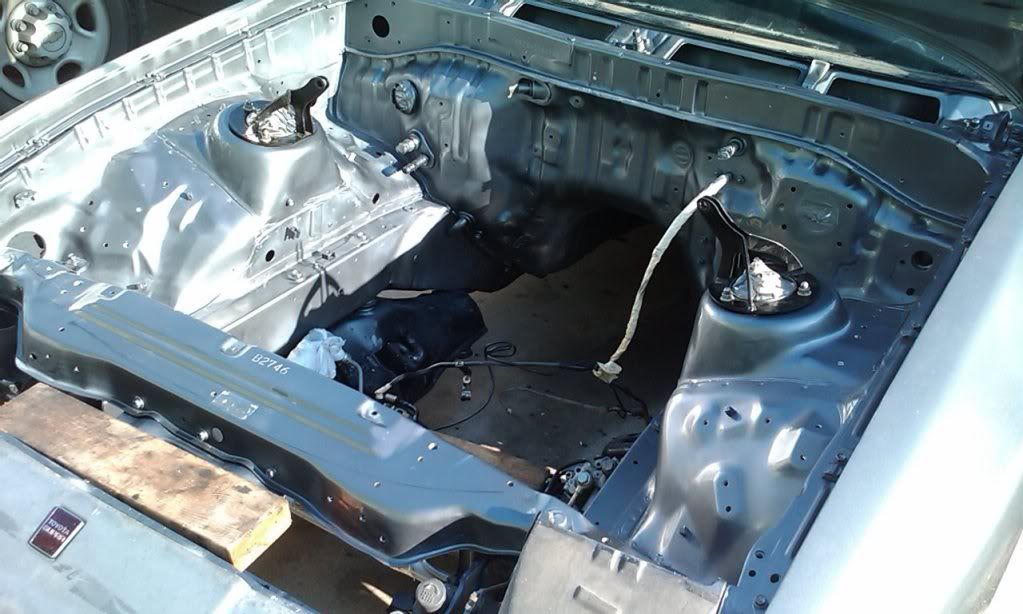
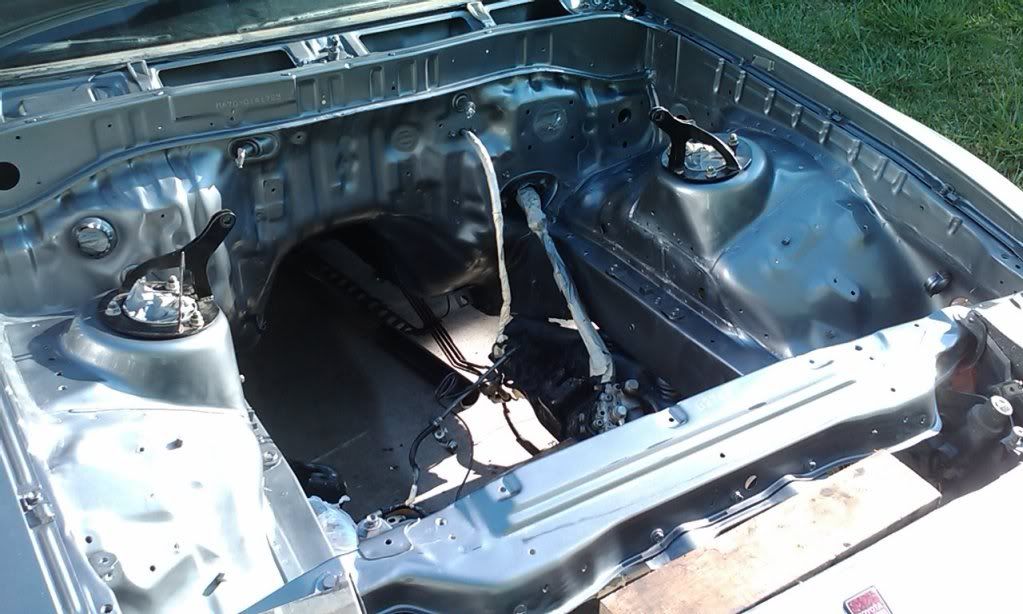
Taken this morning before work
p1597876_3.jpg


p1597876_4.jpg


Now I can move on to the next step: re-clutter the engine bay, go over the engine before install
 

thedave925

Since 9/16/05
Nov 9, 2005
626
0
0
East Bay, Cali
As per request, more info on the bolt on t70.
The serial tag wasn't on it when i received it, but there's some info on it here:
http://www.supramania.com/forums/showthread.php?22717-70mm-Turbo-Maft-Pro-4-quot-DP-LC1

"...Turbo concepts TC70mm W/ P-trim turbo..... 700+ HP
ct-26 style turbo... 4" inlet /2.5 Ic inlet / Polished comp cover
345 whp 354 lbs at 11 psi , never went over 11 psi..... / clocked in stock turbo location.. Internal waste gate/ actuator included(11 psi)..."

jtamulis;273423 said:
That turbo is the same specs as my JT70R, very very nice. And what an awesome price.

Jeff
^^^ notrice.com to check out his bolt-on turbos

Unfortunately I can't find the dyno sheet I saved and the pic from the link got erased in the site upgrade recently. I'll do some more digging in my comp...

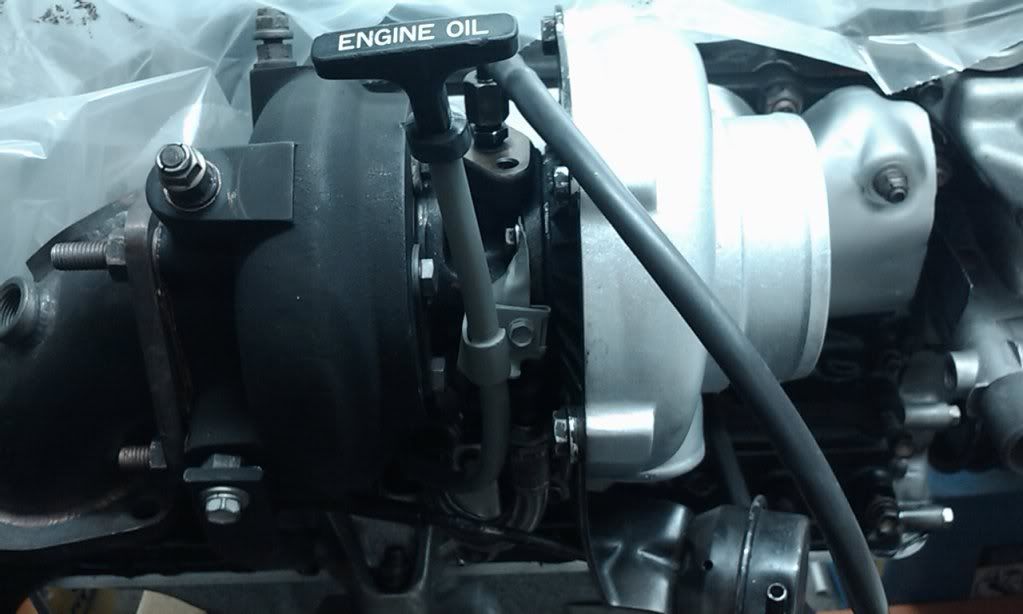
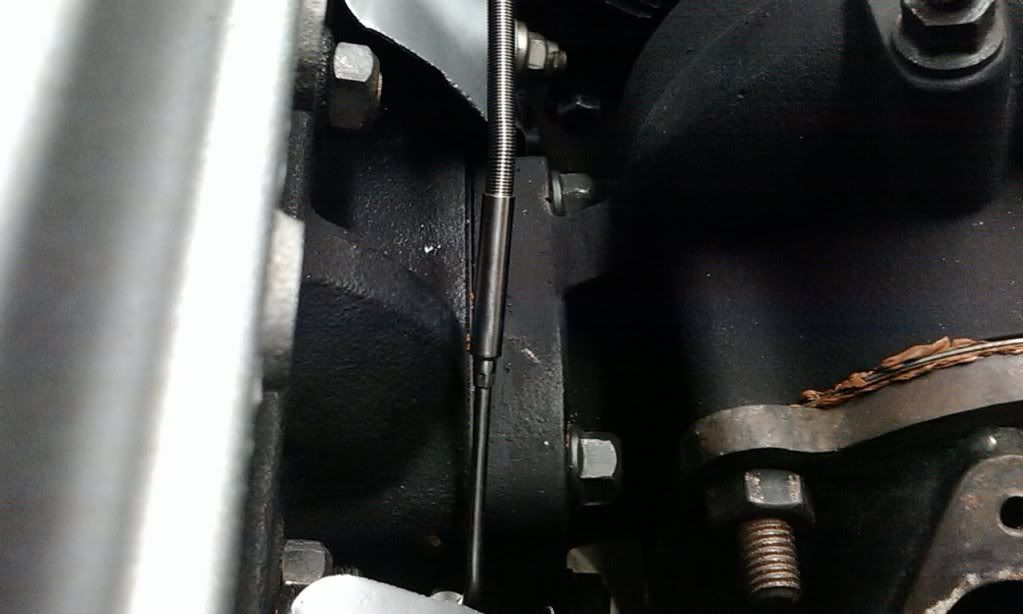
Notice the studs and nuts on the turbine housing, makes for tight but possible fitment of the stock turbo heat shield
p1598378_1.jpg


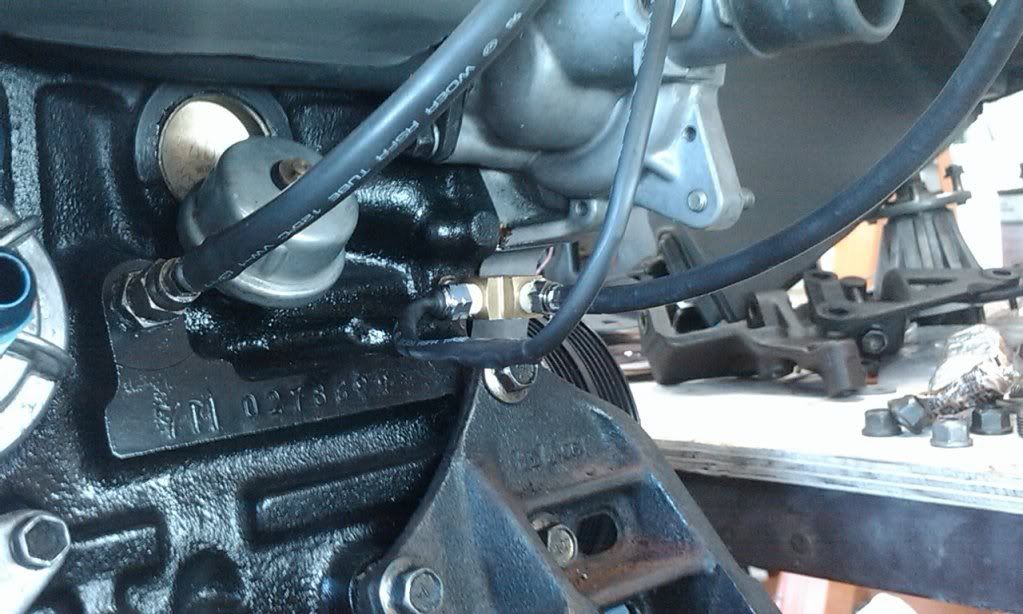
AN-4 Turbo oil pressure adapter to the left of the OEM oil pressure sender in this pic
p1598378_2.jpg


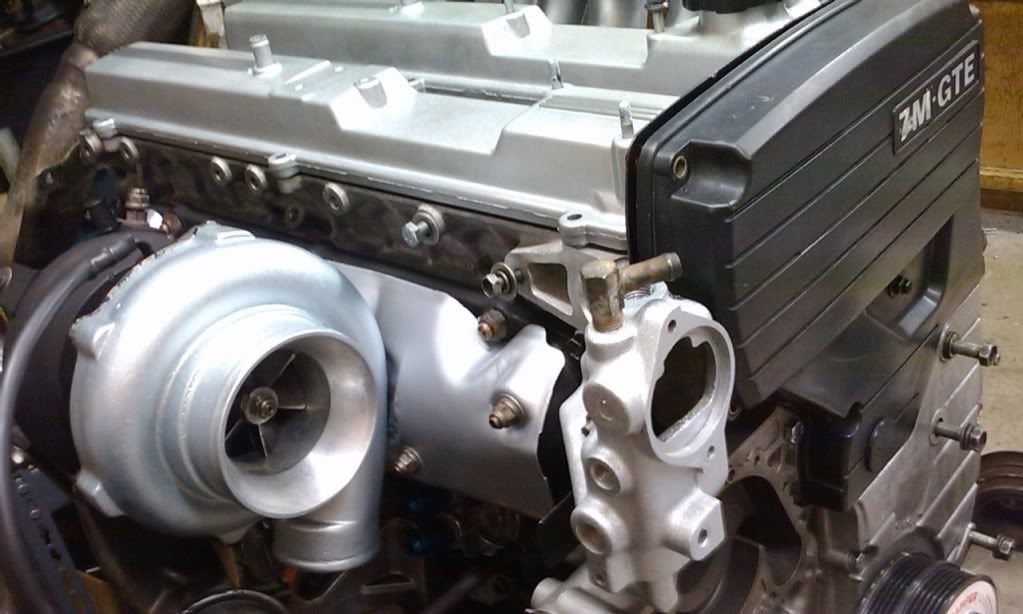
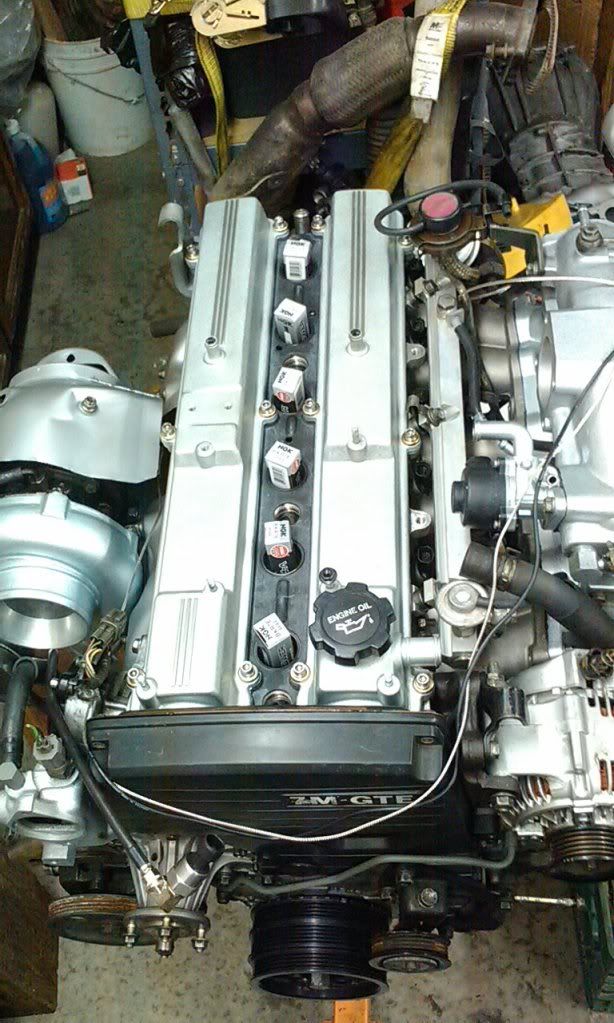
I hammered in the front heat shield on the exhaust manifold to clear the compressor housing
p1598378_3.jpg

p1598378_4.jpg


No adapter required
p1598378_5.jpg


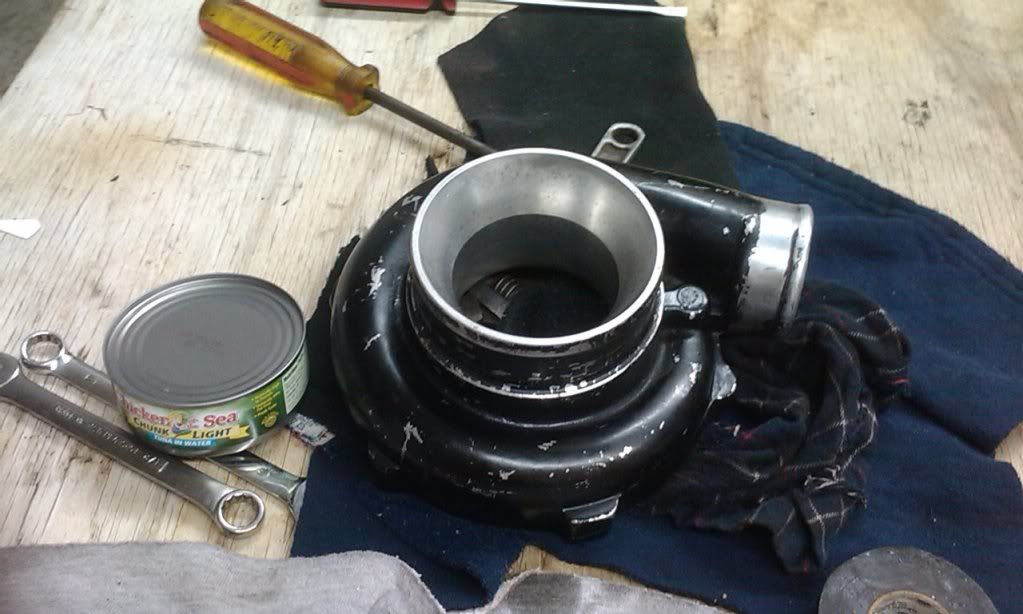
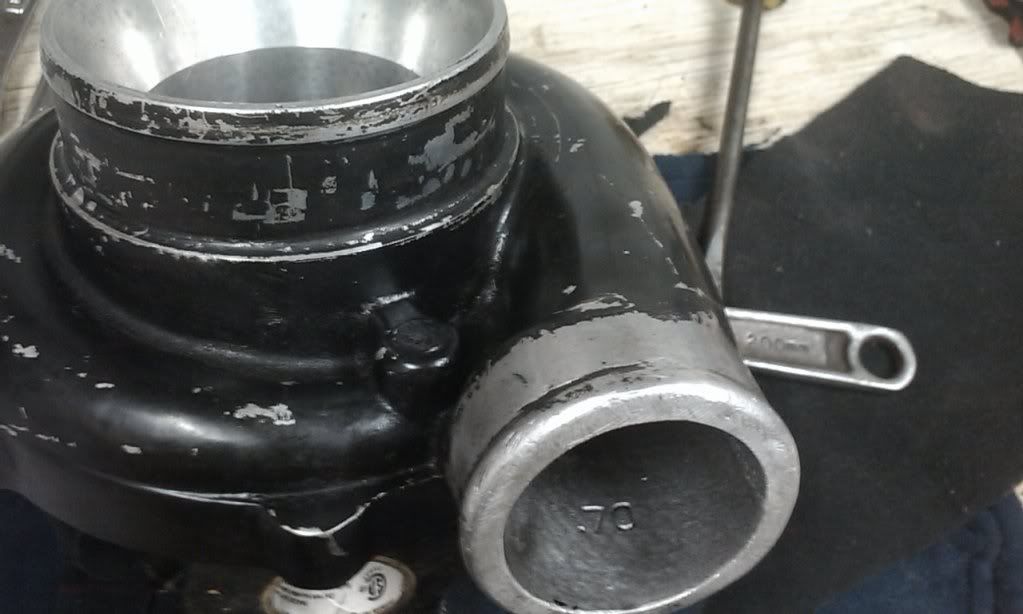
4" inlet, 2.5" outlet
p1598378_6.jpg


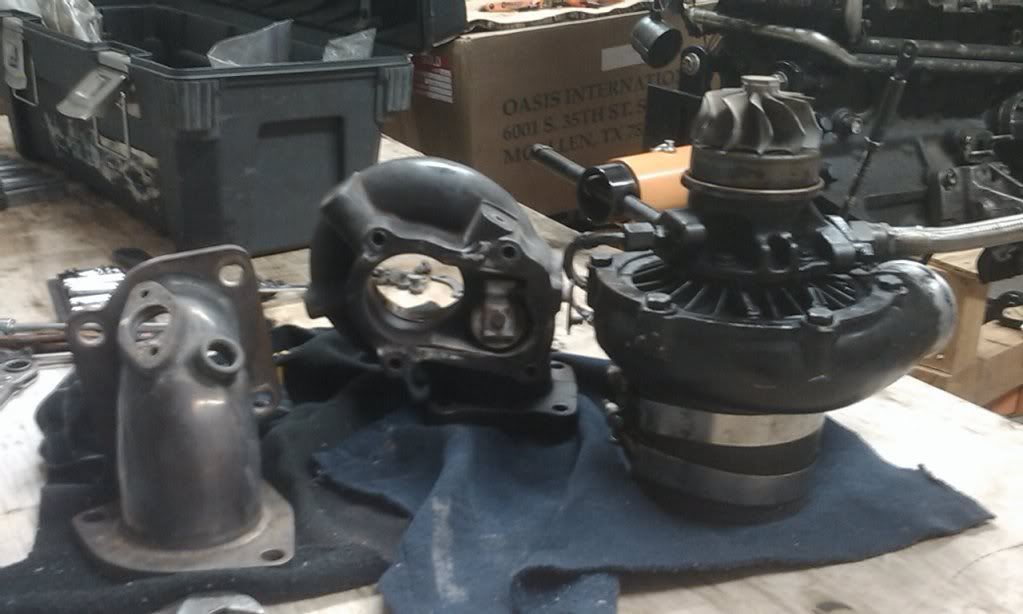
Suprasport 3" stainless elbow
p1598378_7.jpg


.70
p1598378_8.jpg


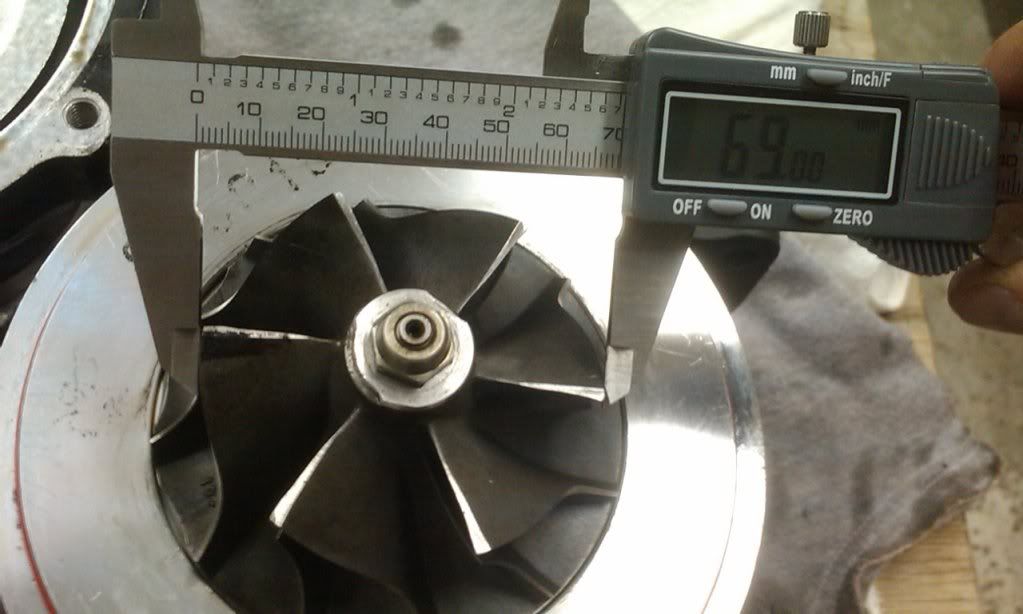
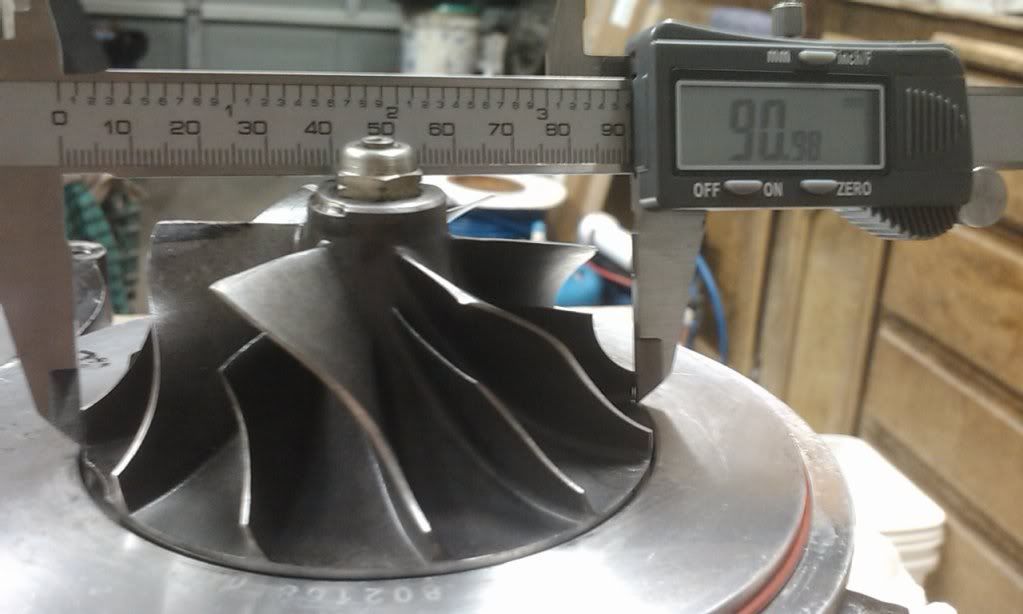
Compressor wheel
p1598378_9.jpg

p1598378_10.jpg


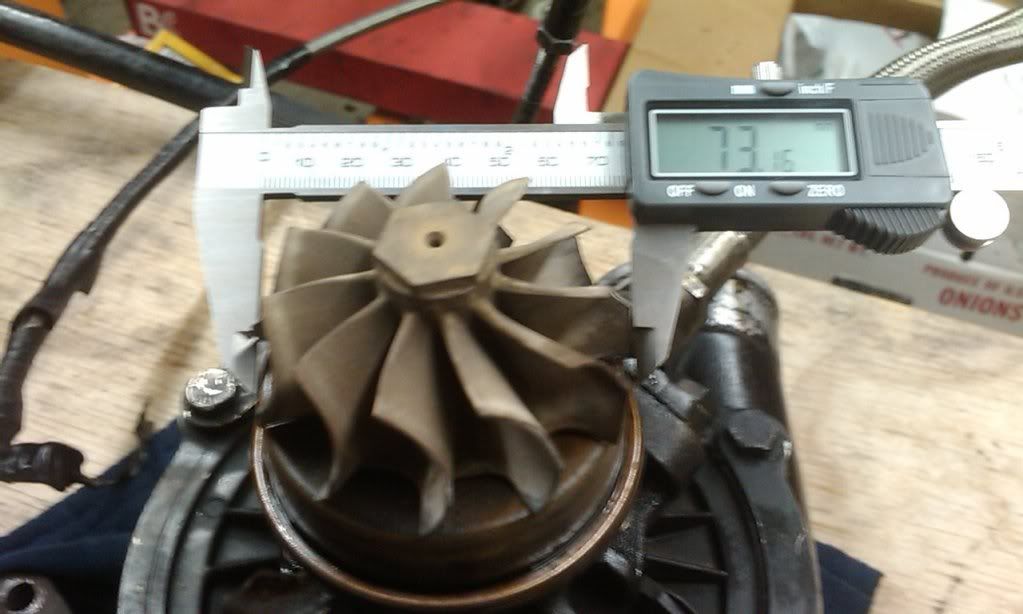
Turbine
p1598378_11.jpg


The turbo was a pretty penny but it really woke up the 7m compared to the shimmed ct26.
Pedal to the floor in 2nd, boost comes online around 4200 and pulls to redline. Mind that its different than cruising in fifth at 60 and seeing positive boost at 2500 4 seconds after depressing the pedal...
I picked this turbo years ago for a few reasons:
-shaft speed to power ratio; more power at less boost is longer lived turbo
-more power at 91 octane limits; depending on tune, 91 octane limit is around 18psi afaik. 18psi on a t70 means more than 18psi of a sp61
-I saw the ct26's instant-on torque when already cruising in the 3k range on the freeway as dangerous in the wet. Going up a grade and then trying to hang a curve in heavy rain with boost coming on is a bit too exciting for me lol
-Z06s were still new, and there is a vette club near me which means plenty to kill hehe

Thats how I arrived at building an engine around a turbo.

Questions, comments/corrections :) and pic requests welcome
 

NTRA08

TWINKY
Jun 10, 2008
530
0
0
37
Conroe, Texas
wow your doing good. The bay looks awesome. I painted my bay black also but I never cleared it. I'll do that when I put in 2jz
 

3tc power

New Member
Jan 3, 2009
106
0
0
Tampa FL.
hey thanks for the pictures bro! i just asked because i have an hx40 and i sourced an .71 bep turbine housing for it. i also purchased a ct26/ t3 adapter and i'm kinda hesitant because im thinking it might be a little to much and touch the strut housing.

anyways thanks again bro for being a good sport!
 

thedave925

Since 9/16/05
Nov 9, 2005
626
0
0
East Bay, Cali
3tc power;1598745 said:
hey thanks for the pictures bro! i just asked because i have an hx40 and i sourced an .71 bep turbine housing for it. i also purchased a ct26/ t3 adapter and i'm kinda hesitant because im thinking it might be a little to much and touch the strut housing.

anyways thanks again bro for being a good sport!

Post 4, first pic, shows the t70 with ample space to the tower, unless that adapter is like 1.25"
I will point out though that I needed most of that to slide the turbo onto the manifold studs, head on block in car.
If your crafty, mounting the turbo to the head and dropping it onto the block in the engine bay is one method.
Put some pics up, I'm interested to see the adapter and a mock up in the engine bay.

And thanks for the PM 3tc, for reminding me to fill in the details ;)
 

NTRA08

TWINKY
Jun 10, 2008
530
0
0
37
Conroe, Texas
I made a ct26 to t3 adapter for a friend of mine with a 38mm wastegate flange also on it and the turbo was only a half inch away from the shock tower. I think the adapter made the t3 flange sit out about 3 inches.

l_3f5c7ead149e47a4a26b0d47ab35d911.jpg


Its looks like a bigger space but its only a half inch.
 

3tc power

New Member
Jan 3, 2009
106
0
0
Tampa FL.
thedave925;1598854 said:
Post 4, first pic, shows the t70 with ample space to the tower, unless that adapter is like 1.25"
I will point out though that I needed most of that to slide the turbo onto the manifold studs, head on block in car.
If your crafty, mounting the turbo to the head and dropping it onto the block in the engine bay is one method.
Put some pics up, I'm interested to see the adapter and a mock up in the engine bay.

And thanks for the PM 3tc, for reminding me to fill in the details ;)

yes... i will start fitting the turbo and i'll put some pictures up!