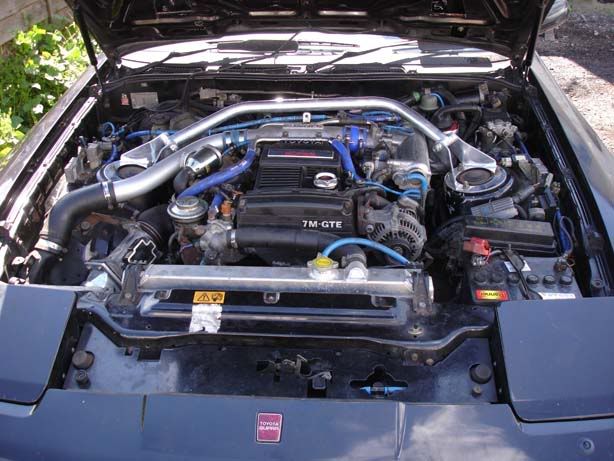
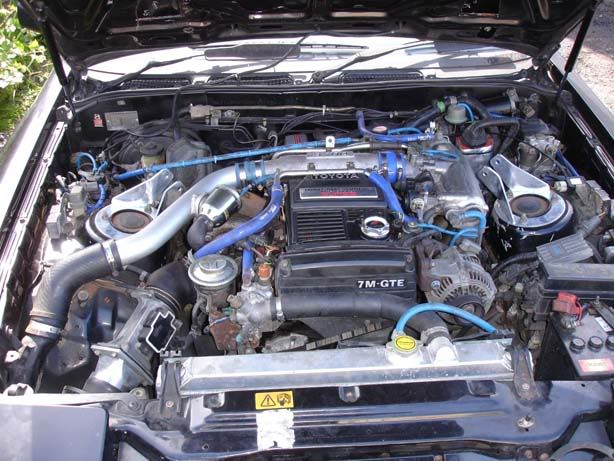
A strut brace is designed to add extra strength to the car when turning forces are applied. The vehicle is subject to great stresses when cornering (especially at speed) and the whole chassis flexes and moves. By joining the tops of the suspension turrets with a hardened metal bar, the flexing is substantially reduced to provide a more accurate feel and sharper handling.
I didn't notice a great deal of difference when fitting a brace to my car although I hadn't been cornering on the limits of the car anyway. Some people rave about strut braces, others think they are a waste of money. At the moment I'm sitting on the fence but it certainly won't do any harm. If you do decide to fit one then here's how:
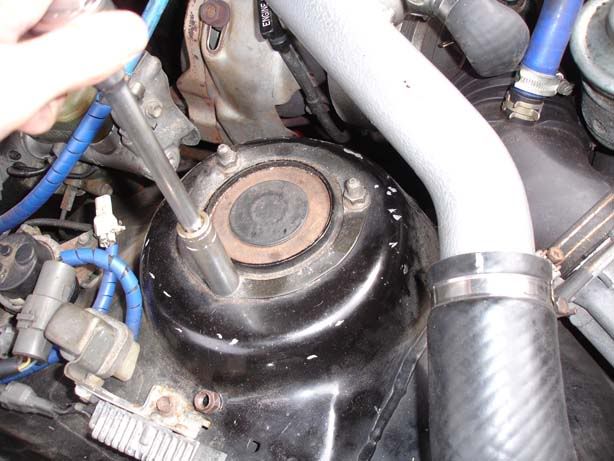
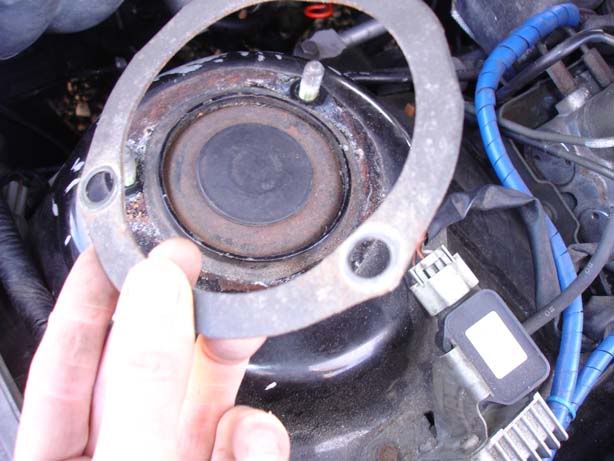
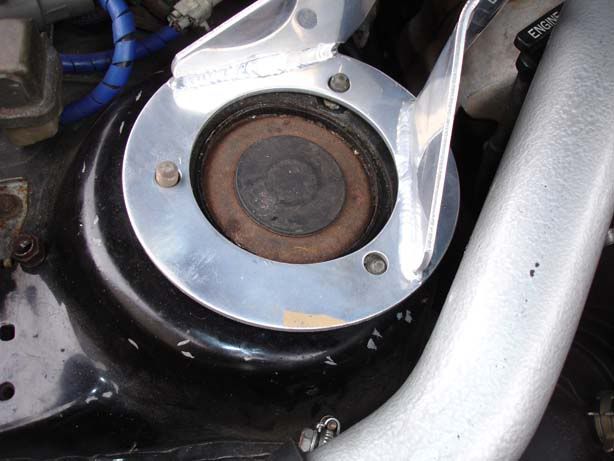
Step 1 - You need to remove the three bolts (on each side of the car) connected to the top of the suspension strut. Don't worry, there's no danger of the suspension moving or being altered by doing this, you have the full weight of the car acting on the shock/spring and it'll stay exactly where it is. You will also be able to remove the metal ring underneath the bolts (second picture) because your strut brace will replace this
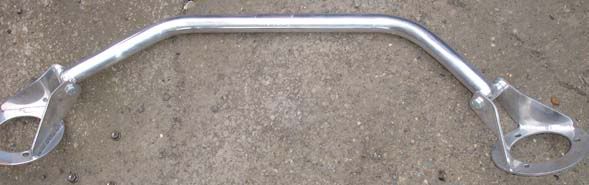
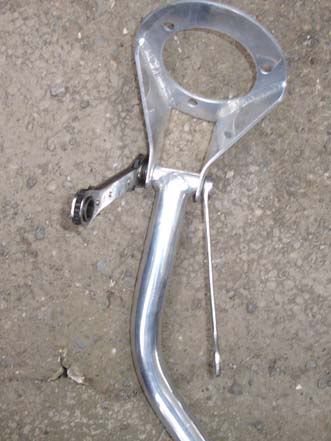
Step 2 - Your strut brace will look something like this, note that mine has a longer piece with a shallower angle on the left hand side and a sharper angled shorter piece on the right. This gives enough clearance for the inlet plenum. Be sure to get a strut brace explicitly for the Supra because it's very easy to get one that will stop your bonnet from shutting!
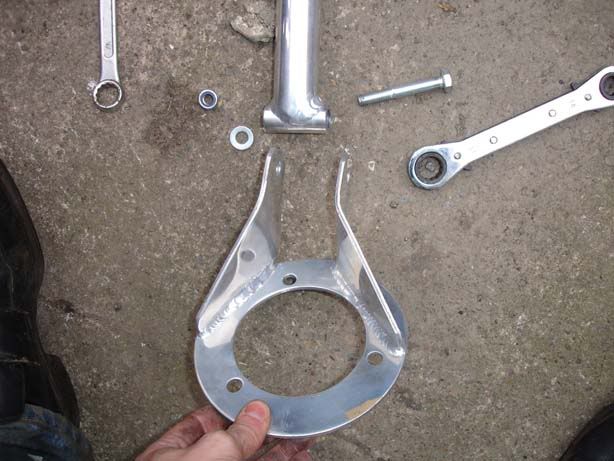
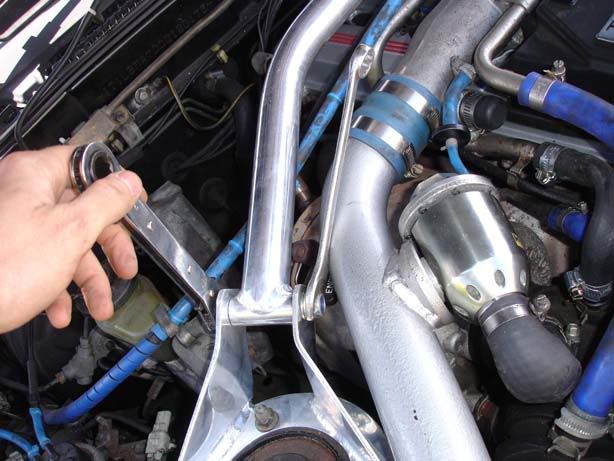
Step 3 - Remove the two end pieces from the strut brace so you can fit them to the car. In my case this was a couple of 17mm buts/bolts. The second picture shows the end piece removed which you will then fit to the car
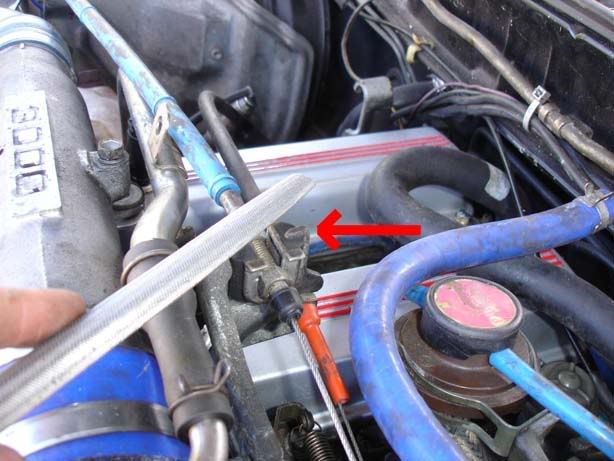
Step 4 - Test to see whether the piece has been machined correctly and fits over the three bolts. In my case I was able to get 2 out of 3 bolts through but the other wouldn't fit. This was the same on both sides but was only slightly out (Don't force it or you risk damaging the threads on the bolts)
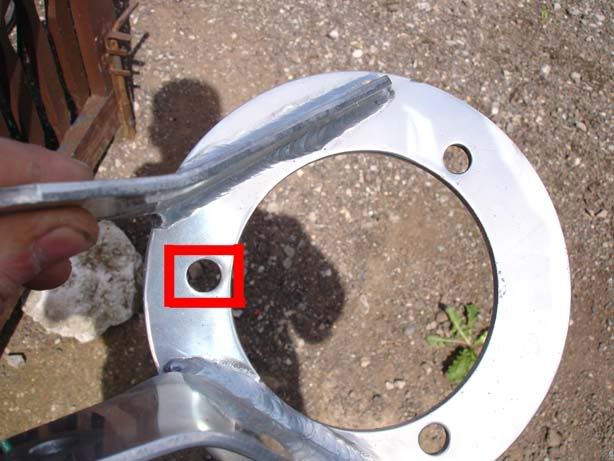
Step 5 - If you have got a problem with the fitment it's not the end of the world, just get a file on it and extend the hole slightly. The first picture shows the file I used (Only took about 30 seconds to do the hole), and the second picture shows it modified. This is just so you can see it doesn't damage/detract from the finished piece by having to do this

I didn't notice a great deal of difference when fitting a brace to my car although I hadn't been cornering on the limits of the car anyway. Some people rave about strut braces, others think they are a waste of money. At the moment I'm sitting on the fence but it certainly won't do any harm. If you do decide to fit one then here's how:
Step 1 - You need to remove the three bolts (on each side of the car) connected to the top of the suspension strut. Don't worry, there's no danger of the suspension moving or being altered by doing this, you have the full weight of the car acting on the shock/spring and it'll stay exactly where it is. You will also be able to remove the metal ring underneath the bolts (second picture) because your strut brace will replace this
Step 2 - Your strut brace will look something like this, note that mine has a longer piece with a shallower angle on the left hand side and a sharper angled shorter piece on the right. This gives enough clearance for the inlet plenum. Be sure to get a strut brace explicitly for the Supra because it's very easy to get one that will stop your bonnet from shutting!
Step 3 - Remove the two end pieces from the strut brace so you can fit them to the car. In my case this was a couple of 17mm buts/bolts. The second picture shows the end piece removed which you will then fit to the car
Step 4 - Test to see whether the piece has been machined correctly and fits over the three bolts. In my case I was able to get 2 out of 3 bolts through but the other wouldn't fit. This was the same on both sides but was only slightly out (Don't force it or you risk damaging the threads on the bolts)
Step 5 - If you have got a problem with the fitment it's not the end of the world, just get a file on it and extend the hole slightly. The first picture shows the file I used (Only took about 30 seconds to do the hole), and the second picture shows it modified. This is just so you can see it doesn't damage/detract from the finished piece by having to do this
")