Rusty's 7M-GTE Build Thread - MKII Swap

kmfdmk

Old School Cool
Engine is in, Turbo oil feed/drain lines overnighted from Cali installed, tranny mounted up, diff prepared to go in (needs fluid), custom driveshaft lengths measured getting fabricated tomorrow, installing the fuel system (pump, regulator etc) tomorrow, picking up driveshaft Friday, picking up straight pipe for the intercooler and exhaust Friday, fabbing the IC & Exhaust pipes Friday, should have it running LATE Friday night. Getting it tuned next Wednesday morning after breaking it in inside of 3 days.

Frickin' local tuner shop RRevMotorsports didn't wanna give me a free hour of tuning in exchange for sponsorship, used the excuse that business has been slow lately which is BS. Their shop has been packed everytime I stop by. Not to mention that NATIONAL exposure on TV & the Internet (during and after) the rally would be invaluable to them and help boost their business. *shrugs* their loss, though I DO plan on telling Tim that it's BS when I see him in person.

Will post pictures late tomorrow night.


As for videos you can watch on SPEED TV this October, the AKA Rally is going to be featured in a 6 episode series. Something tells me I'm not gonna get edited out.
 

kmfdmk

Old School Cool
Most of the downpipe is done.
Driveshaft is done & installed.


Costs:
Driveshaft $380
MKIII Carrier Bearing $170
3 MKIII U-Joints $132
8 sets of Driveshaft Bolts $48
Longer Grade 8 Bolts & Washers to drop the Carrier Bearing down - $5

Total JUST for the driveshaft alone: $735

Left to do:

Finish mounting the:

FPR
Intercooler & Piping
Oil Cooler & Remote Filters
Exhaust
A little bit of Wiring here & there
 

kmfdmk

Old School Cool
Downpipe is done being fabricated, and the exhaust mocked in place.

For tomorrow:
Mount Oil Cooler, Thermostat, & Oil Filters and
Holesaw front fender and lower inner fender for IC piping
5 coats of Ceramic Enamel Black on the Downpipe
3" "Header Flange" welded just upstream of the 3" glasspack "resonator" to make the exhaust replaceable and allow me to separate the exhaust from the downpipe.
Pictures tomorrow.
 

kmfdmk

Old School Cool
Got the exhaust done all welded up today (short of the last 3 feet which includes the yet to be purchased muffler and S curve coming up from underneath the axle and aligned to the muffler) I plan on mounting the muffler in place and orientation and then fabbing the pipe to match the muffler angle & position. Also seriously thinking of adding another flange right before the muffler IF my car with just the glasspack is quieter than 90dB, if not I'll just weld on the muffler. (PIR has a 90dB limit after 10pm).

Getting close, hopefully Saturday night it'll be running.

I've got about 30 minutes of actual MIG weld time under my belt and I've discovered I LOVE MIG welding, it's so much easier than stick. My favorite part is not having to stop welding just to put on another stick. Going to try my hand at GMAW (Gas Mig) this weekend on the Intercooler pipes, hopefully it'll be a lot cleaner and less splatter.

By the end of the night tonight I was laying beads that looked almost as good as the roboticly welded glasspack.

0904081851_G.sized.jpg


0904081852_G.sized.jpg

Glasspack "Resonator" on left Downpipe on right

0904081904b.sized.jpg

My bead on left, robotic on right

0904081852a.sized.jpg

Glasspack 3" ID 4" OD, and downpipe on the right

0904081853_G.sized.jpg

It's only 4" but I SWEAR it looks bigger.

Can't wait to rent a TIG and get good enough to build me my FFIM for cheap as in $200 to $300 cheap. (factoring parts and my cheap labor).
 

kmfdmk

Old School Cool
DSCN0216.sized.jpg

Downpipe w/ 4 coats of 1800* VHT Ceramic Enamel flat black.

DSCN0217.sized.jpg

Inside shot of the downpipe. Could have been a bit more smooth and less turbulent if we had bothered to take the time during fabrication, but I want it running NOW!

DSCN0218.sized.jpg

Hole in Drivers Side fenderwell for Charge Pipe/Hot Side to the Intercooler. I went about 1/2" too low and nicked the frame rail. I'll be welding in a piece to keep water out and return what structural integrity I can to the frame.

DSCN0219.sized.jpg

What's that? Oh yeah, it IS possible to run FFIM pipes w/o relocating the battery tray HA! (FFIM to come later, SFIM for now).

DSCN0220.sized.jpg

My helper for the day (and team mate Adam) posing next to the work in progress. You can see the filter & turbo intake pipe, oil filter mount, and the new old stock strut top hats here.

DSCN0222.sized.jpg

After a long day & into the night the Intercooler is mounted along with the Oil Cooler.

DSCN0223.sized.jpg

Still need to add a piece of 1/2" strapping to hold the other side of the Oil Cooler.

DSCN0225.sized.jpg

Clockwise from Top, (ignore the red wire) Radiator, Oil Cooler, Intercooler.

DSCN0226.sized.jpg

Custom Fabricated Oil Filter mount located in the stock AC Compressor location, made from 1 1/4" x 1/8" steel strap. You can see the flow lines on the filter mount from when I delusionally thought I could fit filters, thermostat and oil cooler all between the two headlights (between the intercooler and radiator there's enough room but not left to right room w/o using right angle elbows).

DSCN0227.sized.jpg

Underside shot of the drivers fender well. No holesawing the fender well that's behind the furthest outside air dam entrance, actually went under it and still have just as much ground clearance as I would w/o the IC.

DSCN0229.sized.jpg

View from underneath of the Oil Cooler mounted (flash was overkill but couldn't see w/o it).

DSCN0230.sized.jpg

The perfect location, plenty of clearance front to back between sway bar and engine mount, no ground clearance issues, and PERFECT accessability.

Still have to run the oil lines, and figure out how the hell I'm going to get the lines around the turbo charge outlet, damn spin-on remote oil filter adapter has the lines just about dead center in the way. Also have the remainder of the IC pipes to do, mount the FPR, and get a speedo cable elbow to get the cable to the tranny, other than than it's ready!!

T-minus about 3 days!!!
 

honestabe

Happy as hell :D
Jan 15, 2006
3,713
0
0
38
Mount Vernon, WA, USA
www.cardomain.com
Damn rusty, that beast is looking good. I must have just missed you yesterday (I had to pull my alternator from Gutless Wonder). When you're done I want to see the drag race between you and James, both on slicks. That'll be fun to watch.
 

kmfdmk

Old School Cool
honestabe;1126242 said:
Damn rusty, that beast is looking good. I must have just missed you yesterday (I had to pull my alternator from Gutless Wonder). When you're done I want to see the drag race between you and James, both on slicks. That'll be fun to watch.

I see you got the fender done, car painted, and headlights completed. Car looks great now, can't believe what it looked like a month ago compared to now.

BTW where in the hell did you score the Group A scoop/fender grille/ gismo that you molded into the front bumper? I'm looking to do the same not to copy you but because I'm losing like 1/3 my Intercooler cross section to bumper.
 

honestabe

Happy as hell :D
Jan 15, 2006
3,713
0
0
38
Mount Vernon, WA, USA
www.cardomain.com
It is actually a RaceOnUSA duct that is smooth and fiberglass. I molded it in using Fibre Resin and a flexable bondo. I also cut out the bumper support and boxed it in with 1/16" steel. Look in my build thread for pictures and details starting in January.
 

kmfdmk

Old School Cool
honestabe;1127053 said:
It is actually a RaceOnUSA duct that is smooth and fiberglass. I molded it in using Fibre Resin and a flexable bondo. I also cut out the bumper support and boxed it in with 1/16" steel. Look in my build thread for pictures and details starting in January.

Do you have a link? I looked on their website and couldn't find it.
 

kmfdmk

Old School Cool
Attempt number two, my computer ate the first one.

Apparently my left rear brake light got broken recently. James says he noticed it was broken a month ago or so over Joel's. All I know is that I don't remember it being broken before I left for vacation 3 weeks ago, and I don't remember it being broken the other night. I do know I'm getting tired of working in other peoples' driveways and getting kicked out when they leave. I'm tempted to tow the damn thing back to my garage after the welding is done and finish it here.

2008_09_12_001.sized.jpg

Upper TB to IC pipe

2008_09_12_002.sized.jpg

Somehow the pilot bit for the holesaw snapped in the first few revolutions. I should have the receipt, I'm gonna take it back and get a new one, that's bullshit, doesn't even complete two holes and it snaps. Hopefully the broken one didn't get thrown away.

2008_09_12_003.sized.jpg

Finally got oil line clearances nailed down. Had to file down the shoulders of the brass 45* fitting to clear the shank on the 90* elbow, and rotate the whole spin on adapter counter clockwise. Apparently I had hand tightened it to such extremes that it required a floor jack and a few extensions to push on the ribs of the adapter to get it to turn counter clockwise. >.< At least it shouldn't leak.

2008_09_12_004.sized.jpg

Passenger side mounting bracket for the oil cooler in place. Just need to drill the mounting holes for the cooler and install the ny-lock nuts I bought for it.

2008_09_12_006.sized.jpg

Underside view of the mounting bracket for the oil cooler. I welded on a tab to keep it square while utilizing one of the stock mounting places on the lower radiator core support.

2008_09_12_008.sized.jpg

Upper TB to IC pipe in place and almost complete. Still have to weld on the BOV bung/flange and paint it, and then clean it out with solvent.

2008_09_12_010.sized.jpg

Upper TB to IC pipe in place.

2008_09_12_011.sized.jpg

An underside view of the completed lower IC pipes. Still have to complete the charge pipe that will run from the turbo outlet to the IC inlet on the drivers side. You can see it peeking out behind the radiator on the far side.

I plan on getting the car running with the old radiator and then installing electric fans on an electric thermostat, and installing the new radiator. I'm going to have to utilise the Beech Permormance billet aluminum alternator relocation bracked to clear the hose inlet on the radiator. It lines up almost perfect with the stock 7M alternator pulley, and nothing short of a 90* bend will make it fit. The lower engine feed outlet lines up no problems.

A ton of work left to do. Looks like I'll be lucky to race my car at all this season.
 

kmfdmk

Old School Cool
Getting closer and closer, should have it up and running in a day or so. Need to locate a 7M-GTE Manual ECU and finish a few wiring issues.

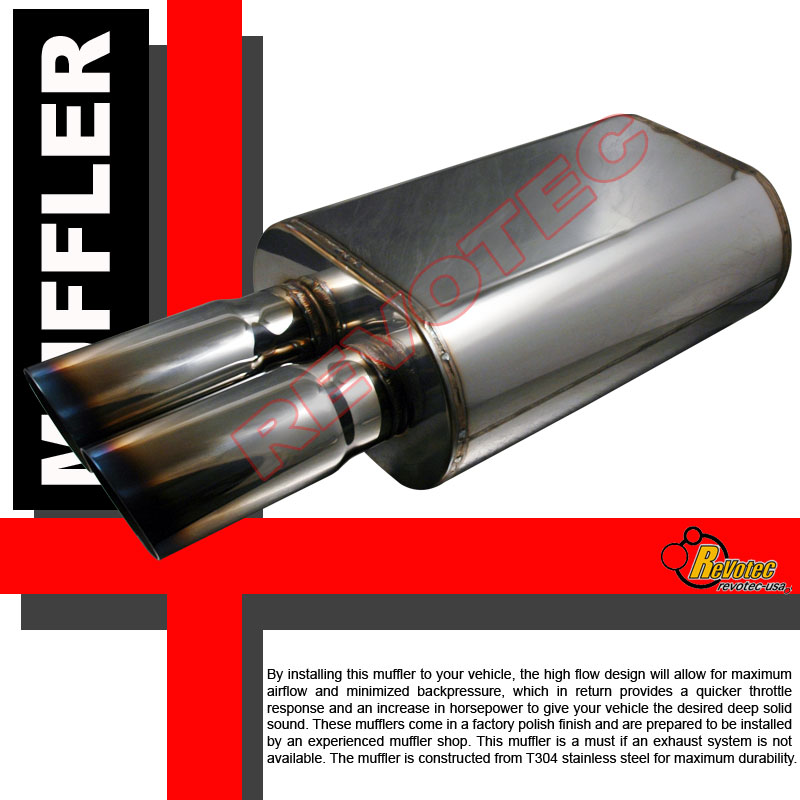
Ordered the muffler, and struts, will install those tomorrow. Just bought an ebay cheapy stainless that was 3" inlet with dual 2.5" outlet tips, and Monroe Sensatrac's (39.99 ea) till I can get the Megan coilover kit.

All the oil cooler lines are loomed, attached, and situated properly to not kink, coolant lines installed and tightened, IC pipes cleaned, primed, painted, and installed, BOV modified (Tial knockoff - removed 2 coils from stock spring, was ridiculously stiff), and tightened up various loose ends and bolts.

MU-214B.jpg
 

kmfdmk

Old School Cool
Yeah actually my car IS running. I've already figured out that I love the MAFT-Pro!!!

No videos of my car yet, however it is pretty amazing even at only about 250hp untuned. The MAFT-Pro piggyback ecu is amazing and the data-logging and tuning I can do with the laptop is phenomenal. I know I already need a new tranny, this R154 was from a wrecked car and has noises. Also cut the fuck out of my hand, however I now have new Strut Top Hats, as well as Stainless Steel braided and sleeved brake lines & new Struts (Monroe Sensatrac, because I'll be getting coilovers in November).

Can you say wheel-spin @ 0-3lbs in 4th gear @ 65mph (gps) (80+/- indicated) Wow. this thing just begs to spool up. Wish it would stop raining so I could enjoy it more.

Also the driveshaft is whipping around on quick clutch engagement. Not sure WTF I need, new tranny mounts or what but it's not happy. Smooth out on the clutch and it's ok, quick out, and it makes a bit of noise. I need to get it up on the lift and figure out WHERE the driveshaft is hitting so I can figure out WHAT it's hitting. (Painted Driveshaft made it easy to figure out I had to remove the stock E-Brake cable carrier in the transmission tunnel immediately behind the carrier bearing mounts. The driveshaft was like 3mm away @ rest and would whack it when the carrier bearing flexed on clutch engagement. Might still be hitting there *shrugs* I know I can't wait to figure out how to tune the MAFT-Pro even better.

BTW I need a R-154 somebody talk to me!!