I finally have an apartment with washer and drier hookups. I have always thought it would be a good idea to buy a quality washer/drier setup. I see commercials for fancy front-loader models but I'm not sure if that's the way to go. Should I spend some money or just go with a cheapo model? If you have something crazy, I'd like to see pics.
Post your washer/dryer setup
- Thread starter greg88
- Start date
You are using an out of date browser. It may not display this or other websites correctly.
You should upgrade or use an alternative browser.
You should upgrade or use an alternative browser.
ORIGINALLY POSTED in another forum of crispresidence... but since you ASKED!!! heh heh heh...
Well, we are tired of going up and down into the cave-of-a-basement to do laundry all the time! Four kids, a dungeon for a laundry room, ANCIENT equipment that SUCKS, and a DELAY on our home addition (WITH NEW LAUNDRY ROOM ON FIRST FLOOR!) has come to a "head" lately... so I spring for some new STACKABLE front load washer/dryer units, and managed to SQUEEZE them into an upstairs bathroom. I started the ALL NEW plumbing and electrical this past weekend, and HOPE to be fully operational THIS weekend!
NOTE: MY HOUSE IS OLD! Built in 1950, (not THAT old... but OLD ENOUGH!), the house is SOLID but old construction, so I have NO square/plumb walls anywhere, FULL dimension lumber that is ROCK hard, BLACK CAST IRON drain plumbing (that needed CUT with a DIAMOND SAW... after ruining several other blade types...) and wallboard that is nearly an INCH thick (with that DAMN PLASTER shell over ROCK hard gypsum rock or whatever this stuff is...)
Anyway... here are some shots of the 2" drain and couple hot/cold feed lines that I ran for the washer unit. The VENTING and electrical for 220v and dryer outlet are yet to come...
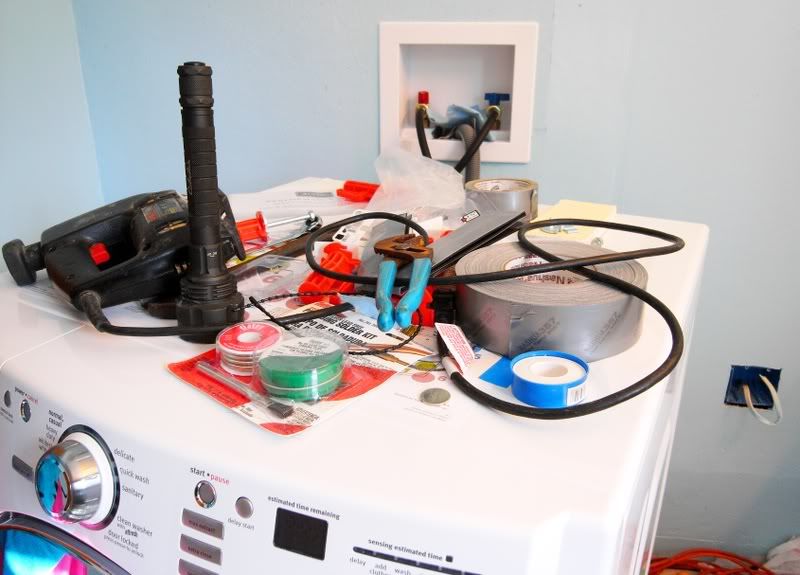
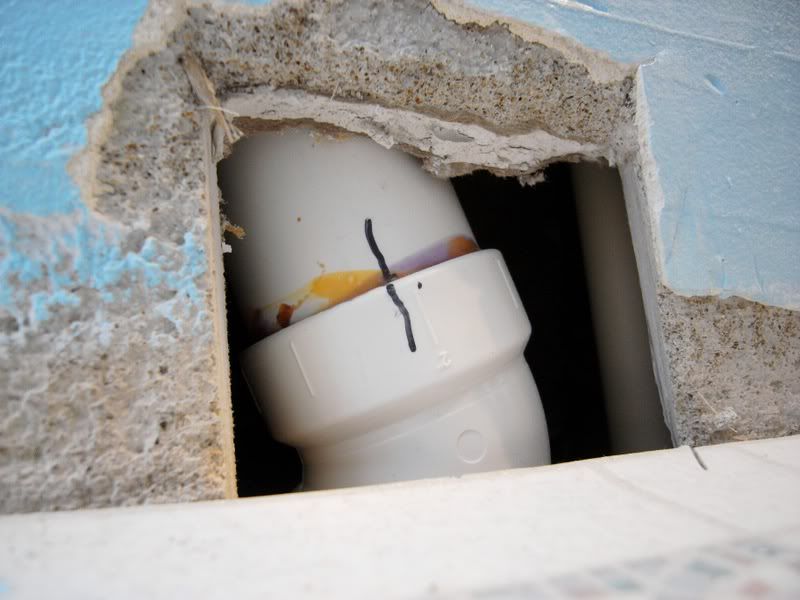
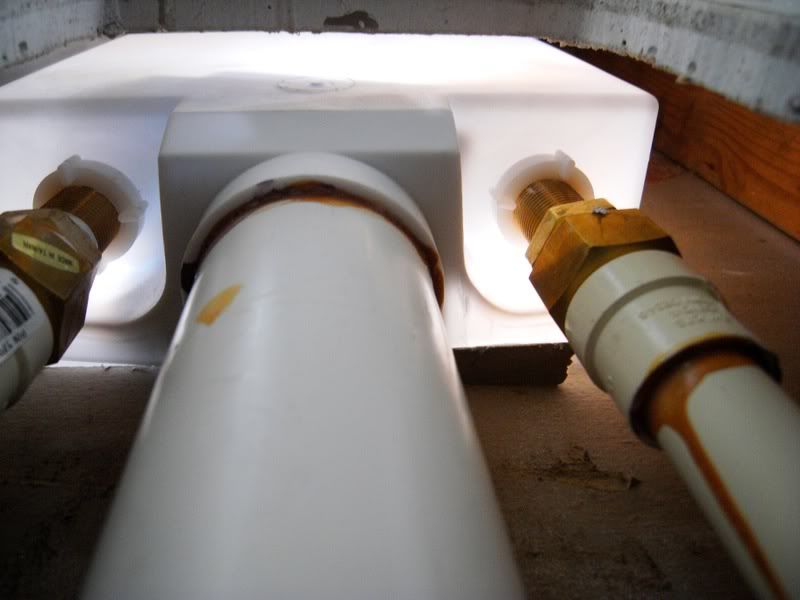
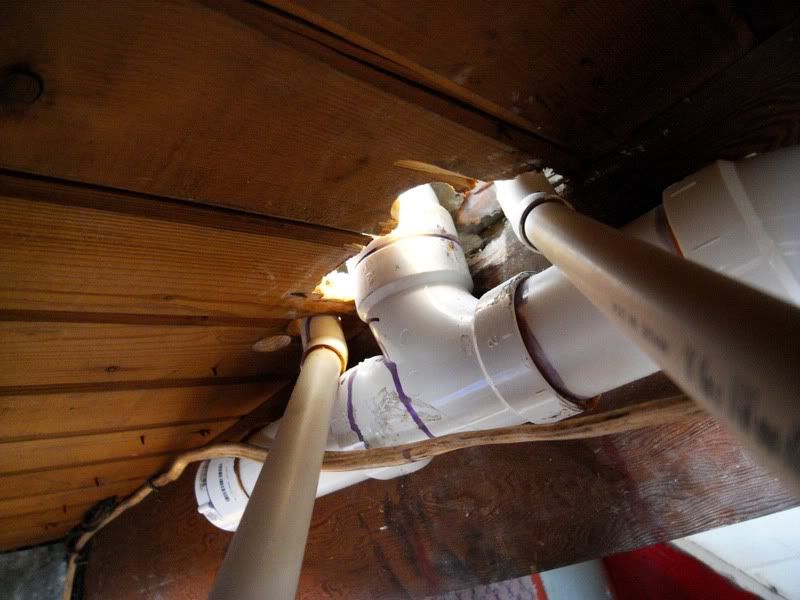
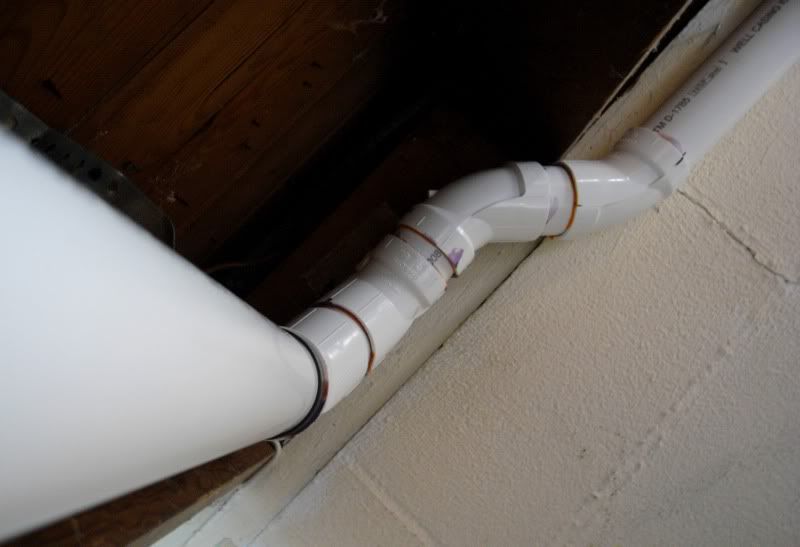
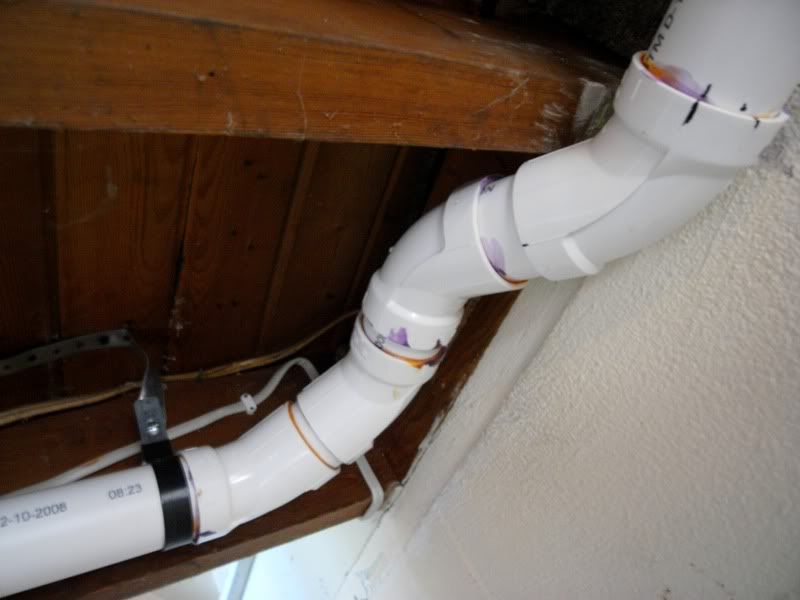
^^^ I had to be really "tricky" with the drain line to keep it on a STEADY DOWN-GRADE SLOPE for the entire 30' of run, AND maneuver under, up inbetween joists, and around a 90 bend to clear for HEADROOM where the stairwell is in this corner. I think I did a bang-up job of these complex transitions, myself... :wink:
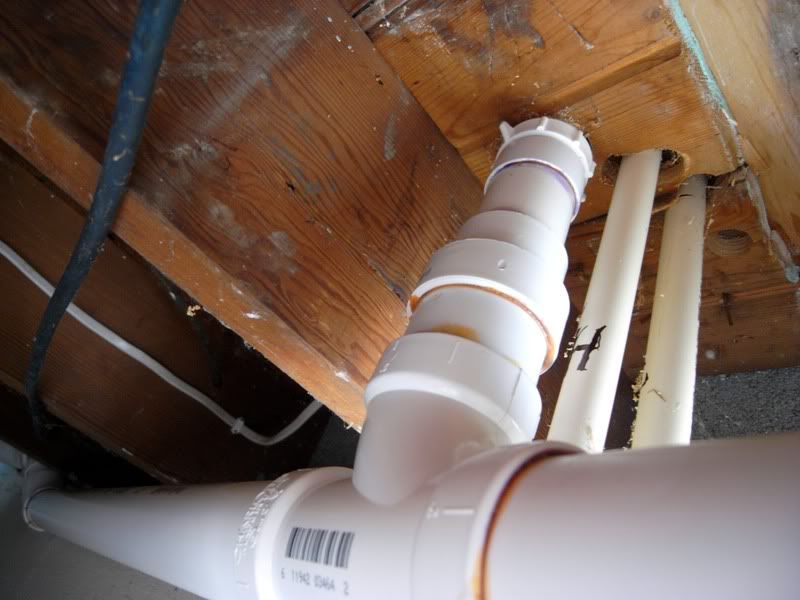
^^^ You can see how I tapped into this new 2" drain from my double sink in the bathroom HERE. (It WAS much narrower pipe, but I don't intend to EVER have a clog or poor drain-flow again! heh heh heh...)
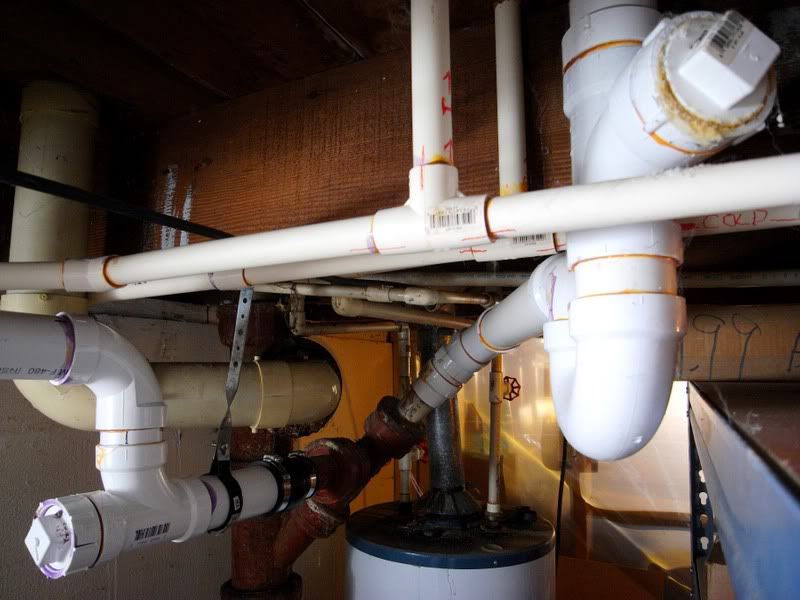
^^^ Here is the "nexus" at the water-heater/septic OUT (ALL CAST IRON!) where I "tapped" into the line with a rubber 2"-1 1/2" rubber boot/coupling. Other than taking EIGHT FULL MINUTES with my weight on a sawsall with DIAMOND BLADE... and nearly being CRUSHED by the section of black-pipe (CAST IRON... must have weighed 30 lbs for a 4' section!) the job went fairly smoothly. Honestly, as "busy" as this area looks, it is FAR better than before I re-ran some of the primary drain lines from the tub I put in a couple years ago, to the new drain for the washer dryer project...
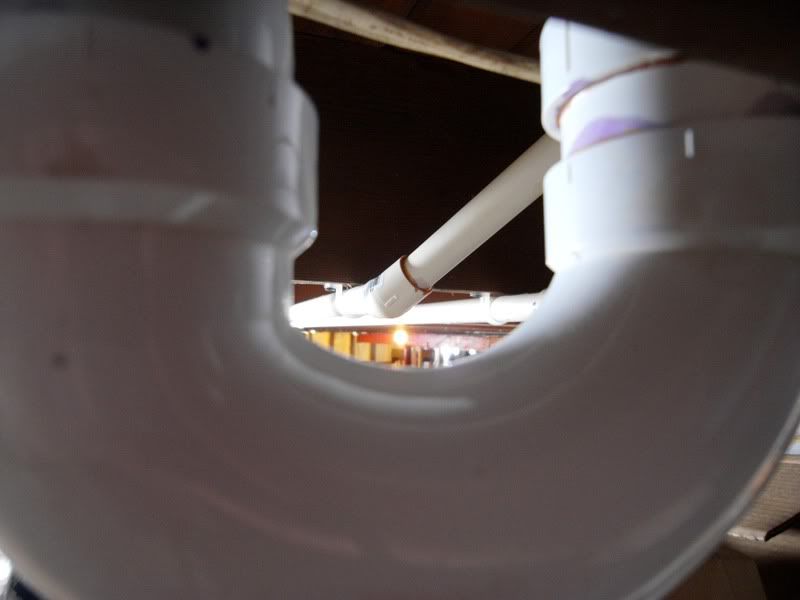
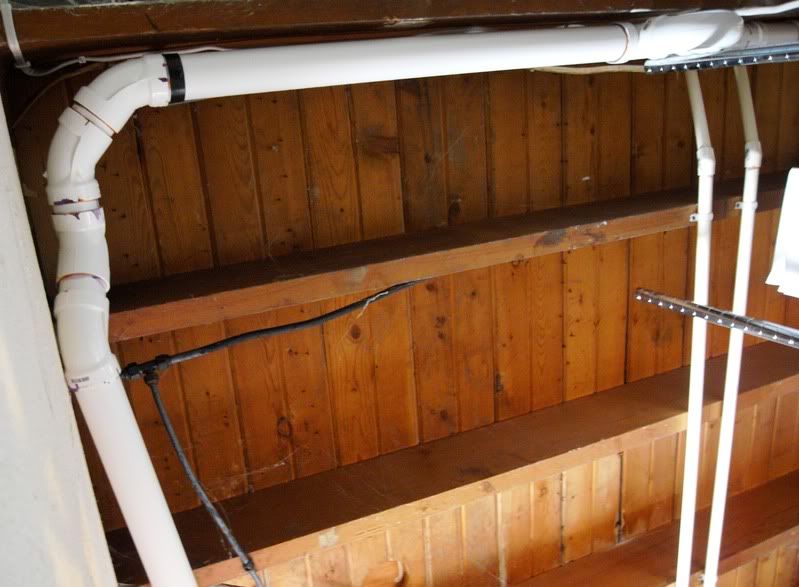
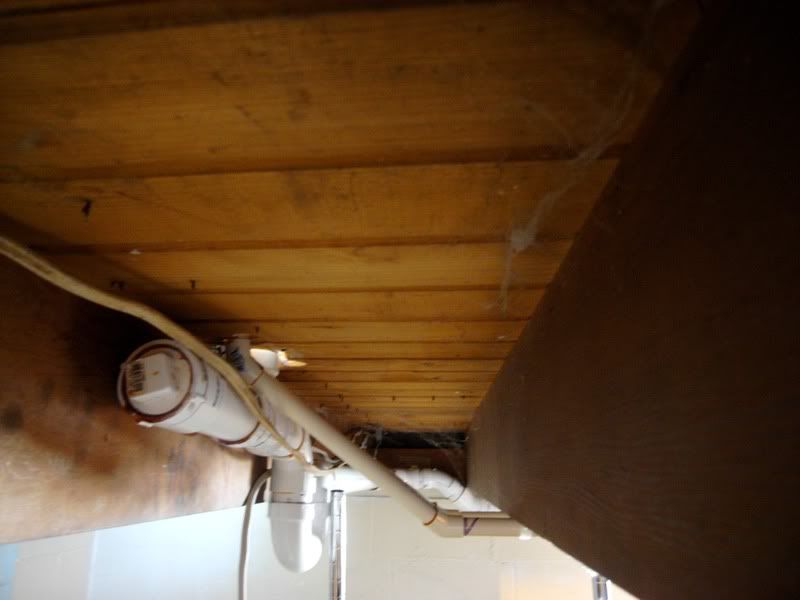
I had to cut through the hardwood flooring, THROUGH a 2x4 "sill-plate" INTO the wall above (which was RIGHT ABOVE the floor joist, and so I had to use 22.5* couplings x4 with a little SHIFT to off-set the line INTO the wall... hence the "show" through in the bathroom in the second pic at top of page... what a PAIN!)
I left a "clean-out" here, but it is SEALED, since I just needed a plug for potential future extension of my drain into the kitchen, which has 1 1/2" line that is poorly plumbed...
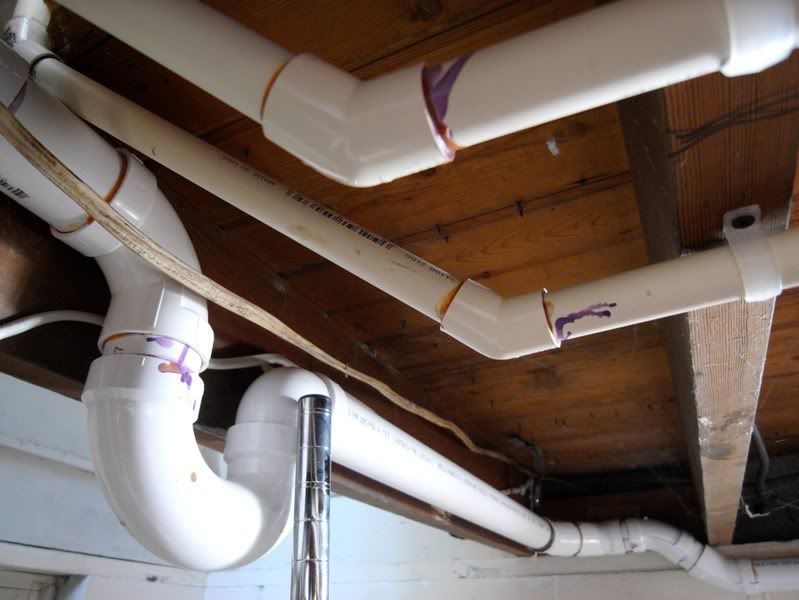
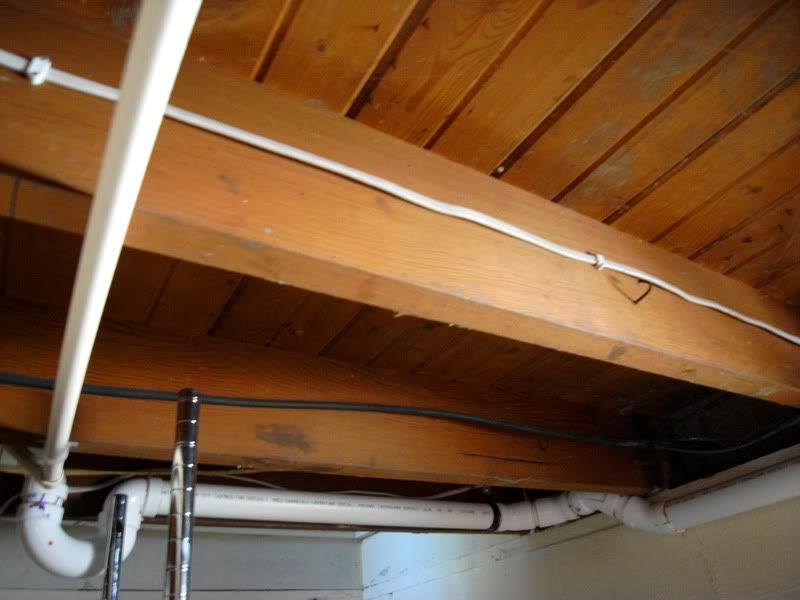
^^^ I even remembered the trap! You can see the carefully routed corner for clearance coming down the stairs... nearly DIED from inhalation of Oatey Primer and Cement... but the end result is really solid, and doesn't impair passage at all... (any more than it already was with the low joist coming downstairs... BONK!)
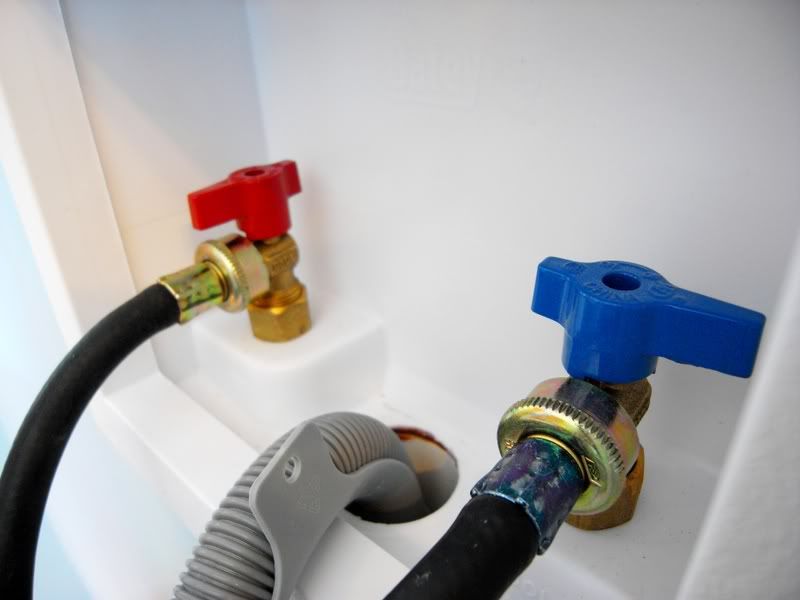
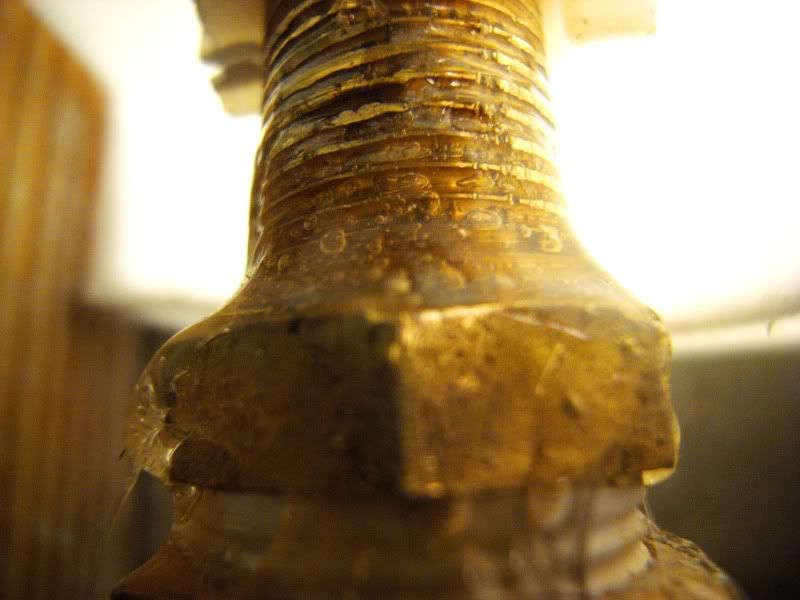
^^^ Had this ONE fitting giving me a real hassle when I wrapped the teflon tape and initially "snugged it up". Little did I know, it would "sweat" from the threads AFTER installed in the wall! DOH! NO WAY to readily "remove" and redo it, so I managed to get VICE-locks on the threaded shaft, MONKEY wrench it as TIGHT as I could IN PLACE, then ENCASED it with "GOOP" for plumbing, which has effectively achieved a positive seal!

^^^ VIOLA! Maytag to my service! YAY!
...more when the venting is run... THROUGH an inside wall, DOWN the basement stairwell... THROUGH the wall, then MORTAR siding (brick house!) and out. (NOT to mention the 220v outlet, etc...!)
-crisp
Well, we are tired of going up and down into the cave-of-a-basement to do laundry all the time! Four kids, a dungeon for a laundry room, ANCIENT equipment that SUCKS, and a DELAY on our home addition (WITH NEW LAUNDRY ROOM ON FIRST FLOOR!) has come to a "head" lately... so I spring for some new STACKABLE front load washer/dryer units, and managed to SQUEEZE them into an upstairs bathroom. I started the ALL NEW plumbing and electrical this past weekend, and HOPE to be fully operational THIS weekend!
NOTE: MY HOUSE IS OLD! Built in 1950, (not THAT old... but OLD ENOUGH!), the house is SOLID but old construction, so I have NO square/plumb walls anywhere, FULL dimension lumber that is ROCK hard, BLACK CAST IRON drain plumbing (that needed CUT with a DIAMOND SAW... after ruining several other blade types...) and wallboard that is nearly an INCH thick (with that DAMN PLASTER shell over ROCK hard gypsum rock or whatever this stuff is...)
Anyway... here are some shots of the 2" drain and couple hot/cold feed lines that I ran for the washer unit. The VENTING and electrical for 220v and dryer outlet are yet to come...


^^^ I had to be really "tricky" with the drain line to keep it on a STEADY DOWN-GRADE SLOPE for the entire 30' of run, AND maneuver under, up inbetween joists, and around a 90 bend to clear for HEADROOM where the stairwell is in this corner. I think I did a bang-up job of these complex transitions, myself... :wink:

^^^ You can see how I tapped into this new 2" drain from my double sink in the bathroom HERE. (It WAS much narrower pipe, but I don't intend to EVER have a clog or poor drain-flow again! heh heh heh...)

^^^ Here is the "nexus" at the water-heater/septic OUT (ALL CAST IRON!) where I "tapped" into the line with a rubber 2"-1 1/2" rubber boot/coupling. Other than taking EIGHT FULL MINUTES with my weight on a sawsall with DIAMOND BLADE... and nearly being CRUSHED by the section of black-pipe (CAST IRON... must have weighed 30 lbs for a 4' section!) the job went fairly smoothly. Honestly, as "busy" as this area looks, it is FAR better than before I re-ran some of the primary drain lines from the tub I put in a couple years ago, to the new drain for the washer dryer project...


I had to cut through the hardwood flooring, THROUGH a 2x4 "sill-plate" INTO the wall above (which was RIGHT ABOVE the floor joist, and so I had to use 22.5* couplings x4 with a little SHIFT to off-set the line INTO the wall... hence the "show" through in the bathroom in the second pic at top of page... what a PAIN!)
I left a "clean-out" here, but it is SEALED, since I just needed a plug for potential future extension of my drain into the kitchen, which has 1 1/2" line that is poorly plumbed...


^^^ I even remembered the trap! You can see the carefully routed corner for clearance coming down the stairs... nearly DIED from inhalation of Oatey Primer and Cement... but the end result is really solid, and doesn't impair passage at all... (any more than it already was with the low joist coming downstairs... BONK!)


^^^ Had this ONE fitting giving me a real hassle when I wrapped the teflon tape and initially "snugged it up". Little did I know, it would "sweat" from the threads AFTER installed in the wall! DOH! NO WAY to readily "remove" and redo it, so I managed to get VICE-locks on the threaded shaft, MONKEY wrench it as TIGHT as I could IN PLACE, then ENCASED it with "GOOP" for plumbing, which has effectively achieved a positive seal!

^^^ VIOLA! Maytag to my service! YAY!
...more when the venting is run... THROUGH an inside wall, DOWN the basement stairwell... THROUGH the wall, then MORTAR siding (brick house!) and out. (NOT to mention the 220v outlet, etc...!)
-crisp
...ADDITIONAL POST...
Well... after viewing some of the OTHER threads and posts in here... I don't feel so bad about boring you all with my LATEST PROGRESS! 8)
Now that I've (temporarily) overcome the SUMP PUMP emergency and related interruptions... I've been busily trying to finish up the WASHER/DRYER install...
I turned my attention back to the VENT for the dryer...
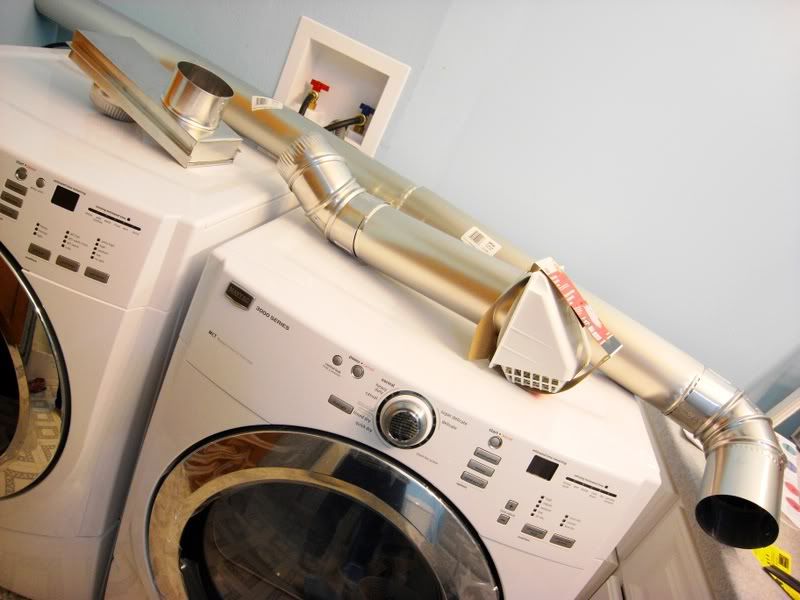
^^^ So there was the last VENTING shot... which I began to ROUTE through the WALL (which is like GRANITE or something! Kept WEARING DOWN saw blades and DULLING drill bits! Here's a CROSS-SECTION of the ANCIENT drywall in my place...
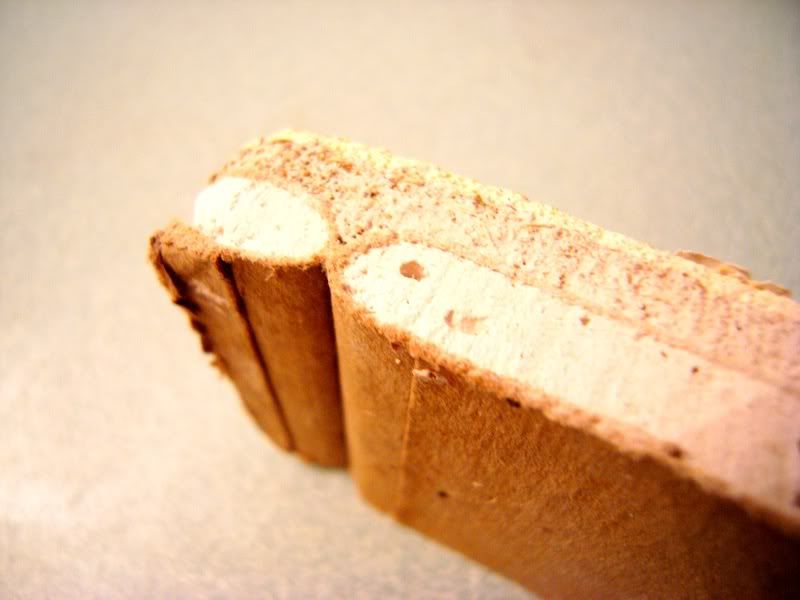
^^^ Notice the "drywall" substrate that is then "coated" with another layer of what looks like "plaster", followed by some kind of HARD SHELL SURFACE that is painted with something with the characteristics of EGGSHELLS! NO WONDER my blades didn't like it!
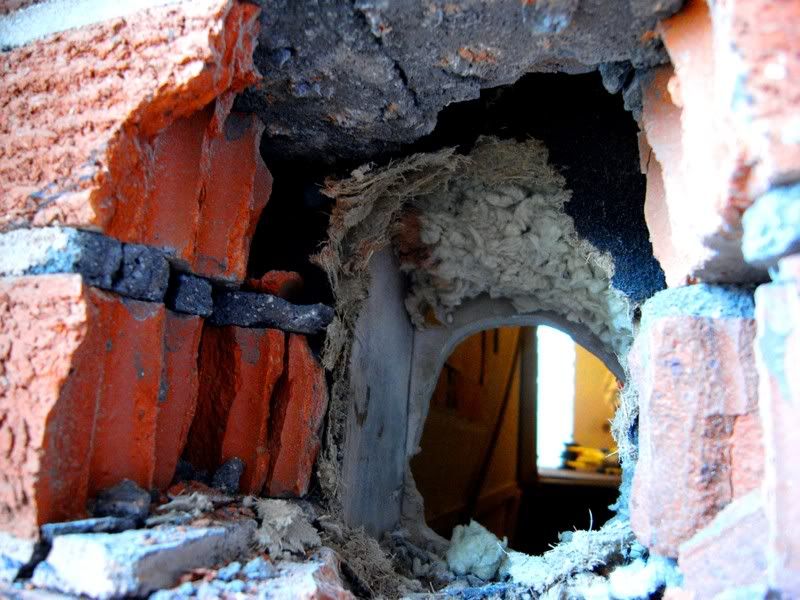
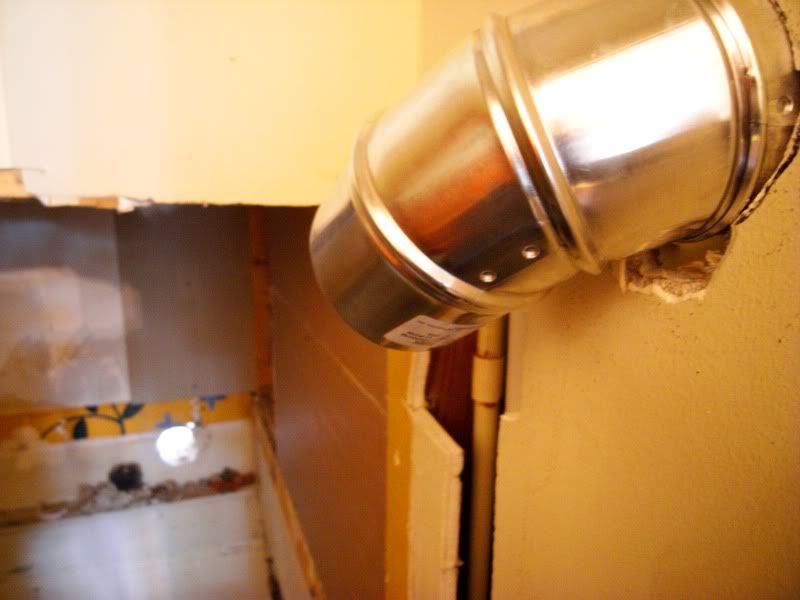
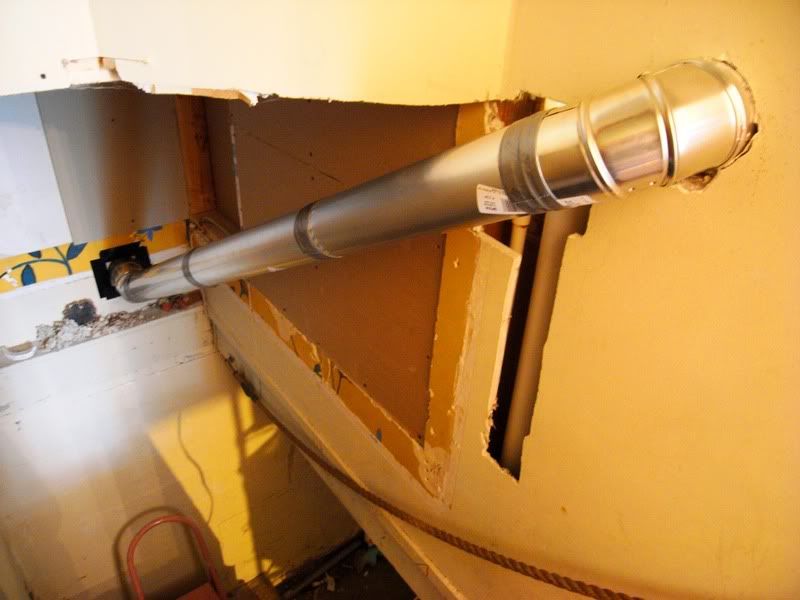
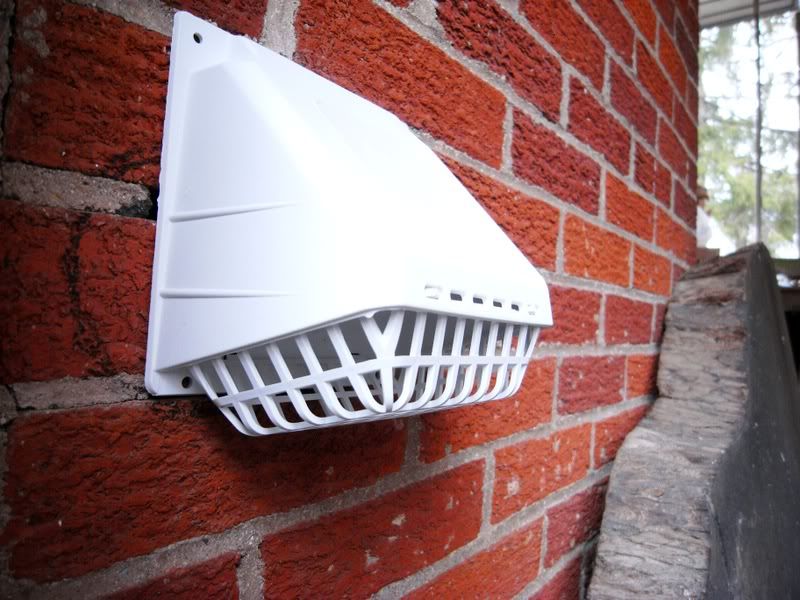
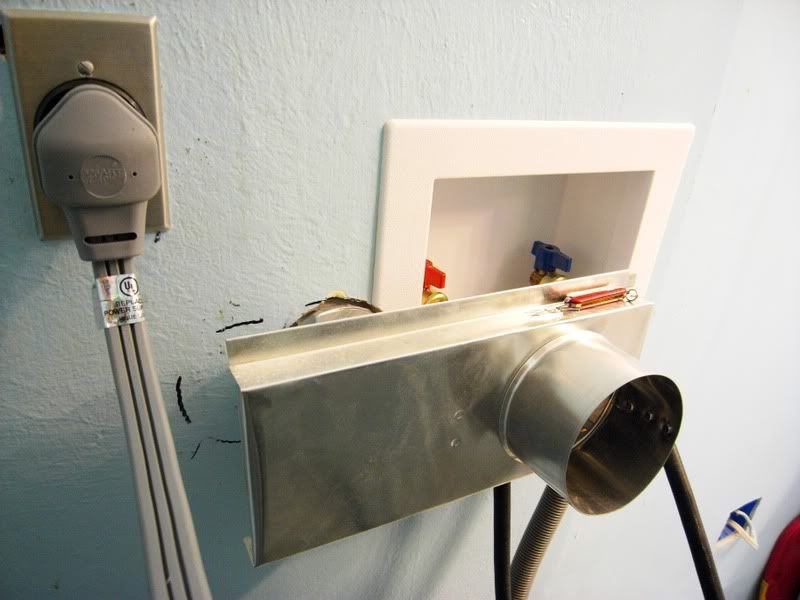
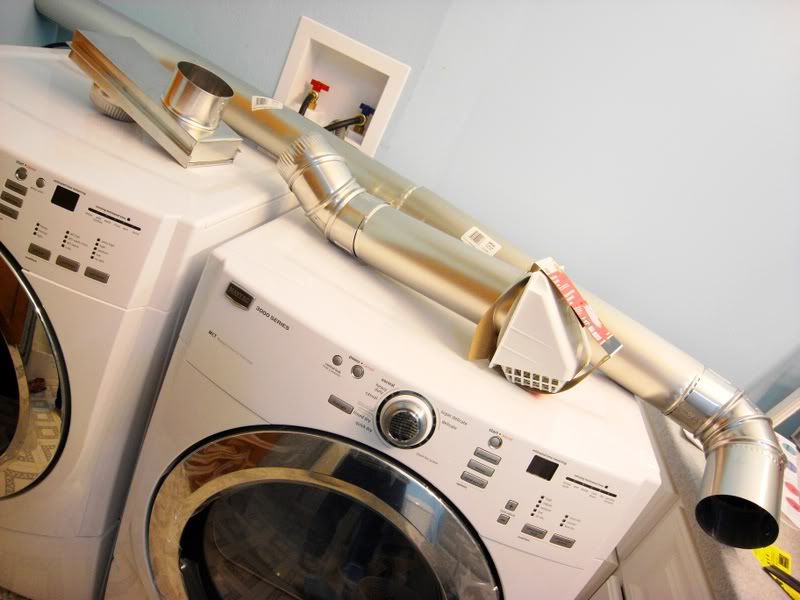
^^^ So... I HAD to use an "off-set" vent because of my STACKED arrangement and the location of the water feed lines and drain. (I HAD to place it between the joists in this position, since I COULDN'T have WET plumbing in the same stud-hollow as WIRING, which was in EACH SIDE of this segment...) In the end, although there is a few inch "crank" in the flow, it seems to flow VERY WELL all the way out the exhaust venting and out the vent-cap to the outside. You can see the ROUGH status of the basement stairwell, which is already torn up due to some other home-mods that were under way. The current bathroom WAS two different "rooms". A little "token closet" and the bathroom. I busted out the wall, and made it ONE room... hence the TWO eight-panel doors in the photo below. The ONE door will be secured SHUT, but otherwise left intact... since my new home addition will have a complete laundry on the first floor, and this room is more-or-less temporary.
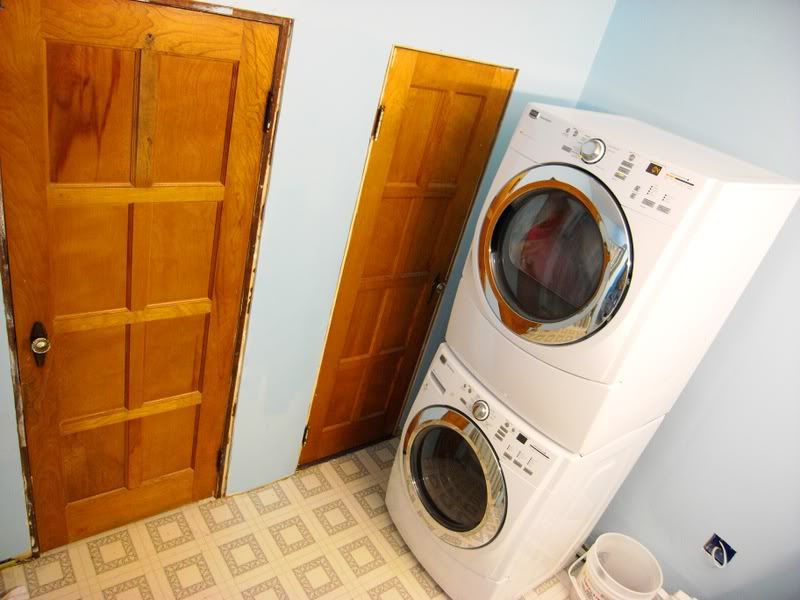
^^^ There's the final STACKED set! Now for some cleanup, painting, and trim work... not to mention SHELVING in that little "nook" behind it... and I'll have a functional laundry room on the first floor for the wifey!:wink:
...let's see... now about some C4 to take care of that STUMP out back... 8)
-crisp
Well... after viewing some of the OTHER threads and posts in here... I don't feel so bad about boring you all with my LATEST PROGRESS! 8)
Now that I've (temporarily) overcome the SUMP PUMP emergency and related interruptions... I've been busily trying to finish up the WASHER/DRYER install...
I turned my attention back to the VENT for the dryer...

^^^ So there was the last VENTING shot... which I began to ROUTE through the WALL (which is like GRANITE or something! Kept WEARING DOWN saw blades and DULLING drill bits! Here's a CROSS-SECTION of the ANCIENT drywall in my place...

^^^ Notice the "drywall" substrate that is then "coated" with another layer of what looks like "plaster", followed by some kind of HARD SHELL SURFACE that is painted with something with the characteristics of EGGSHELLS! NO WONDER my blades didn't like it!


^^^ So... I HAD to use an "off-set" vent because of my STACKED arrangement and the location of the water feed lines and drain. (I HAD to place it between the joists in this position, since I COULDN'T have WET plumbing in the same stud-hollow as WIRING, which was in EACH SIDE of this segment...) In the end, although there is a few inch "crank" in the flow, it seems to flow VERY WELL all the way out the exhaust venting and out the vent-cap to the outside. You can see the ROUGH status of the basement stairwell, which is already torn up due to some other home-mods that were under way. The current bathroom WAS two different "rooms". A little "token closet" and the bathroom. I busted out the wall, and made it ONE room... hence the TWO eight-panel doors in the photo below. The ONE door will be secured SHUT, but otherwise left intact... since my new home addition will have a complete laundry on the first floor, and this room is more-or-less temporary.

^^^ There's the final STACKED set! Now for some cleanup, painting, and trim work... not to mention SHELVING in that little "nook" behind it... and I'll have a functional laundry room on the first floor for the wifey!:wink:
...let's see... now about some C4 to take care of that STUMP out back... 8)
-crisp
I got the LG front load ones. I flippin love them.
If it wasn't for buttons/zippers you wouldn't even know they were going. I've walked by them and not even known that they were on.
That being said, I've personally only used them maybe a dozen times or so. Just when I want something. lol
I can't say I would buy them for an apartment though...
If it wasn't for buttons/zippers you wouldn't even know they were going. I've walked by them and not even known that they were on.
That being said, I've personally only used them maybe a dozen times or so. Just when I want something. lol
I can't say I would buy them for an apartment though...
Front loaders tend to cost more initially, but they use such little water that it's worth it.
I no longer have a dryer as it was costing WAY too much to run (electricity wise).
I no longer have a dryer as it was costing WAY too much to run (electricity wise).
Wow crisp, thats quite a setup. Hopefully I'll be using the existing plumbing.:biglaugh: Don't want to upset the landlord...
I really want to buy something thats going to last a long time. I believe I've seen commercials for the LG front loaders... the red ones? My concern is that "high tech" may equal "not durable".
mkiiSupraMan18;1539501 said:I can't say I would buy them for an apartment though...
I really want to buy something thats going to last a long time. I believe I've seen commercials for the LG front loaders... the red ones? My concern is that "high tech" may equal "not durable".
greg88;1539636 said:I really want to buy something thats going to last a long time. I believe I've seen commercials for the LG front loaders... the red ones? My concern is that "high tech" may equal "not durable".
FWIW... If everything isn't perfect dryer wise, they're a total PITA. In our brand new house we had issues w/ the vent hose going from the dryer to the outside of the house (10' or so) and we had to have Best Buy come out and tell us wtf was wrong probably 6 times or so before we all figured out what was wrong. If the vent isn't flowing 100% the dryer just spins and doesn't dry. We haven't had the issue for probably 6 months or so, so it must have fixed itself (possibly a kink in the vent hose we were told, running one of those vent brushes through must have fixed the problem.)
But as far as durability, they seem really stout. my son (25lbs+) hangs on the door while we (my wife) are doing laundry and it isn't even loose in the slightest bit.
I would probably steer away from the bases... we only use ours for storing blankets. lol
Clip, how is the stacked units working for you? We're planning on stacking ours, but we aren't sure how reaching the top (dryer) controls will work. Did you get a remote control unit for it?
I've got a matching Electrolux set with the pedestals. Probably the biggest washer/dryer combo you can have for a non comercial use.
No complaints here.
No complaints here.
VERY HAPPY with the "Commercial Grade" Maytag's we installed here! LOVE the front load models over the conventional top loaders. MUCH more efficient, quiet, and FAST! Lots of modes that offer good flexibility (I usually just do a "quick wash" with minimum soap or the single sheet detergent/softener option) and FLUFF stuff like sweatshirts I've only worn an afternoon or something to freshen 'em up and make 'em toasty on a cool morning! The upper controls are well within reach (no base pedestal here) and there is minimal "rocking" around even with them essentially "self-standing".
I'll likely never go back to the conventional top loaders. Actually, plan on a DUPLICATE set of these SAME UNITS when we add our addition. We'll have them stacked side-by-side for DOUBLE duty... one in cycle and the other being off-loaded and re-loaded. With FOUR KIDS you NEED a home "non-coin" laundry! HA!
G/L w/your choice!
-crisp
crisp;1539844 said:With FOUR KIDS you NEED a home "non-coin" laundry! HA!
More fun to look forward to... lol
But it makes total sense.
While the new front loading washers are good for the environment, they are not only more costly to buy but also to repair. All those complicated functions and touch pads require a few circuit boards to run. Have one of those boards die out of warranty (this happens often) and you're out $600 just for parts. They also don't work as well at getting out stains though that has improved considerably over the years.Most of the older conventional laundry equipment can be fixed with minimal cost and will give an long service life. Too many of the new products are designed to be disposable after a few short years. Look out for the warranties too. 1 year parts and labour is about all you get these days. It used to be 3 or 5. Appliances are about the only place I would spend more for an extended warranty. Especially if you get a front loader.
Oh, and I don't own any. I rent right now but when I need some I will be finding a broken old pair at my parents shop and fixing them for free.
Oh, and I don't own any. I rent right now but when I need some I will be finding a broken old pair at my parents shop and fixing them for free.
if you are a homeowner, do what crisp did.
if you are single, or just a couple in an appt, go down to the local used appliance shop, spend 200 bucks, and get something functional
my set in this house is going strong after about 5 years
the 900 dollar hi-zoot techy washer i bought for my ex-wife lasted 6 weeks before it was totally destroyed. (had a lot to do with our divorce, not the broken washer, but the mentality of the way it was abused)
its all in how you take care of shit.
Sawbladz;1539862 said:Appliances are about the only place I would spend more for an extended warranty. Especially if you get a front loader.
Oh, and I don't own any. I rent right now but when I need some I will be finding a broken old pair at my parents shop and fixing them for free.
So very true, we bought an extended 3 year warranty with our Electrolux set, a 5 year warranty on our Sharp Aquos 60" LCD 120 HZ TV, and a 2 year warranty on both of our PS3's. We've already had to use the warranty on one PS3. Glad we got them!
Be realistic and get yourself a cheap washer and dryer. W/D sets with all those neato whistles and bells are a waste. You're just going to use the "Normal" cylce 99% of the time. The only things you're going to change is the water temp, and load size. I bought the cheapest Maytags availble back in 1994, and they're still going strong. Not one hiccup. I also bought the extended warranties for them, but those expired back in 1998. Both W&D were just under $400.
If you want to impress you're young peers then sure, buy a $3600 W/D set. Or save yourself $3000 and pay some bills off and free up some income. Snowball that money into another bill. Or save for a down payment on a house. Or go on a couple very nice vacations. Or whatever else you can think of. That's just my two cents.
---------- Post added at 08:35 AM ---------- Previous post was at 08:31 AM ----------
If I could do it all over again I would do that.
If you want to impress you're young peers then sure, buy a $3600 W/D set. Or save yourself $3000 and pay some bills off and free up some income. Snowball that money into another bill. Or save for a down payment on a house. Or go on a couple very nice vacations. Or whatever else you can think of. That's just my two cents.
---------- Post added at 08:35 AM ---------- Previous post was at 08:31 AM ----------
Sawbladz;1539862 said:Oh, and I don't own any. I rent right now but when I need some I will be finding a broken old pair at my parents shop and fixing them for free.
If I could do it all over again I would do that.
I thought the same thing... Just need a landscaping/lawn care FAQ.
FTR, We bought the front loaders for the steam/dissinfecting capabilities since my wife and I work in healthcare... Not something we want hanging around the house from our scrubs.
FTR, We bought the front loaders for the steam/dissinfecting capabilities since my wife and I work in healthcare... Not something we want hanging around the house from our scrubs.
Supracentral;1540540 said:LOL @ this thread...
Supramania, is there anything you cannot do?
LMAO! My thoughts exactly!!
I saw the thread title and said "nah, gotta be something else" but quickly realized that it was exactly what it sounded like once I got in here.
We are a wacky bunch, eh? haha
ya know, as much as it pains me to say this, there are things besides cars in life.
where else on the net can i browse pics of peoples builds, find a recipie, have a discussion about religion, rant about women, debate politics, bs with other like minded people at 3 in the am, see bewb pics, and talk about household type shit?
i think the word is community
where else on the net can i browse pics of peoples builds, find a recipie, have a discussion about religion, rant about women, debate politics, bs with other like minded people at 3 in the am, see bewb pics, and talk about household type shit?
i think the word is community
