install fmic
- Thread starter supisarethebest
- Start date
You are using an out of date browser. It may not display this or other websites correctly.
You should upgrade or use an alternative browser.
You should upgrade or use an alternative browser.
- Status
- Not open for further replies.
grimreaper;1397644 said::nuts: what was the point of your statement?
And this thread???:nono:
go to the local section northeast in your case...and ask there...and be more specfic....alot more
grimreaper;1397644 said::nuts: what was the point of your statement?
ask a useless question, get a useless answer
Where in RI are you? I can help do it or do it if you want to make an hour drive up to MA.
I've got a garage and all the tools necessary
I've got a garage and all the tools necessary
thanks to the people that actually take this thread seriously,just because some of you have your cars at bpu you think you can actually make fun of someone thats actually triying to make their car look-drive nice...
yeah i kind'a figured,i tried deleting it when i noticed i made the mistake but it wasnt giving me the option so i just left it,then made it in my local section,sorry dudes have a great day
Davismj711
PA Mountain Supra
You will find the help you need there. There are quite a few good wrenches up your way.
Just remember, it is a sacrifice of their time and treat them accordingly ^^
GL with your install.
Just remember, it is a sacrifice of their time and treat them accordingly ^^
GL with your install.
It's not that hard to install. A little patience goes a long way. Most of the time goes into finding the route that you will take. I just finished mine up yesterday, and took a few pictures along the way. In these pictures, you will see some 90 degree that are not included in the universal kit. Be prepared to need 1-2 of those. This is my second time around with this kit. I didn't use near all of the pipes the first time, and the extras came in handy for the re-work. You will see a couple of pieces where I used a short piece that was cut off of another to make a small extension. That will be where you see two couplers together. The extra piece is hidden under the couplers. Keep in mind that every time you cut a pipe, that you are loosing the bead on that pipe, and therefore adding potential for failure.
Lower piping - I'll update this tomorrow after verifying exactly which pipes are used. It's a 90coupler coming off the IC to a 45 pipe and another (not sure).
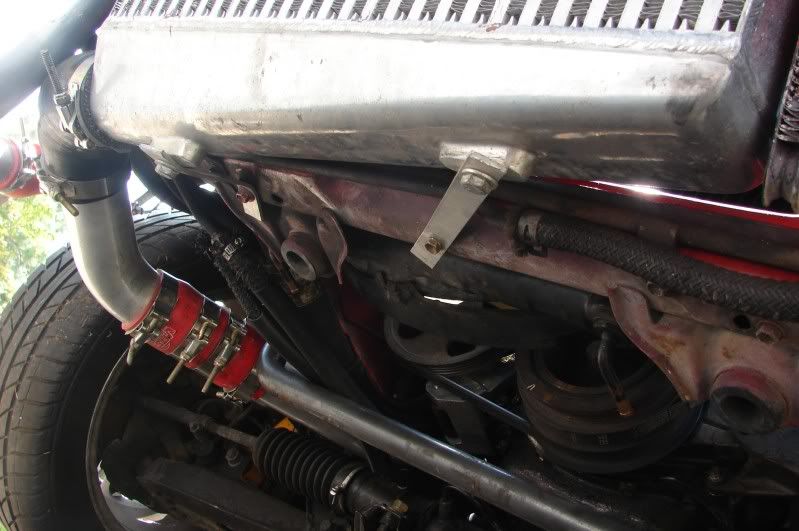
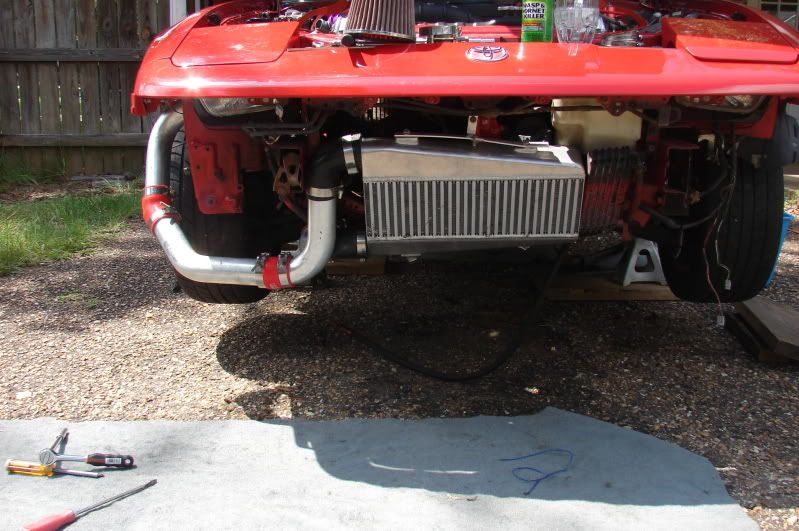
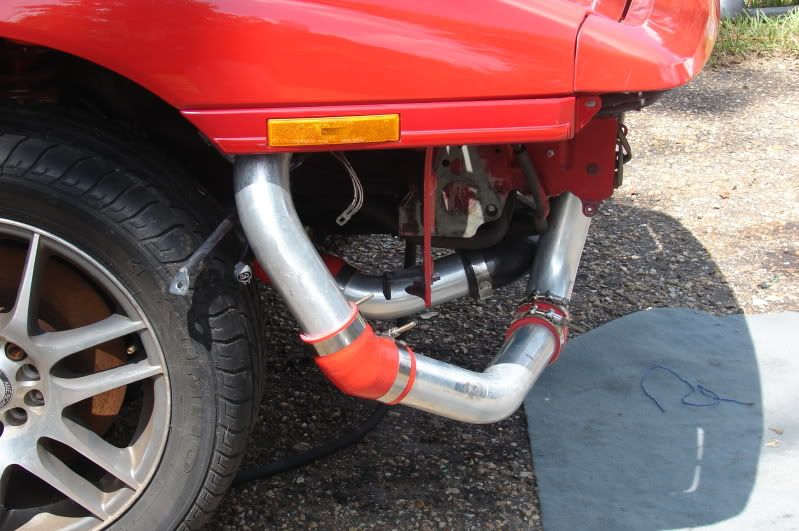
Front view with bumper removed. I used a 90 coupler, a cut 1/2 of a 180 pipe, straight coupler, 45 pipe, 45 coupler, 45 pipe. This takes it just through the fender hole. Note the IC mounting in this pic. The top is a straight piece of flat bar, with a piece bent 90 degree piece bolted to it, and then bolted into the hood latch bracket. Lowers will be seen better in the later pic.
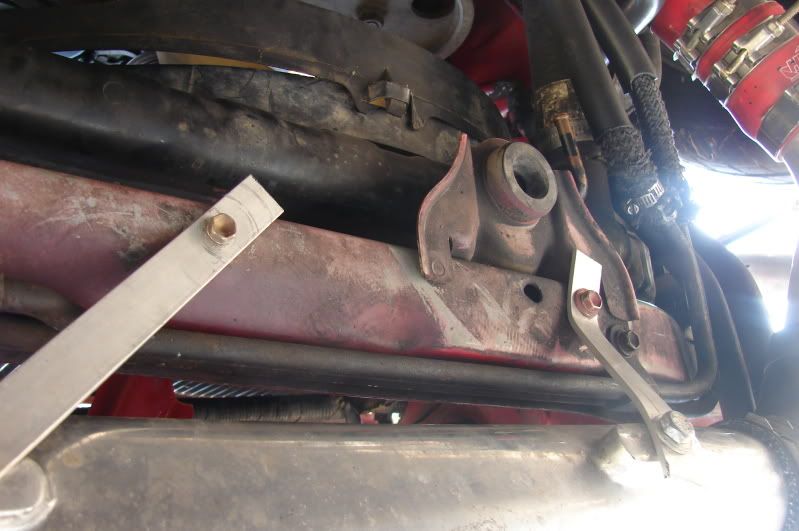
Lower IC mounts. Two pieces of flat bar. One stays flat, and bolts into the radiator support. The threaded holes are already there. Maybe they were once for an engine undercover? The other piece will almost go straight across like the other, but it needs to bend a little to compensate for the taper of the IC. You can see where I bent mine.
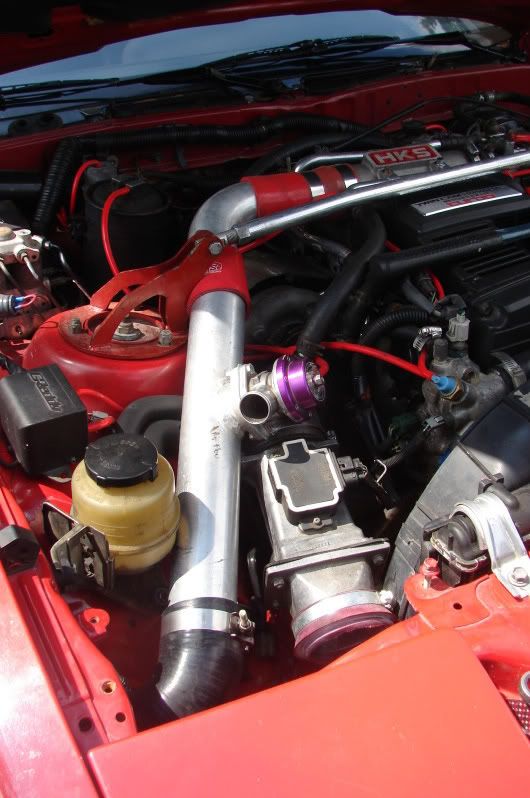
Inside the bay. Start with another 90 coupler, then a straight pipe(mine has BOV), straight coupler, then the other half of that 180 pipe I cut in half, and then whatever coupler you need to mate up with your 3000 pipe. My HKS pipe is 2.75, so I had to go 2.75/2.50 reducer to make it match. A stock 3000 pipe is 2.25 there.
Lower piping - I'll update this tomorrow after verifying exactly which pipes are used. It's a 90coupler coming off the IC to a 45 pipe and another (not sure).

Front view with bumper removed. I used a 90 coupler, a cut 1/2 of a 180 pipe, straight coupler, 45 pipe, 45 coupler, 45 pipe. This takes it just through the fender hole. Note the IC mounting in this pic. The top is a straight piece of flat bar, with a piece bent 90 degree piece bolted to it, and then bolted into the hood latch bracket. Lowers will be seen better in the later pic.


Lower IC mounts. Two pieces of flat bar. One stays flat, and bolts into the radiator support. The threaded holes are already there. Maybe they were once for an engine undercover? The other piece will almost go straight across like the other, but it needs to bend a little to compensate for the taper of the IC. You can see where I bent mine.

Inside the bay. Start with another 90 coupler, then a straight pipe(mine has BOV), straight coupler, then the other half of that 180 pipe I cut in half, and then whatever coupler you need to mate up with your 3000 pipe. My HKS pipe is 2.75, so I had to go 2.75/2.50 reducer to make it match. A stock 3000 pipe is 2.25 there.

- Status
- Not open for further replies.

