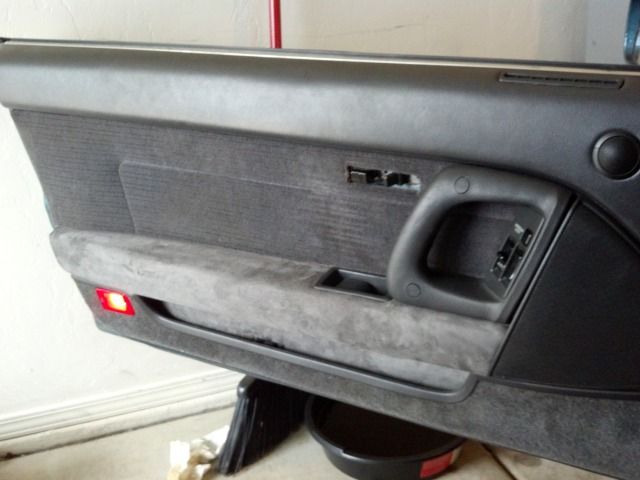
Hey guys this week I decided to redo the door panels on my supra. I have shadow grey door panels and they are pretty hard to find and also pretty pricey when a set come up on the forsale section so I thought I would make an attempt on repairing them. My driver door was completely shot thanks to the previous owner and the passenger door was beginning to show some signs of failing. This is the first time I have done fiber glass and any kind of upholstery work and I am in no way a professional so keep that in mind you experts out there. I do have to say this will only look good with 90+ cars because the speaker grill makes a nice cut off line from the rest of the panel so keep that in mind guys. Almost everything can be found a Walmart and it cost me $50 to do both doors and about 10hrs of work. I just wish the suede was a tad darker but it looked fine when the door was all back together.
Items Used:
8ft x 8ft piece of fiberglass mat
3m epoxy resin (both items can be found at Walmart)
4 paint brushes
Nitrile Gloves (resin get messy)
plastic disposable cups (mixing resin in)
One square yard of fake suede
Scotts super 77 spray adhesive
Craft Foam sheets
Tools
Screw driver
Staple Gun
Scissors
Xacto Knife
Step 1: Remove door panel
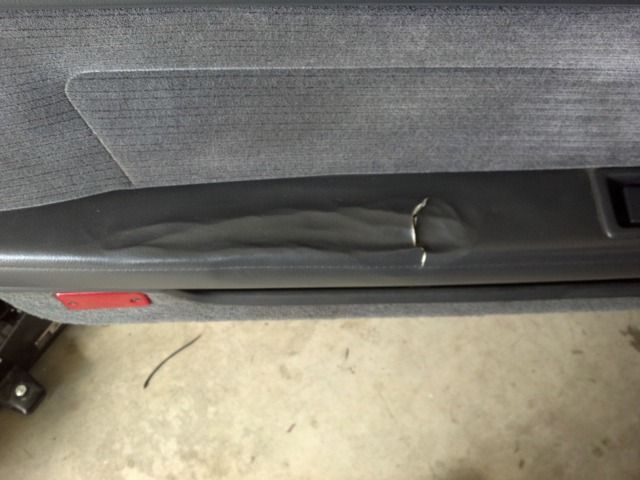
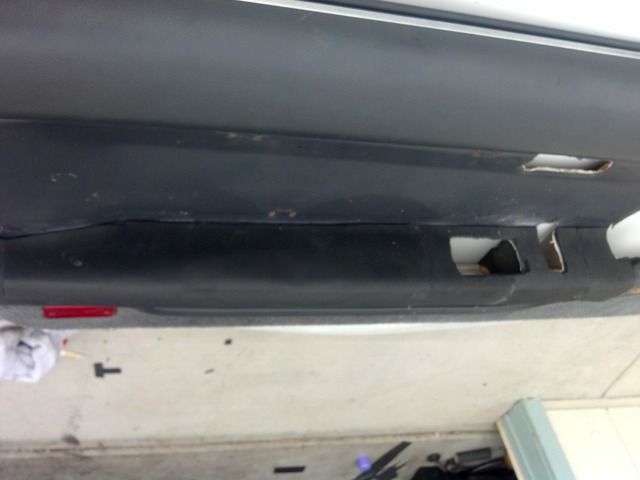
You will need to remove the door panel from the door. Its pretty self expanatory but if you need help you can look it up in the Trsm. As you can see my driver door is looking pretty rough.
Step 2: Remove middle panel
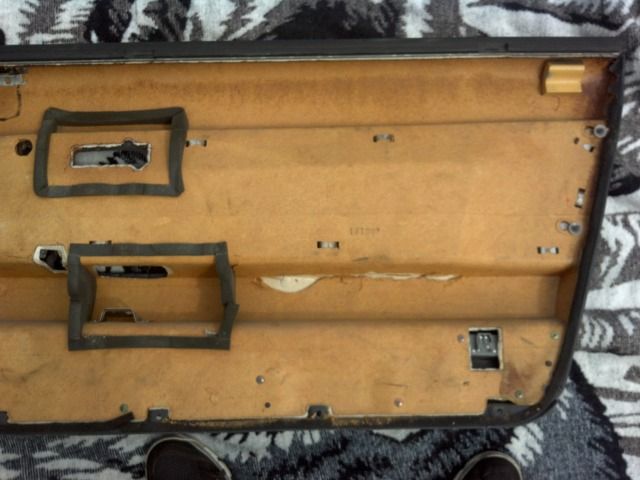
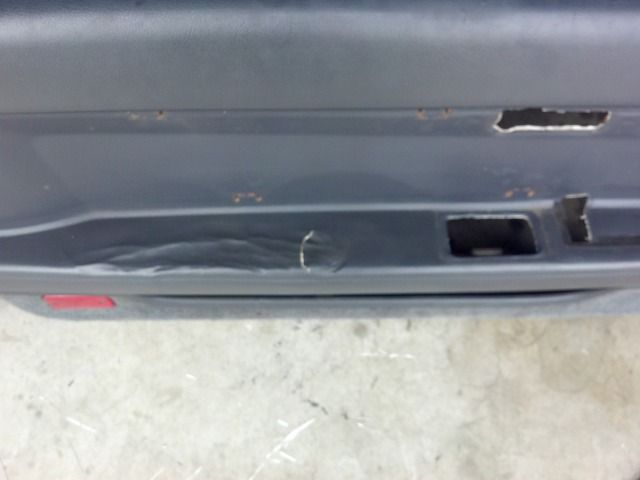
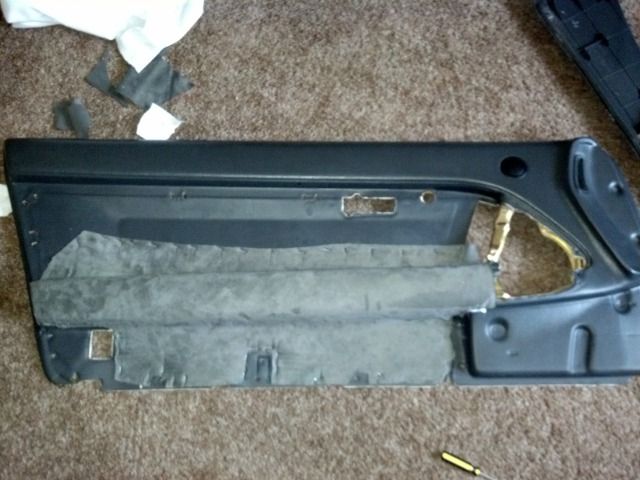
You will need to flip over the door panel and straighten the tabs of the middle panel so that it can be removed. Then remove the panel so that it looks like shown below.
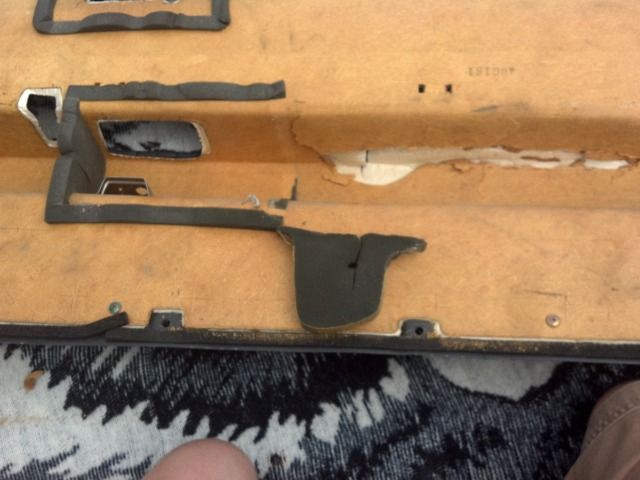
Next remove the little foam tab that keeps air blocked from the door handle
Step 3: Rebuild shape if necessary
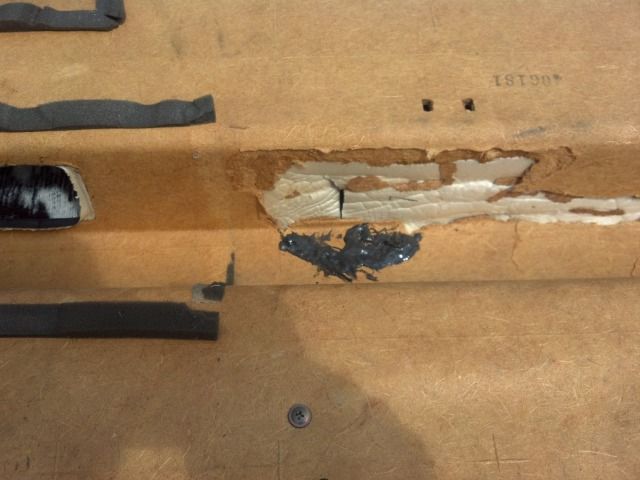
I had all the pieces in the door that broke off fall out. Now the driver door had part of the side of the arm rest punctured in so I took those pieces and epoxied them back together so that the corner of the arm rest had the original shape. (Note that all doors will be in different conditions so take what ever steps are necessary to get as much of the shape back as possible.)
Step 4: Fiberglassing the inside
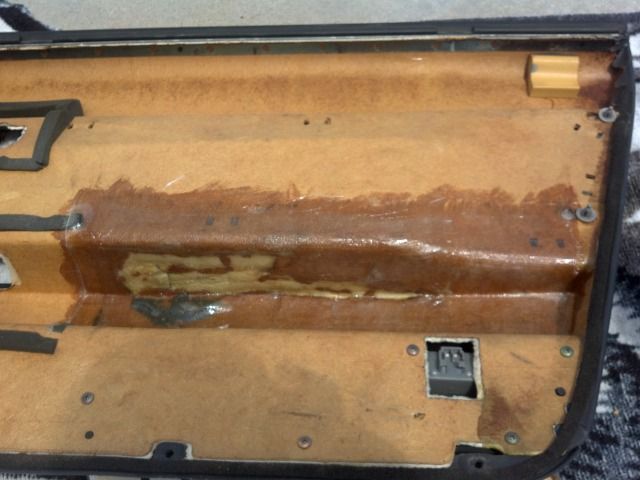
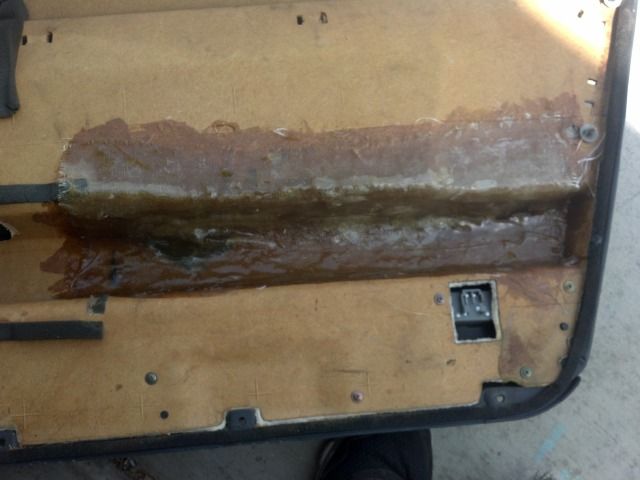
I used the supplies listed above and all can be found at Walmart. I started off with mixing half a cup of resin and spreading it on the door panel to give the fiberglass resin to adhere to. The first sheet I laid down was quite large and as the layer was applied I held a flat surface on the outside of the panel so the fiber would cure flat. The following 4 layers were the size of the arm rest and then covered with another large sheet the same size as the first. I used approximately 1/4 cup of resin per layer of fiberglass. I was a little excessive with the resin because my paint brush cured and I was not able to press the resin into the fibers efficiently.
Step 5: Rebuilding the outside of the door panel
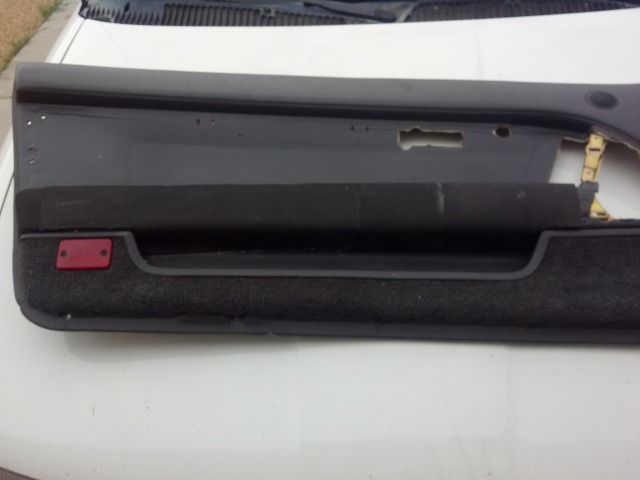
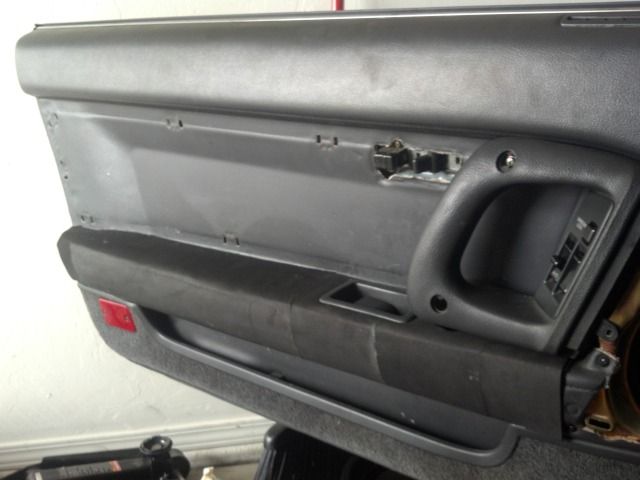
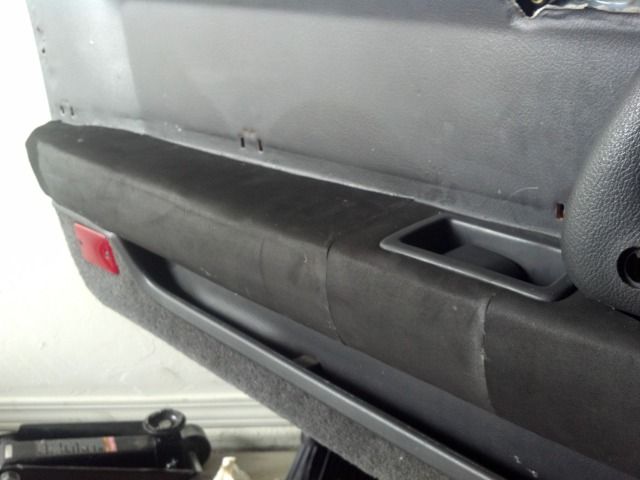
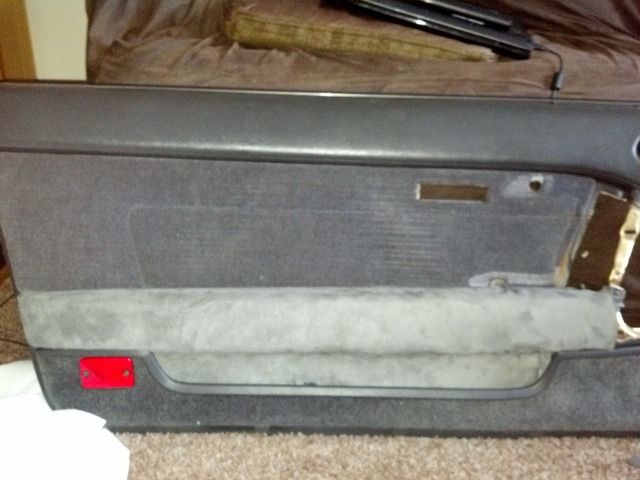
With my door panel the covering was riped this would be noticeable if the suede was just placed on top. So I found out that a good method of covering it up would be to use craft foam from the kids section. I bought 2 of the sheets and layered it on the outside of the armrest to make it smooth again. I did a layer cut in the shape of the top of the rest then I wrapped the entire rest. This made it very smooth and gave a tiny bit of cushion :naughty:. I used super glue for the edges and the spray adhesive everywhere else. Once the foam is on I took the Xacto knife and cut out the necessary areas. Then I did a test fir to make sure it wasn't to much padding and everything fit. GREAT SUCCESS! I did not have to do this with my passenger door and was able to skip this step and go to applying the suede.
Set 6: Mounting on the suede
I unscrewed the carpet panel on the bottom and cut the appropriate size of suede that is needed to go from the middle of the door to the bottom. I then stapled the suede to the middle of the door. Then took the spray adhesive and sprayed the arm rest and placed the suede on. I then did proper trimming to allow the carpet panel to be reinstalled. Once trimmed the bottom was stapled and the carpet panel was reinstalled. The suede also has to be trimmed with the Xacto knife to allow the tabs for the middle panel to go through and as well as the hole for the door handle.
Step 7: Re-install Door Panel
Follow Tsrm if there is questions with this part, it the complete opposite from steps 1 & 2
Step 8: Grab a beer and marvel at your work
Items Used:
8ft x 8ft piece of fiberglass mat
3m epoxy resin (both items can be found at Walmart)
4 paint brushes
Nitrile Gloves (resin get messy)
plastic disposable cups (mixing resin in)
One square yard of fake suede
Scotts super 77 spray adhesive
Craft Foam sheets
Tools
Screw driver
Staple Gun
Scissors
Xacto Knife
Step 1: Remove door panel
You will need to remove the door panel from the door. Its pretty self expanatory but if you need help you can look it up in the Trsm. As you can see my driver door is looking pretty rough.

Step 2: Remove middle panel
You will need to flip over the door panel and straighten the tabs of the middle panel so that it can be removed. Then remove the panel so that it looks like shown below.


Next remove the little foam tab that keeps air blocked from the door handle

Step 3: Rebuild shape if necessary
I had all the pieces in the door that broke off fall out. Now the driver door had part of the side of the arm rest punctured in so I took those pieces and epoxied them back together so that the corner of the arm rest had the original shape. (Note that all doors will be in different conditions so take what ever steps are necessary to get as much of the shape back as possible.)

Step 4: Fiberglassing the inside
I used the supplies listed above and all can be found at Walmart. I started off with mixing half a cup of resin and spreading it on the door panel to give the fiberglass resin to adhere to. The first sheet I laid down was quite large and as the layer was applied I held a flat surface on the outside of the panel so the fiber would cure flat. The following 4 layers were the size of the arm rest and then covered with another large sheet the same size as the first. I used approximately 1/4 cup of resin per layer of fiberglass. I was a little excessive with the resin because my paint brush cured and I was not able to press the resin into the fibers efficiently.


Step 5: Rebuilding the outside of the door panel
With my door panel the covering was riped this would be noticeable if the suede was just placed on top. So I found out that a good method of covering it up would be to use craft foam from the kids section. I bought 2 of the sheets and layered it on the outside of the armrest to make it smooth again. I did a layer cut in the shape of the top of the rest then I wrapped the entire rest. This made it very smooth and gave a tiny bit of cushion :naughty:. I used super glue for the edges and the spray adhesive everywhere else. Once the foam is on I took the Xacto knife and cut out the necessary areas. Then I did a test fir to make sure it wasn't to much padding and everything fit. GREAT SUCCESS! I did not have to do this with my passenger door and was able to skip this step and go to applying the suede.


Set 6: Mounting on the suede
I unscrewed the carpet panel on the bottom and cut the appropriate size of suede that is needed to go from the middle of the door to the bottom. I then stapled the suede to the middle of the door. Then took the spray adhesive and sprayed the arm rest and placed the suede on. I then did proper trimming to allow the carpet panel to be reinstalled. Once trimmed the bottom was stapled and the carpet panel was reinstalled. The suede also has to be trimmed with the Xacto knife to allow the tabs for the middle panel to go through and as well as the hole for the door handle.


Step 7: Re-install Door Panel
Follow Tsrm if there is questions with this part, it the complete opposite from steps 1 & 2
Step 8: Grab a beer and marvel at your work

