
Thanks goes to John89t for his initial guide, this is hopefully to enhance that for the novice mechanic but was a great help to me making this - thanks John
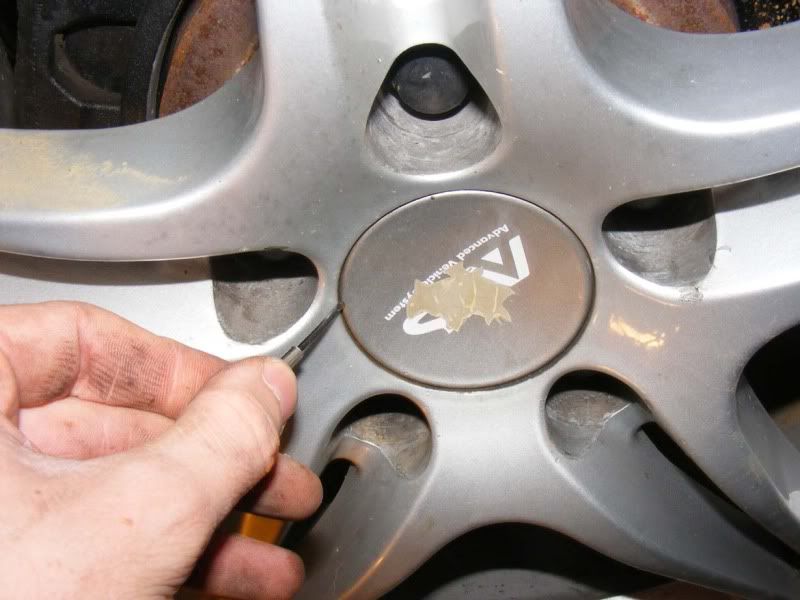
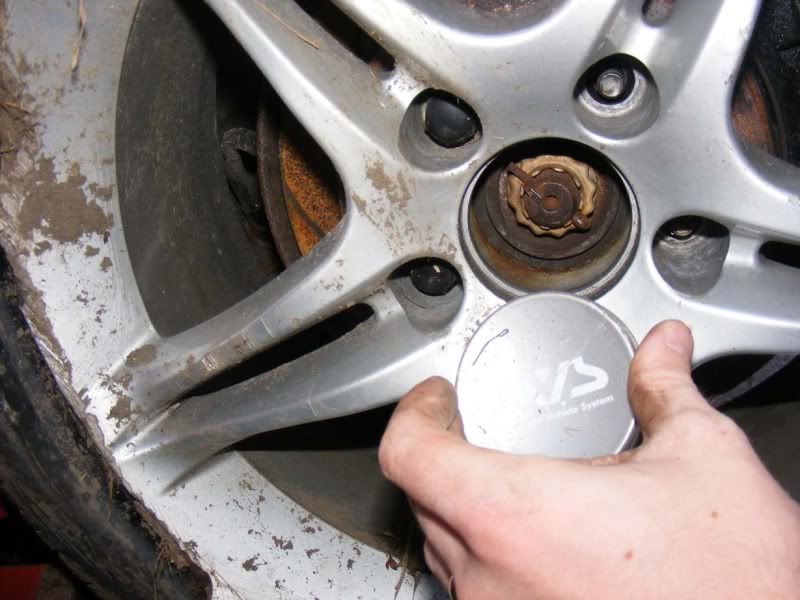
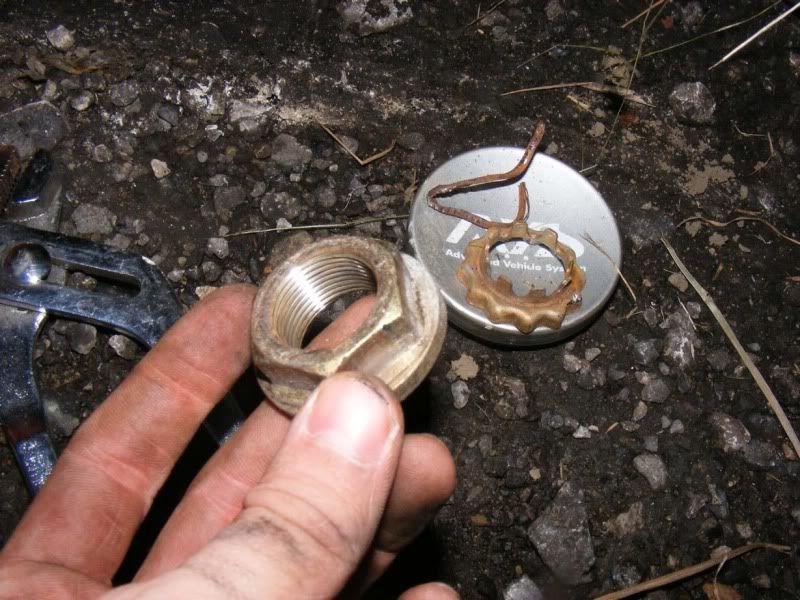
Step 1 - Remove the centre cap to your wheel (jewellers screwdriver helped for mine) so you expose the large bolt that holds the driveshaft in place (note you only need to remove this if you are intending on separating the driveshaft from the hub)
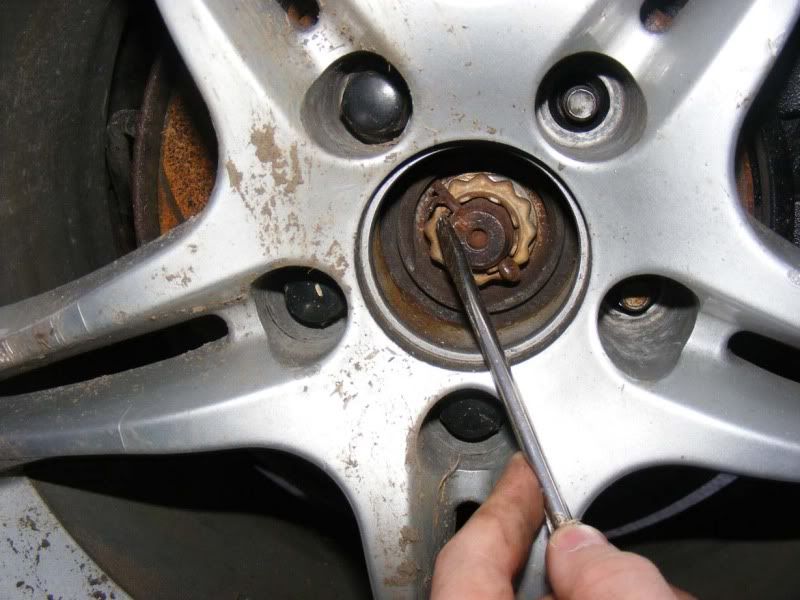
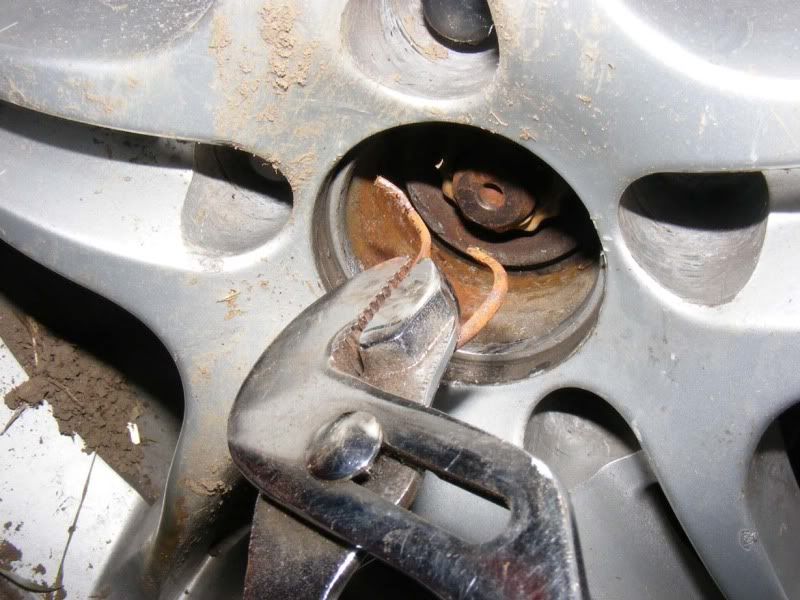
Step 2 - Use a flatblade screwdriver to straighten the legs of the split pin out (tap it with a hammer to make it easier)
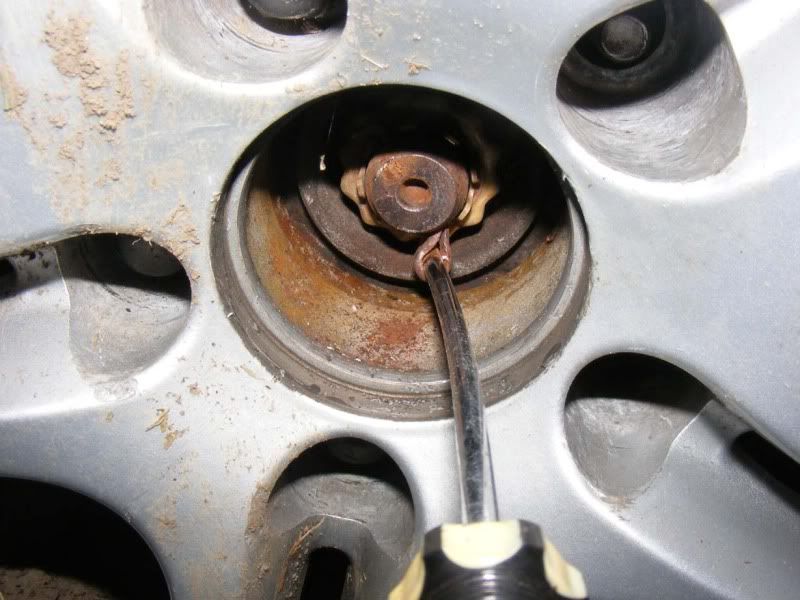
Step 3 - Insert a small screwdriver (or similar) to give you leverage to pull the clip out, this will be quite difficult sometimes so use leverage and plenty of wriggling and twisting - make sure your legs are as straight as possible first because it's very difficult otherwise
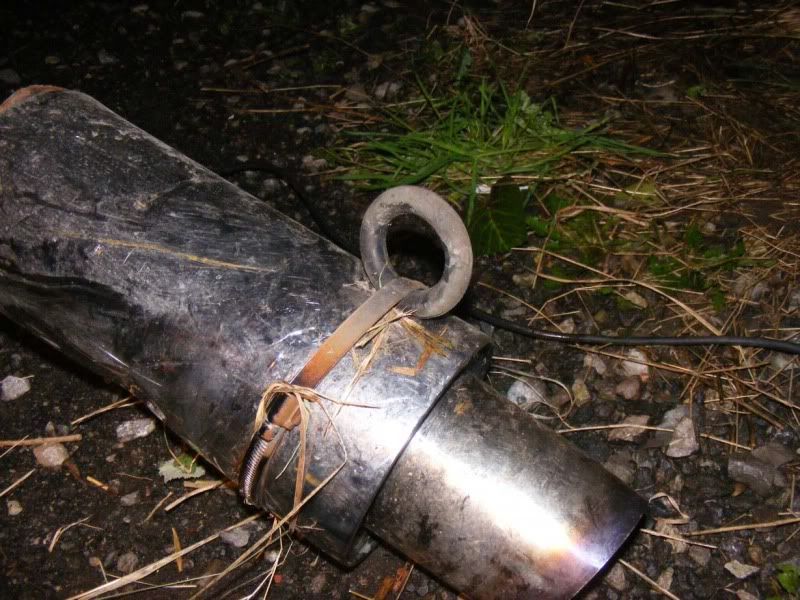
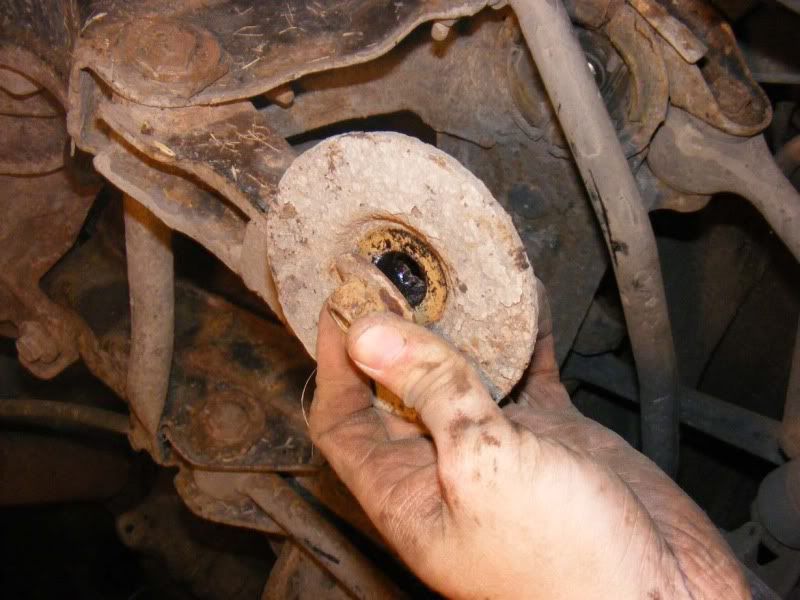
Step 4 - Use some mole grips to finish the job once you've got enough of the split pin through to get some purchase on it. Note they can sometimes be awkward and come out in pieces as shown in pic #2
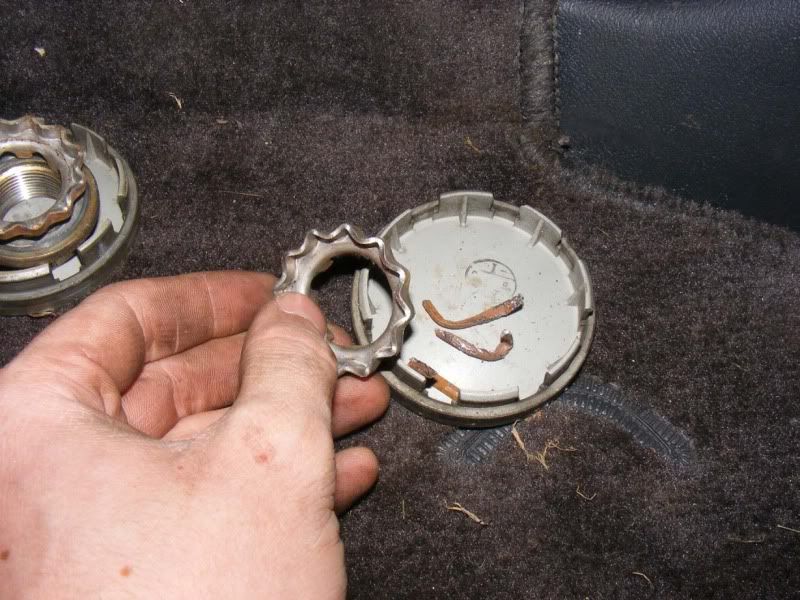
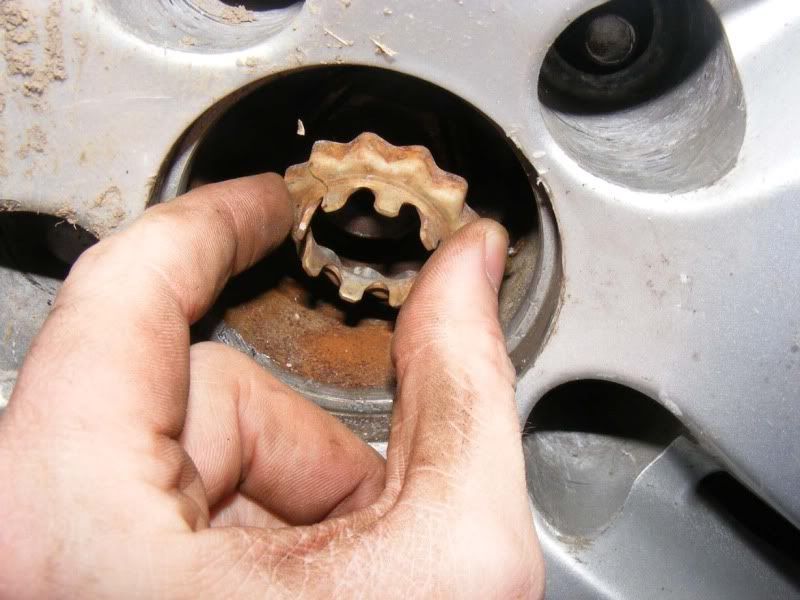
Step 5 - With the split pin out you can remove the collar with your fingers, it should pull out easily
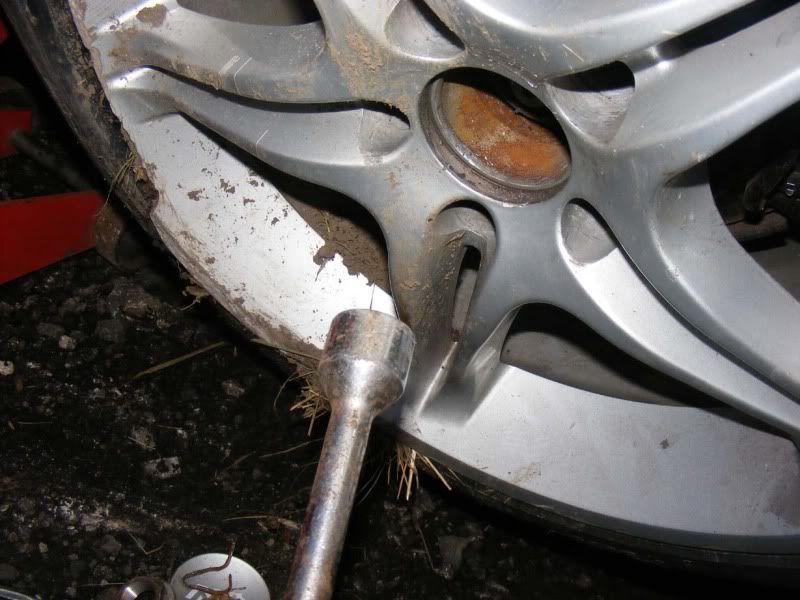
Step 6 - Now you can get to the big bolt with a 1.25" socket (32mm) socket. As with much of this guide you are working with tough bolts so you need to use a breaker bar and plenty of leverage, brute force is not the approach here (well, some of that too actually!) use brains and a long breaker bar

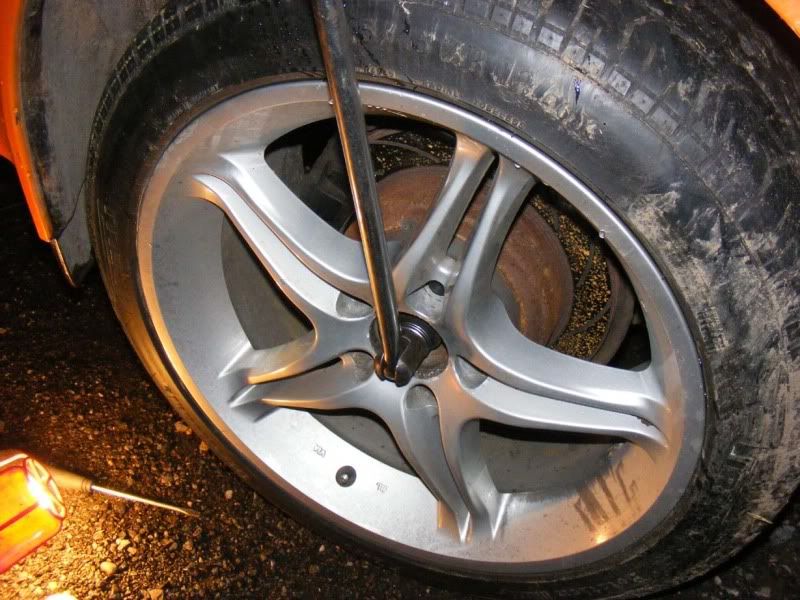
Step 7 - Once you have slackened the driveshaft bolt (you don't need to remove it yet but can if you like), crack off the wheel nuts while the car is still on the floor (don't remove them though!)

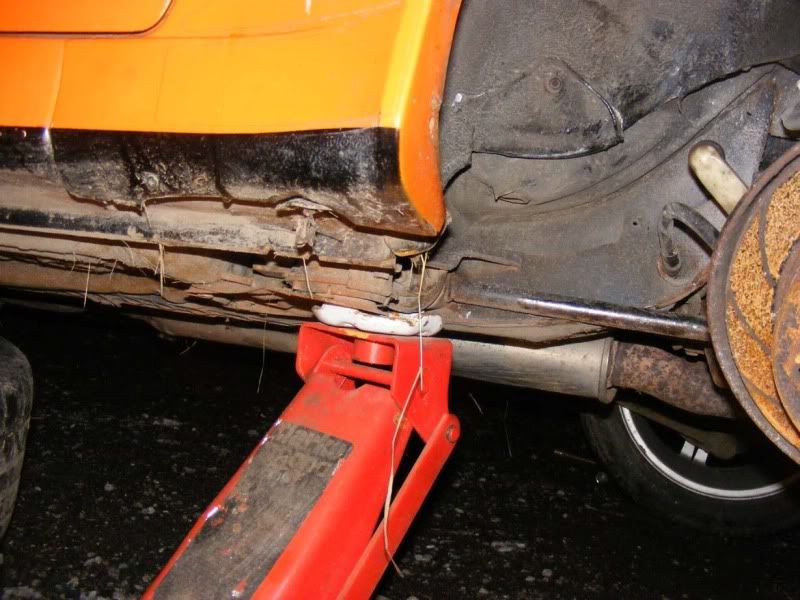
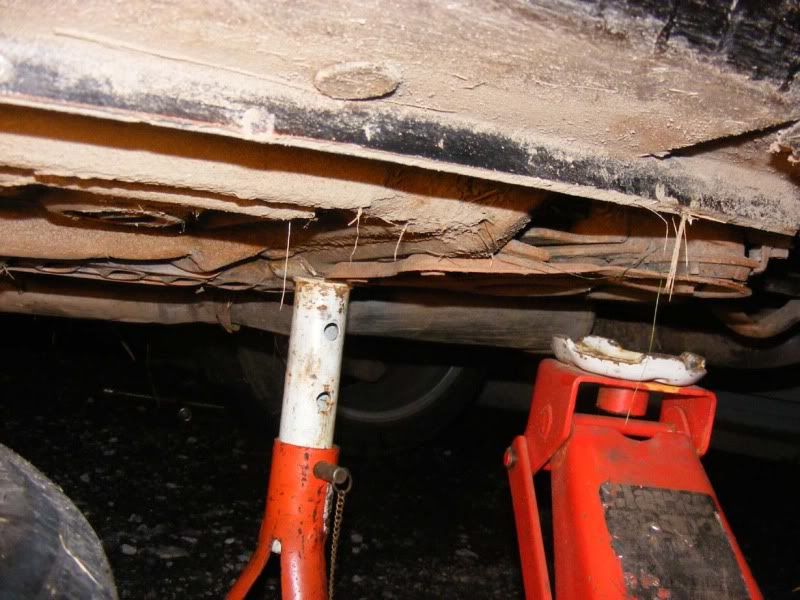
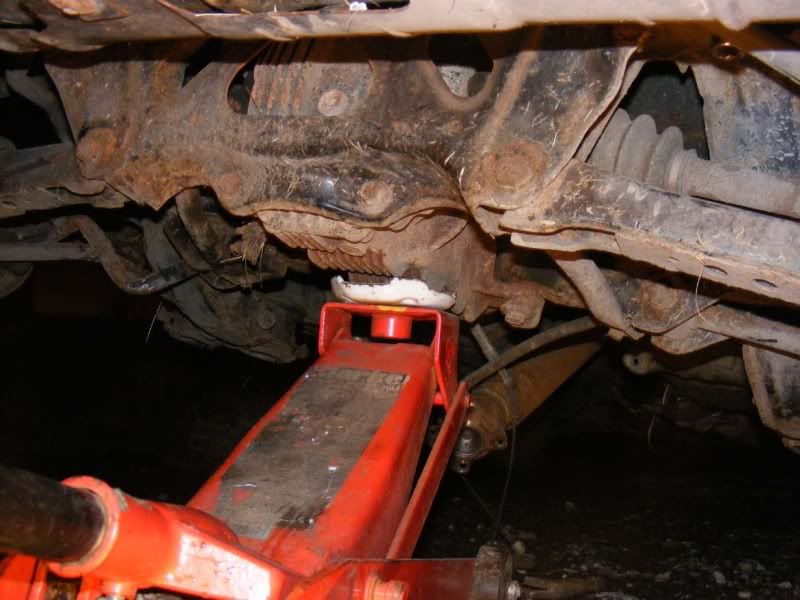
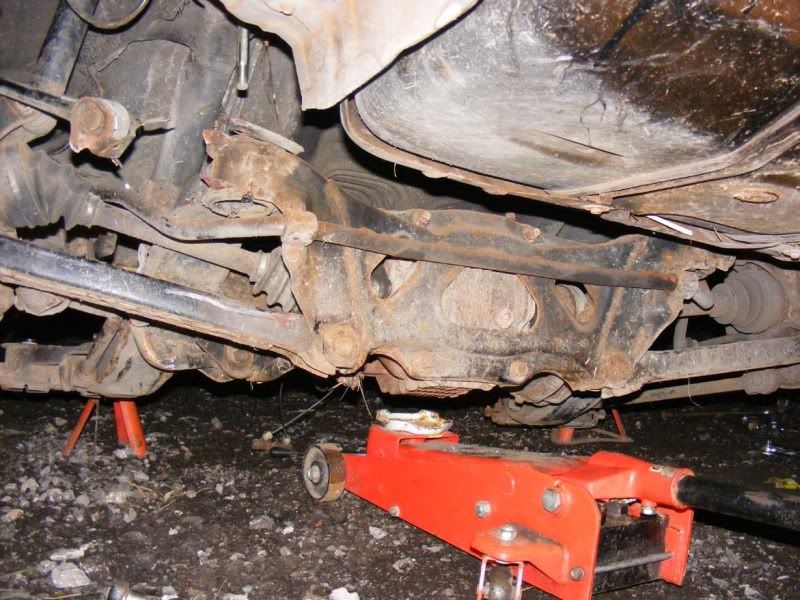
Step 8 - Now jack the car up so you can start the real work. Note it's easier to jack up using the subframe because you can then support the car on axle stands just in front of this as shown

Step 9 - With the car raised you can remove that driveshaft bolt fully
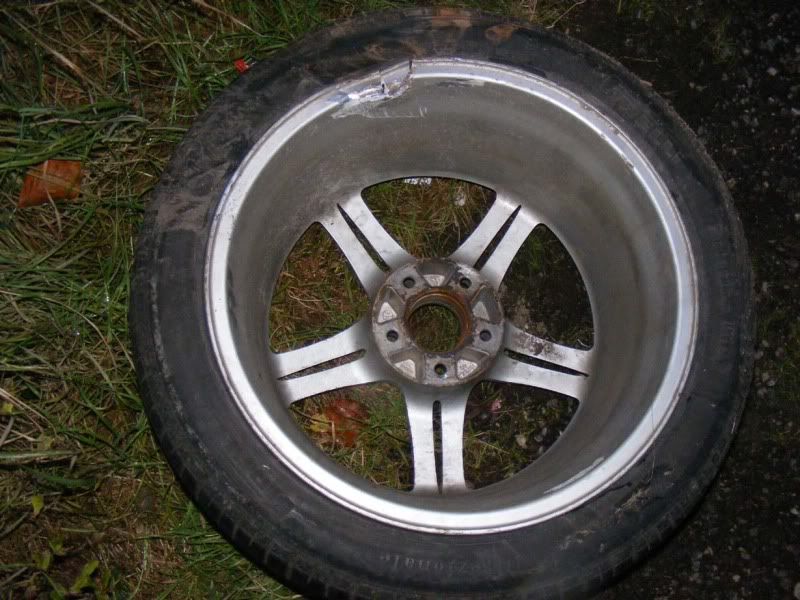
Step 10 - Now remove the wheel nuts and wheels completely
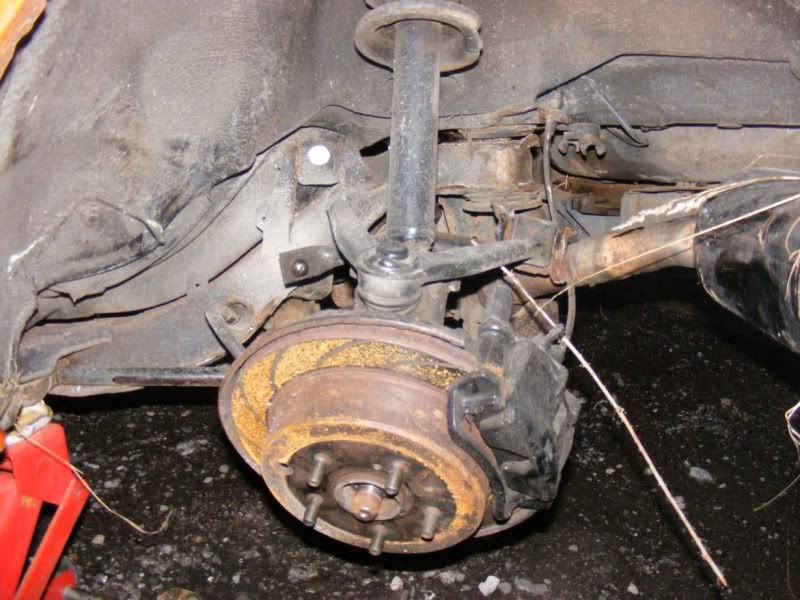
Step 11 - Now you have exposed the brakes, suspension etc you can start stripping things down
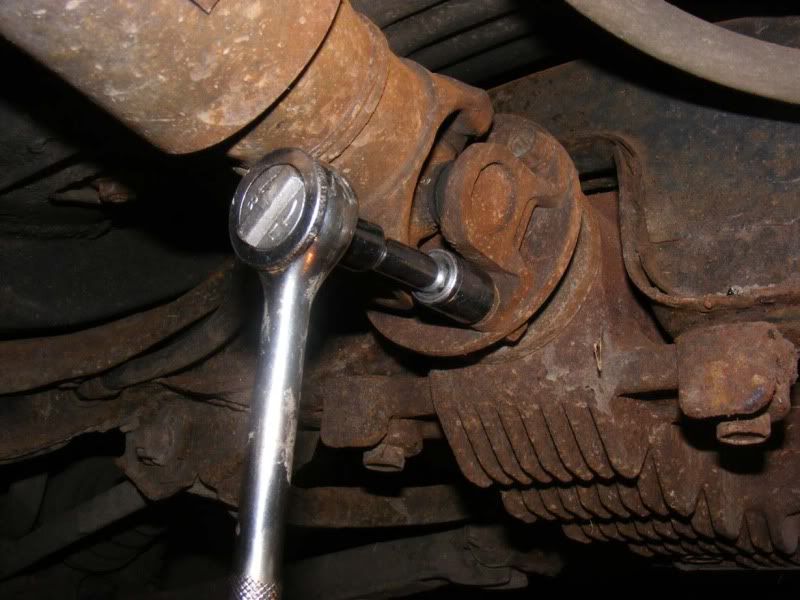
Step 12 - Using a 12mm spanner (or socket) slacken off the bottom bolt on the brake caliper. Remove this completely
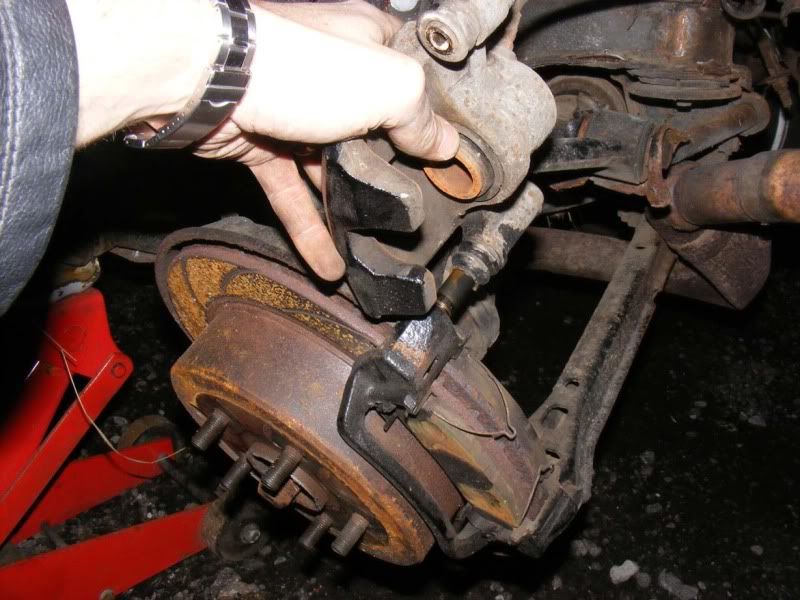
Step 13 - Now lift the caliper upwards and it will pivot on the top sliding pin. If it is particularly stubborn then the back of a claw hammer will help
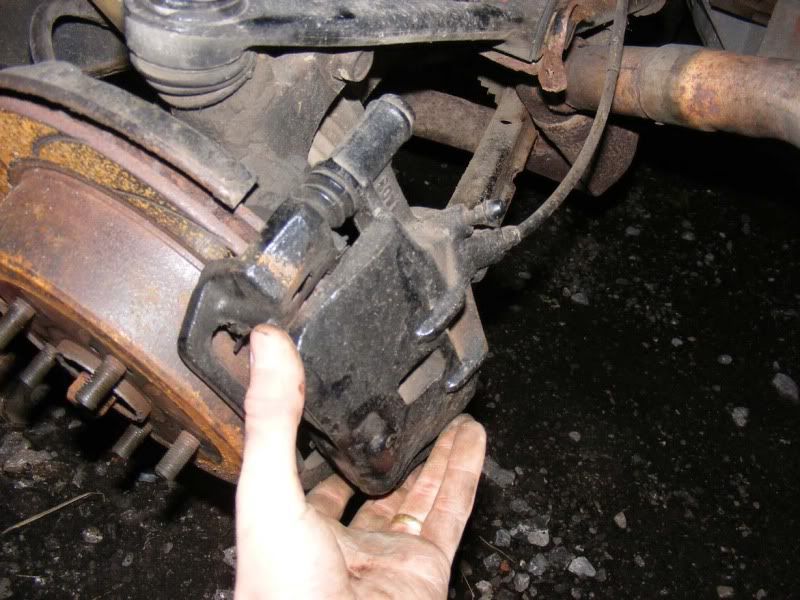
Step 14 - Slide the caliper off towards the car and it will pull away completely
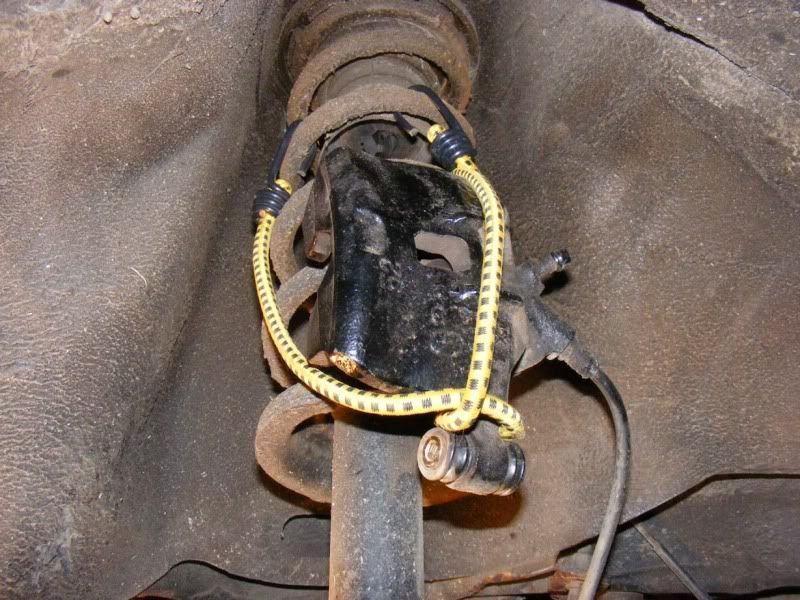
Step 15 - Secure the caliper against the suspension strut with string/wire/bungee cord etc
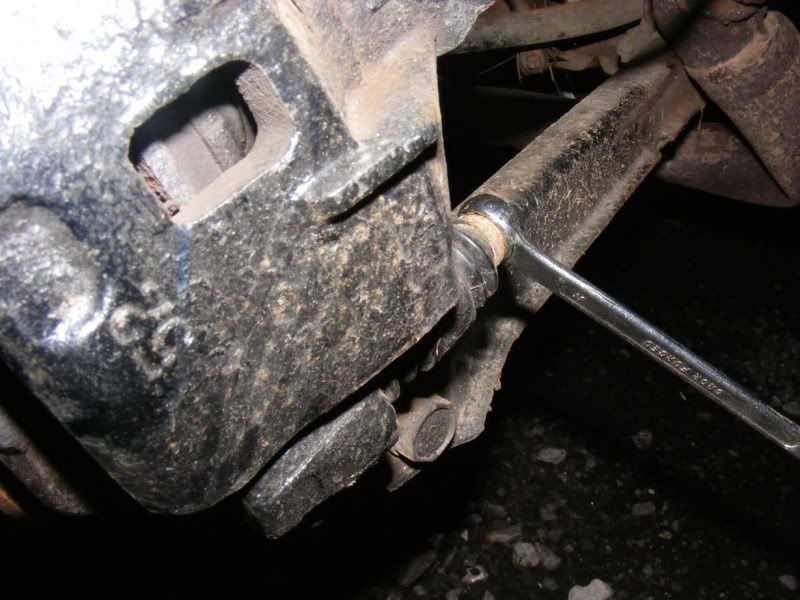
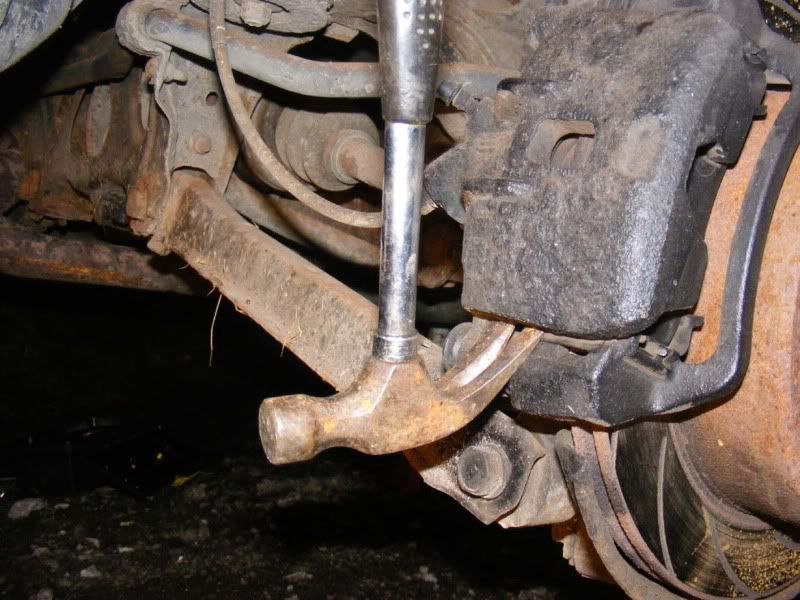
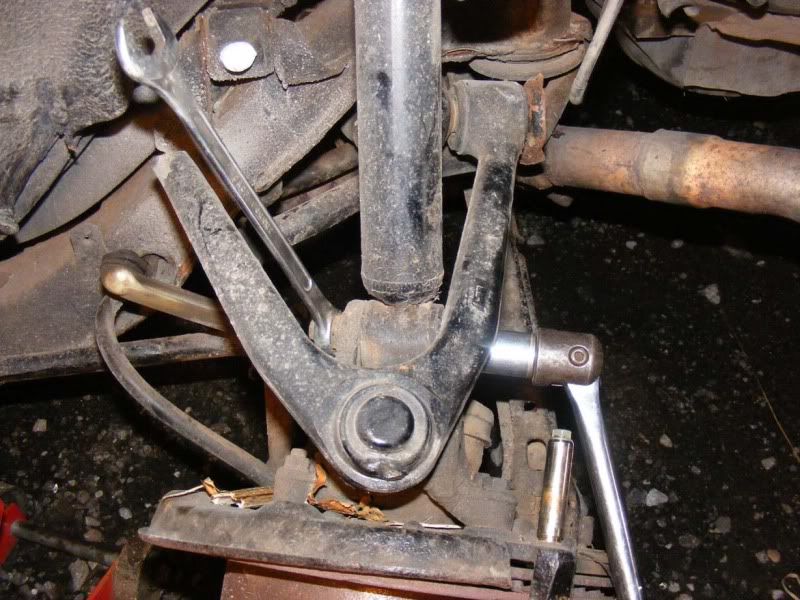
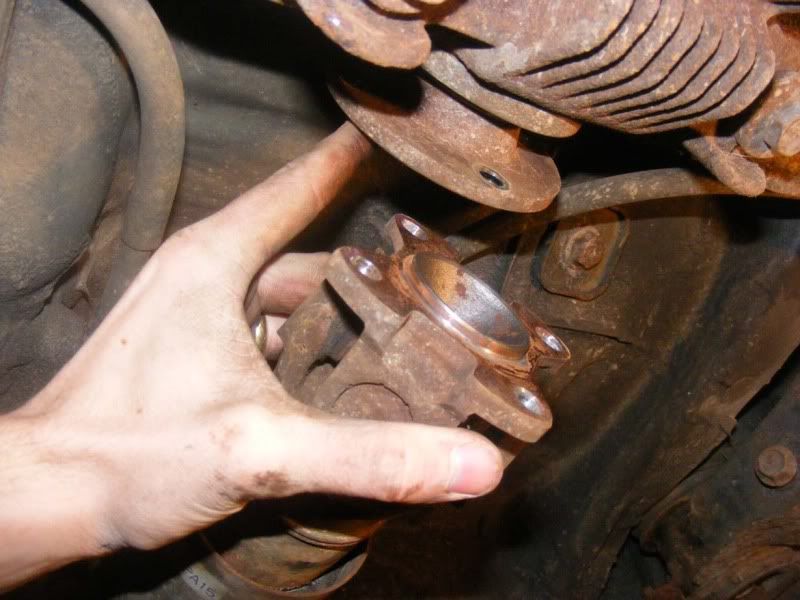
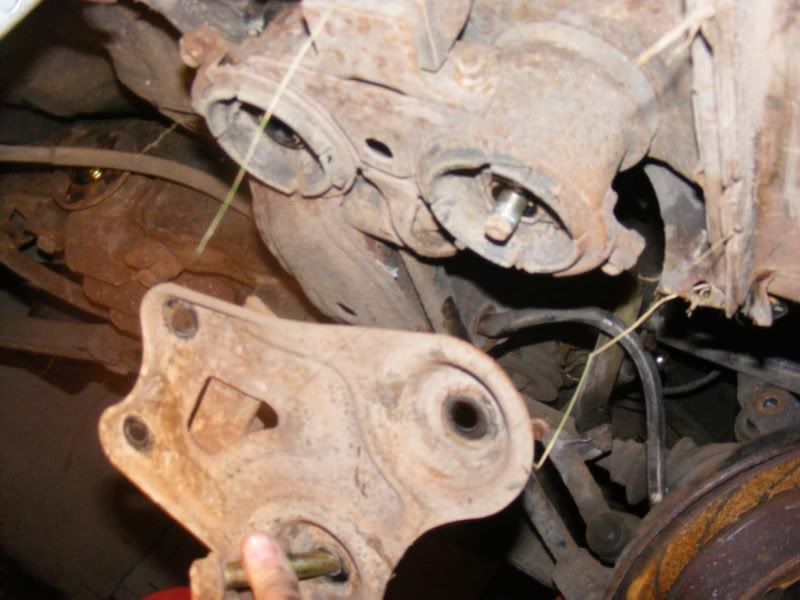
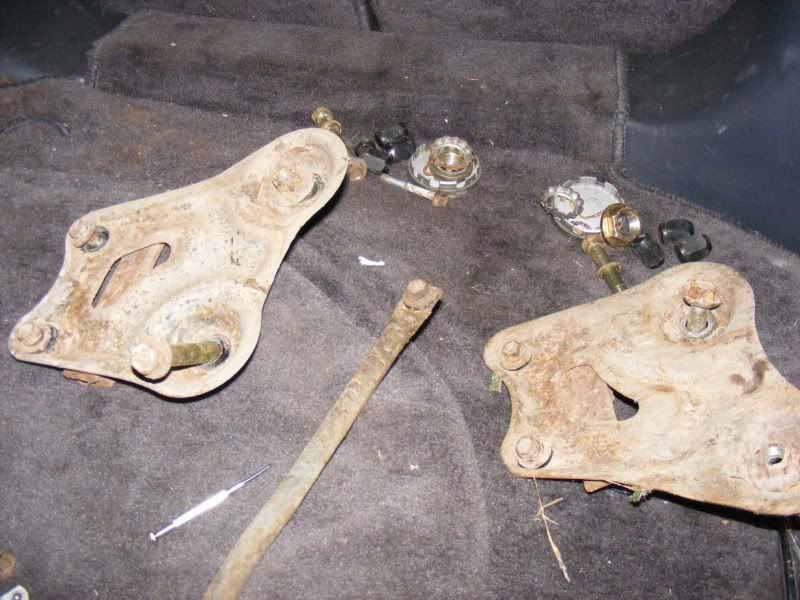
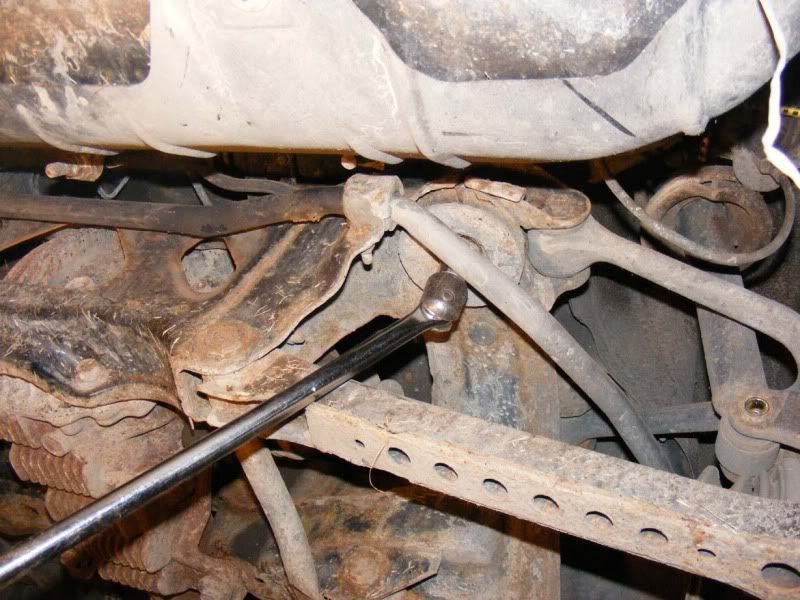
Step 16 - I found a 3/4" socket was the best for all the subframe bolts although you can try a 19mm if you prefer. Use a socket (with a breaker bar) and a spanner to remove the bolt holding the shock to the hub.
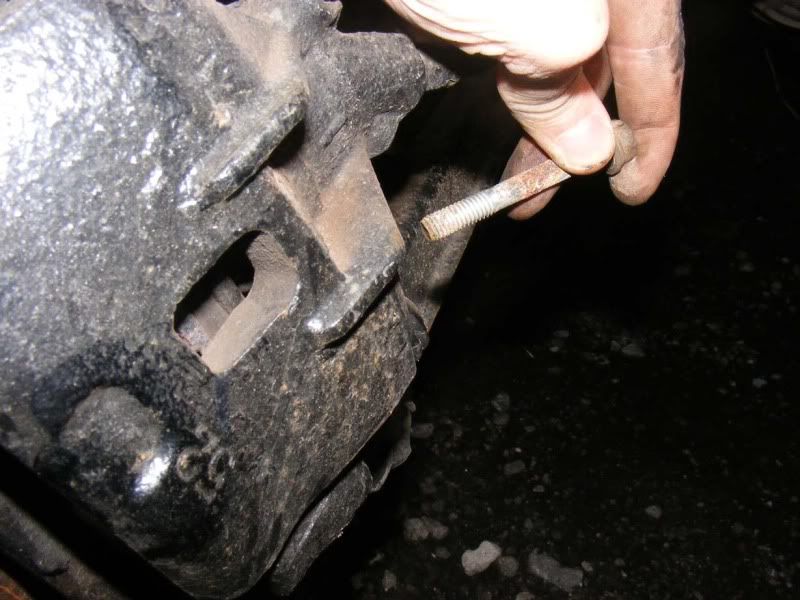
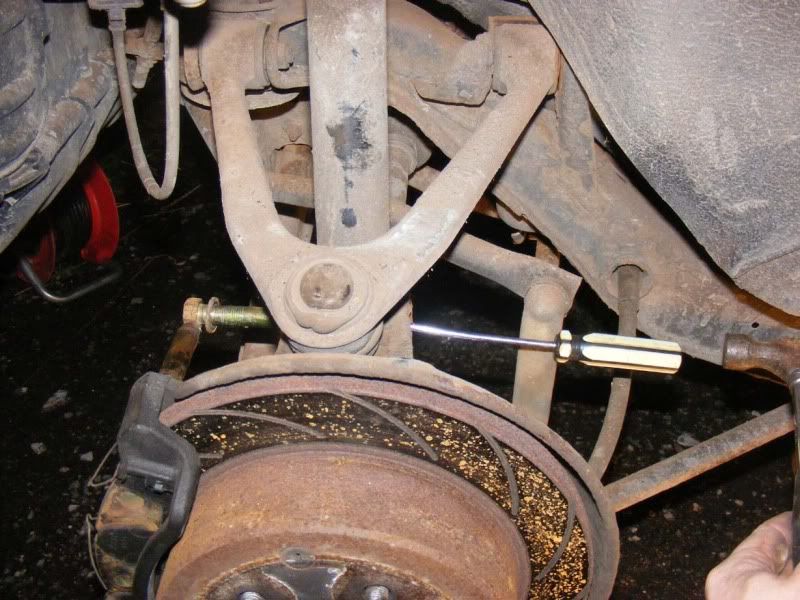
Once you've removed the nut, you will need to tap the bolt out with a mallet with good clean blows, use a screwdriver as a drift to tap it all the way through as shown in the second picture
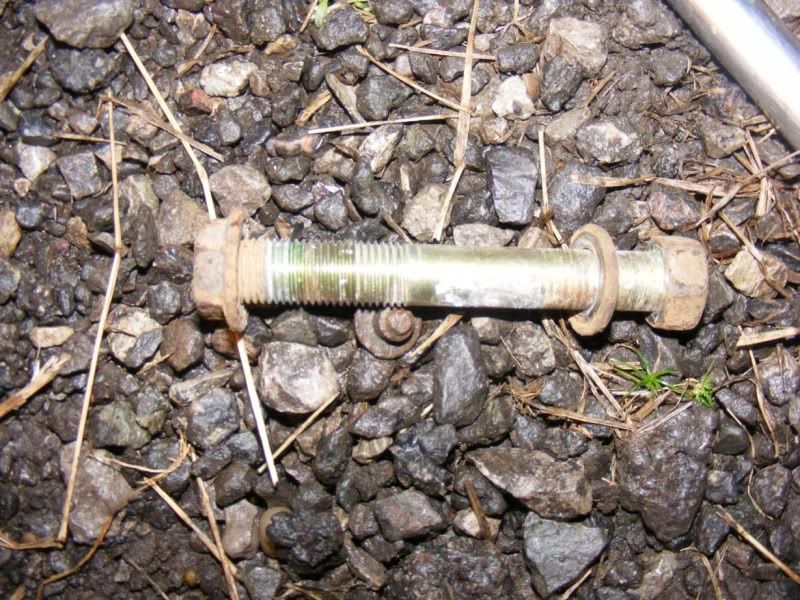
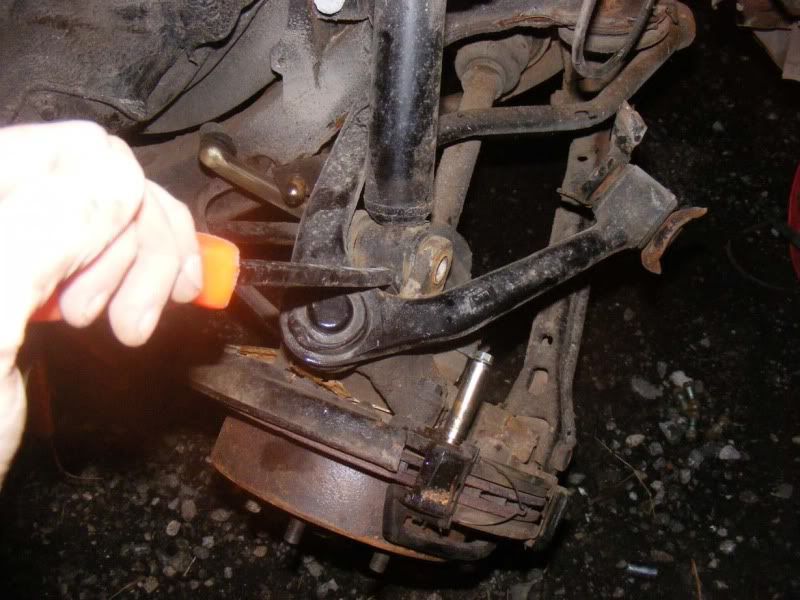
The third picture shows the bolt removed and the fourth shows a pry bar being used to move the suspension away from the hub
Step 17 - Once you have removed the shocks from the subframe on both sides you can disconnect the exhaust just after the second cat, it has a flange with two 17mm nuts (use a socket and a spanner to stop it from spinning)
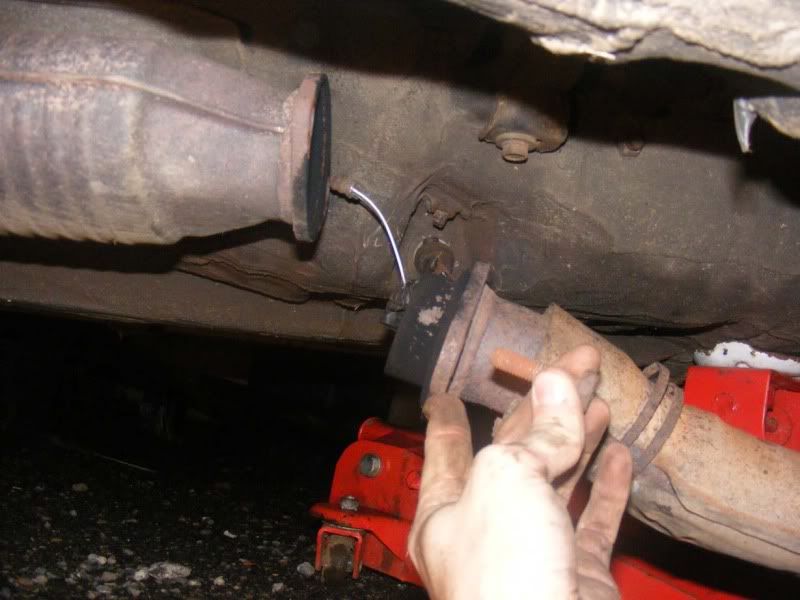
Step 18 - Disconnect any rubber hangers you may have, preferably not cable tied on like mine were! The exhaust should then drop away
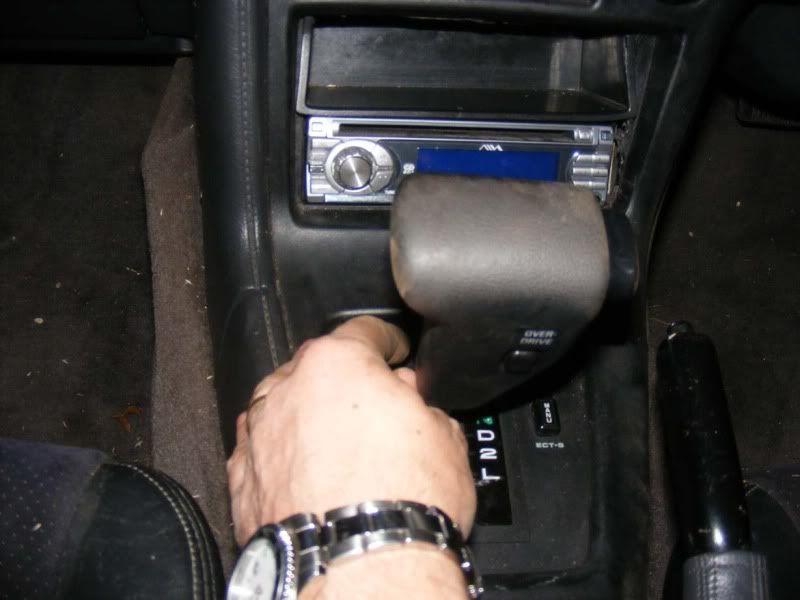
Step 19 - Now undo the 14mm nuts on the prop shaft where it joins the differential. Note you will need to rotate the prop to get to all the bolts. In an auto you will need to press the red button next to the gearstick and move the lever into neutral (just pop it in neutral for a manual), remove the handbrake and then crawl under and rotate the prop by hand before reapplying 'Park' and/or the handbrake to remove the other bolts.
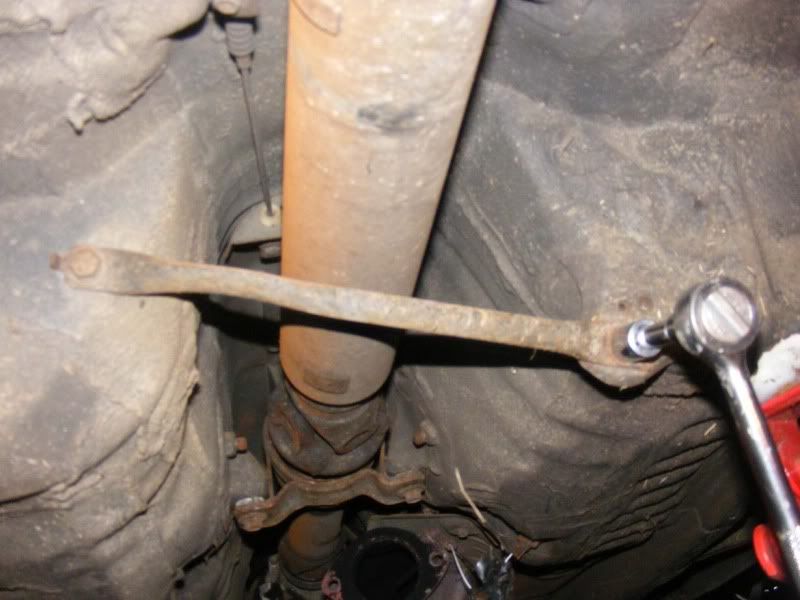
Step 20 - There is a stabiliser bar running underneath the prop shaft, remove the two (14mm IIRC) nuts holding this on and put it to one side
Step 21 - There is a lip on the prop to keep it in the diff, you can easily bend it away and lay it down on the floor now
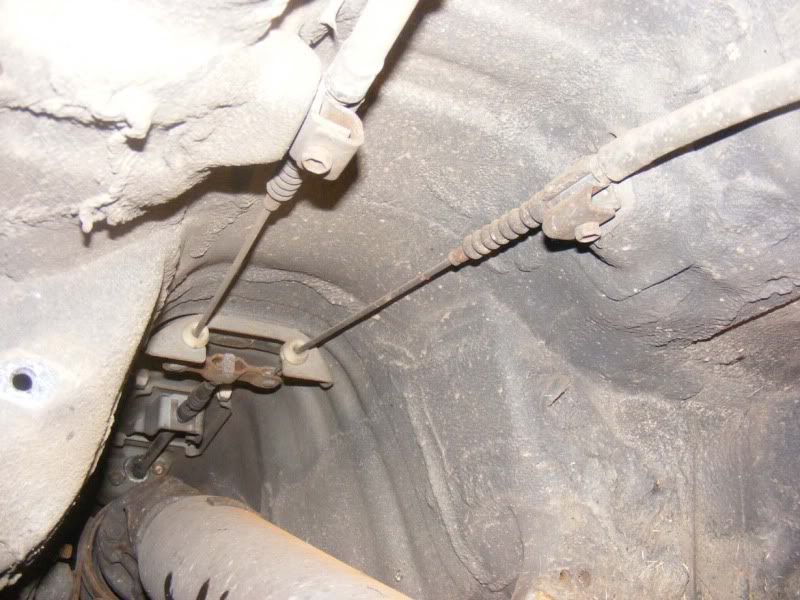
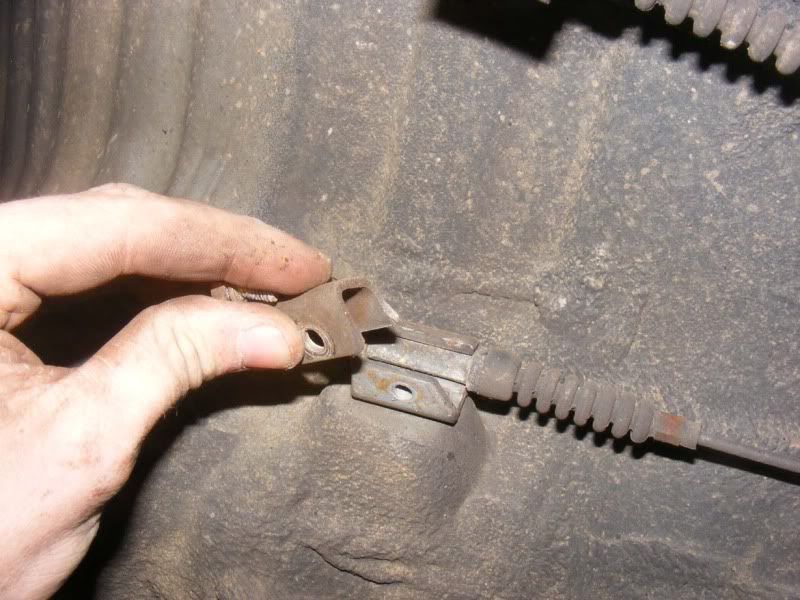
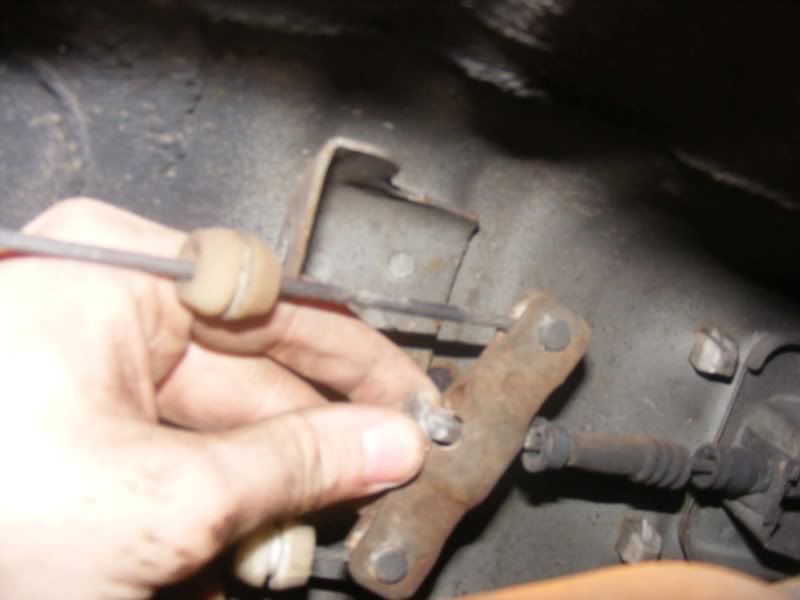
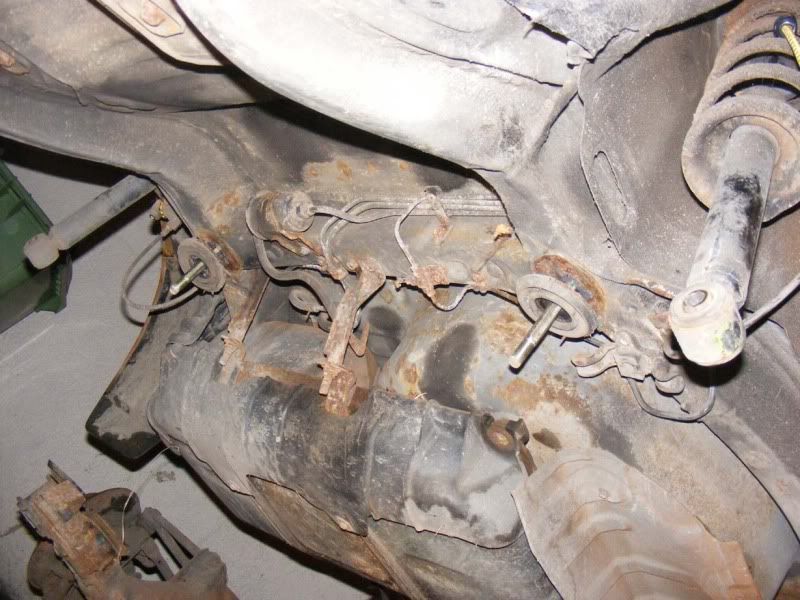
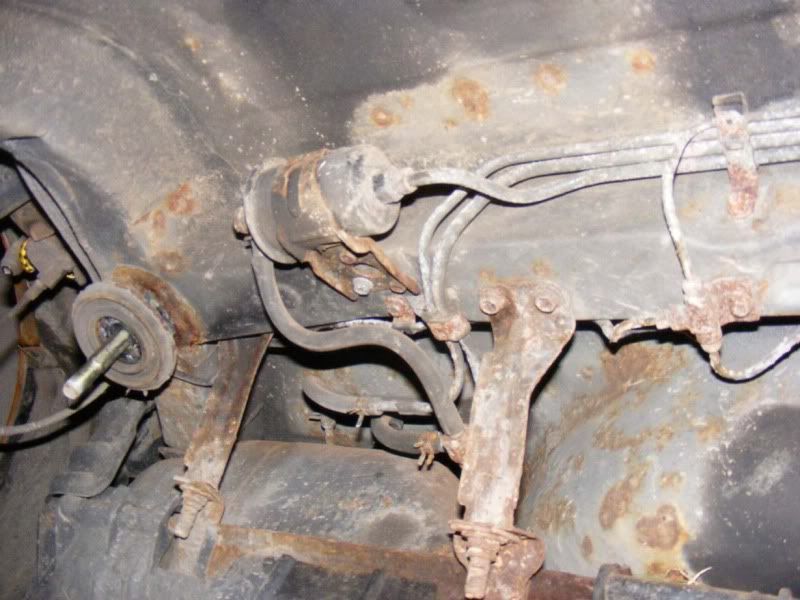
Step 22 - Now you have exposed the handbrake cables (picture 1), as you apply the handbrake, the wire you can see nearest the front of the car (left side of pic) pulls the bar connected to the other 2 cables and applies force to both hubs.
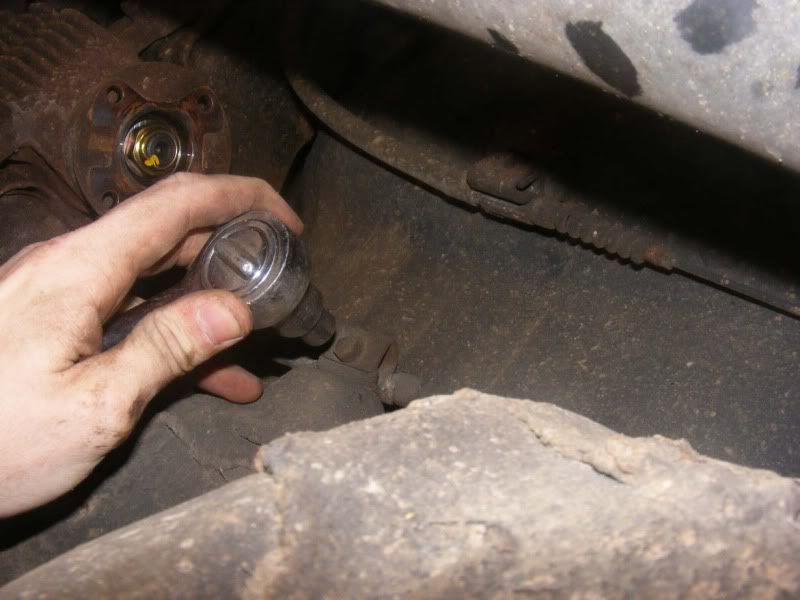
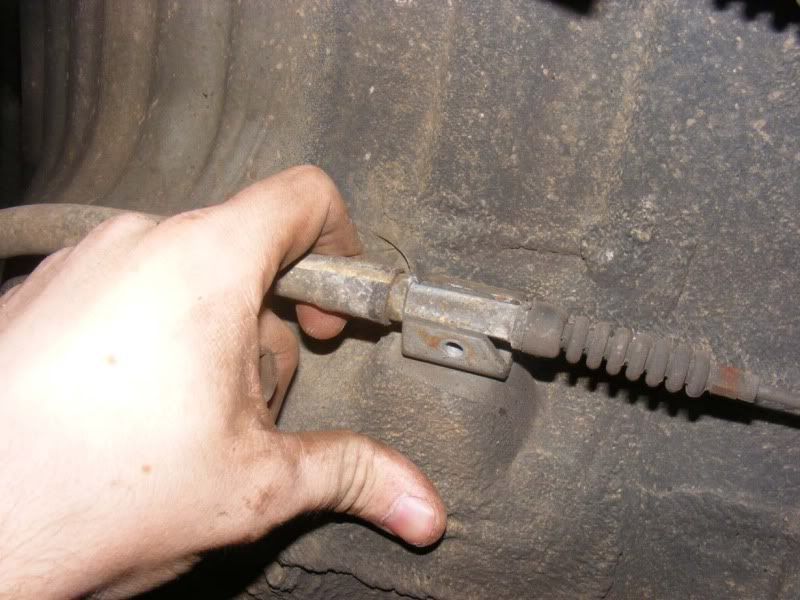
In the second picture you can see one of the 10mm nuts being removed that are holding the cables in place, these allow you to pull away the metal retainer as shown in picture 3.
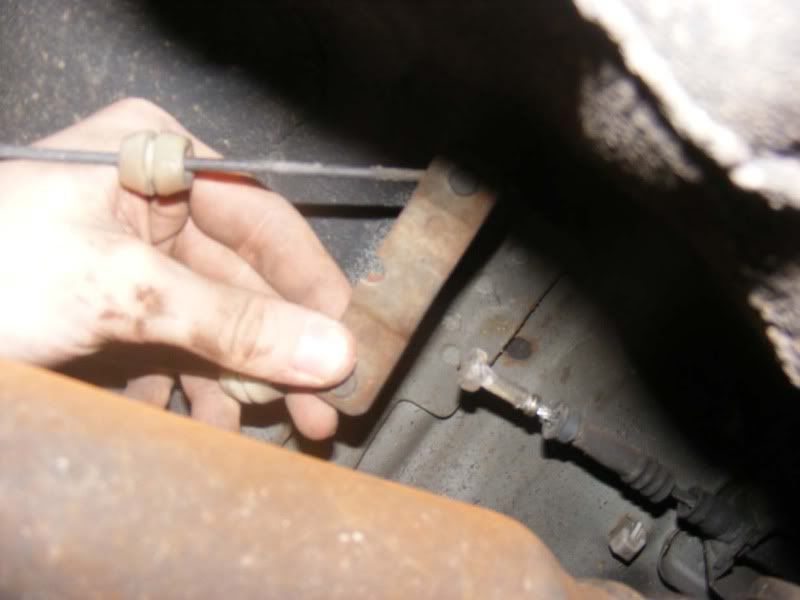
Now ease the cable away as shown in the fourth picture
Note you should have the handbrake off for step 22!
Step 23 - Use a pry bar (or flatblade screwdriver) to pop the cable guides out, they simply slide out
Step 24 - Push the small black boot towards the front of the car so the equaliser bar can be shifted forwards to remove tension on the cable, then rotate the end of the cable from vertical to horizontal so that it slides out
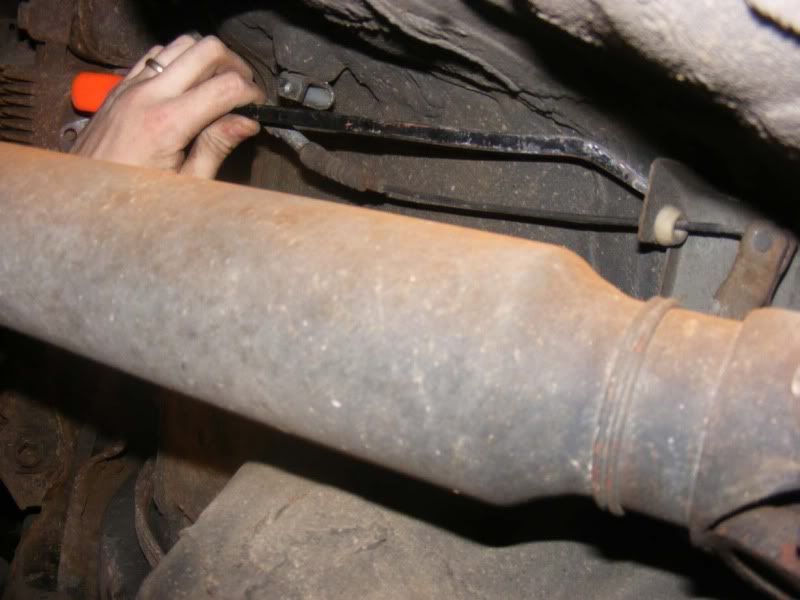
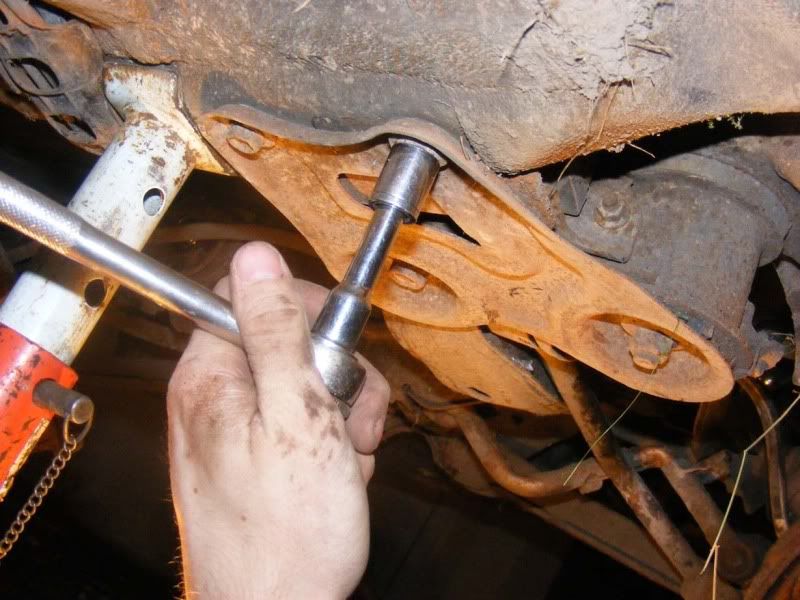
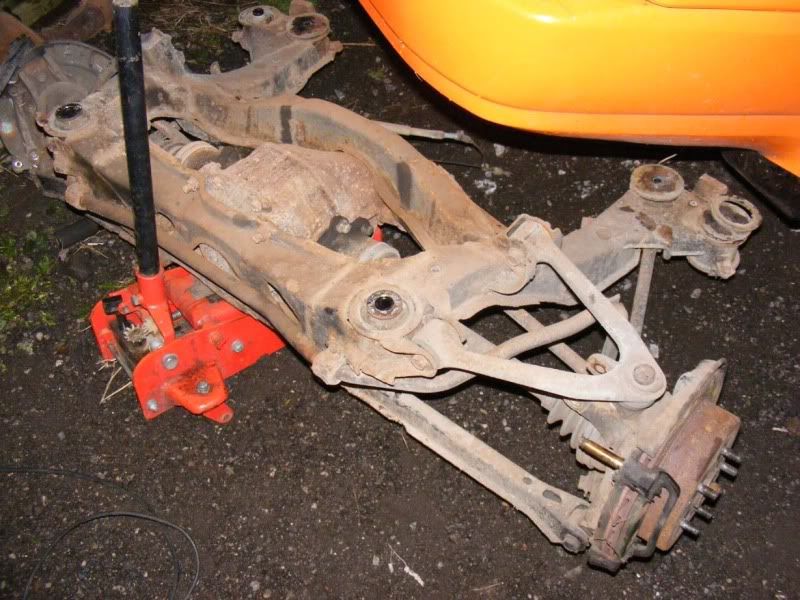
Step 25 - Now the handbrake, prop, exhaust and suspension are detached, the subframe is about ready to come out. Remove the 2 14mm bolts in the cover plate as shown in the first picture.
Next, go for the 3/4" (19mm) larger nuts/bolts to free the entire front of the subframe
Step 26 - Note, when you do this to both sides the subframe will drop if you haven't supported it so you will want to get a jack under the diff before you finish removing the bolts from step 25
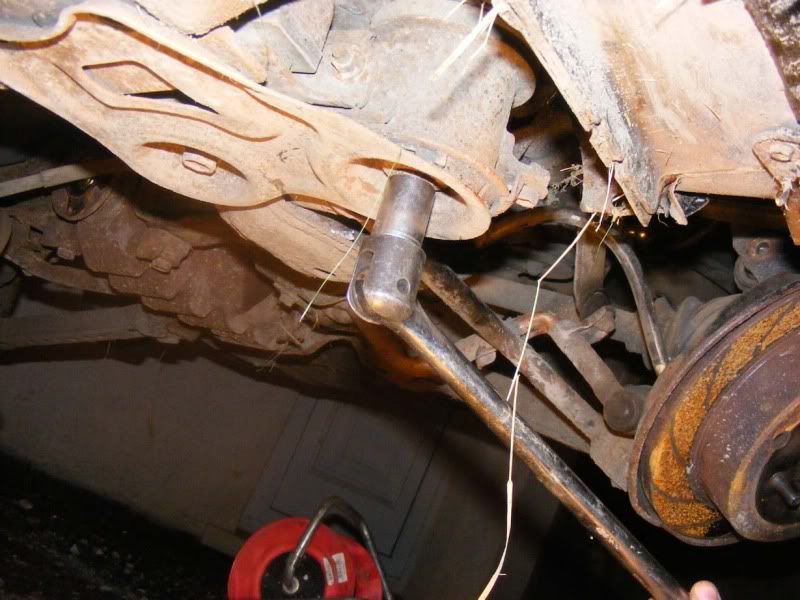
Step 27 - Locate the final two 3/4" bolts near the rear of the car that hold the subframe in place, remove both (note, these come with the metal disc as shown)
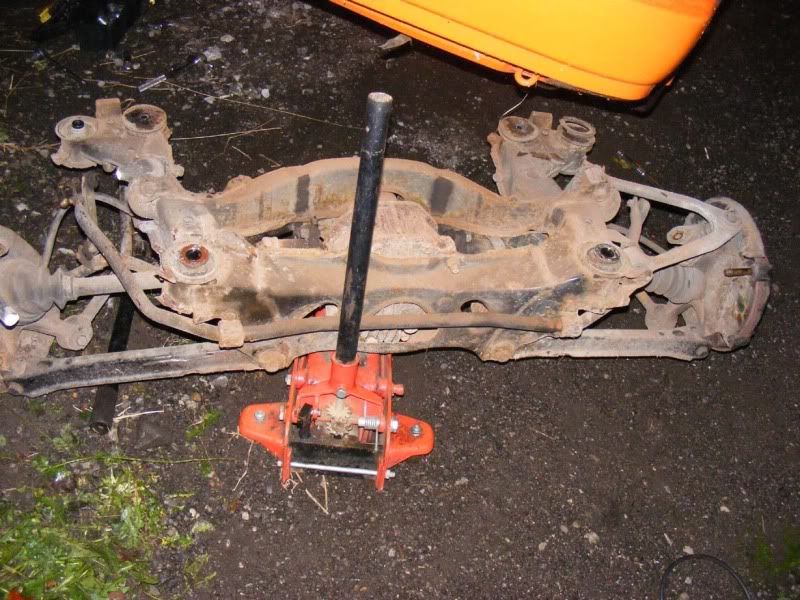
Step 28 - Now lower your jack under the diff and it should all drop away cleanly (and balance pretty well too)
Step 29 - Wheel your jack out and you're done
Step 30 - Crawl under the car and look at what you've left behind - there's the blasted fuel filter!
Now you have a lot of work disassembling the subframe!
Step 1 - Remove the centre cap to your wheel (jewellers screwdriver helped for mine) so you expose the large bolt that holds the driveshaft in place (note you only need to remove this if you are intending on separating the driveshaft from the hub)
Step 2 - Use a flatblade screwdriver to straighten the legs of the split pin out (tap it with a hammer to make it easier)
Step 3 - Insert a small screwdriver (or similar) to give you leverage to pull the clip out, this will be quite difficult sometimes so use leverage and plenty of wriggling and twisting - make sure your legs are as straight as possible first because it's very difficult otherwise
Step 4 - Use some mole grips to finish the job once you've got enough of the split pin through to get some purchase on it. Note they can sometimes be awkward and come out in pieces as shown in pic #2
Step 5 - With the split pin out you can remove the collar with your fingers, it should pull out easily
Step 6 - Now you can get to the big bolt with a 1.25" socket (32mm) socket. As with much of this guide you are working with tough bolts so you need to use a breaker bar and plenty of leverage, brute force is not the approach here (well, some of that too actually!) use brains and a long breaker bar
Step 7 - Once you have slackened the driveshaft bolt (you don't need to remove it yet but can if you like), crack off the wheel nuts while the car is still on the floor (don't remove them though!)
Step 8 - Now jack the car up so you can start the real work. Note it's easier to jack up using the subframe because you can then support the car on axle stands just in front of this as shown
Step 9 - With the car raised you can remove that driveshaft bolt fully
Step 10 - Now remove the wheel nuts and wheels completely
Step 11 - Now you have exposed the brakes, suspension etc you can start stripping things down
Step 12 - Using a 12mm spanner (or socket) slacken off the bottom bolt on the brake caliper. Remove this completely
Step 13 - Now lift the caliper upwards and it will pivot on the top sliding pin. If it is particularly stubborn then the back of a claw hammer will help
Step 14 - Slide the caliper off towards the car and it will pull away completely
Step 15 - Secure the caliper against the suspension strut with string/wire/bungee cord etc
Step 16 - I found a 3/4" socket was the best for all the subframe bolts although you can try a 19mm if you prefer. Use a socket (with a breaker bar) and a spanner to remove the bolt holding the shock to the hub.
Once you've removed the nut, you will need to tap the bolt out with a mallet with good clean blows, use a screwdriver as a drift to tap it all the way through as shown in the second picture
The third picture shows the bolt removed and the fourth shows a pry bar being used to move the suspension away from the hub
Step 17 - Once you have removed the shocks from the subframe on both sides you can disconnect the exhaust just after the second cat, it has a flange with two 17mm nuts (use a socket and a spanner to stop it from spinning)
Step 18 - Disconnect any rubber hangers you may have, preferably not cable tied on like mine were! The exhaust should then drop away
Step 19 - Now undo the 14mm nuts on the prop shaft where it joins the differential. Note you will need to rotate the prop to get to all the bolts. In an auto you will need to press the red button next to the gearstick and move the lever into neutral (just pop it in neutral for a manual), remove the handbrake and then crawl under and rotate the prop by hand before reapplying 'Park' and/or the handbrake to remove the other bolts.
Step 20 - There is a stabiliser bar running underneath the prop shaft, remove the two (14mm IIRC) nuts holding this on and put it to one side
Step 21 - There is a lip on the prop to keep it in the diff, you can easily bend it away and lay it down on the floor now
Step 22 - Now you have exposed the handbrake cables (picture 1), as you apply the handbrake, the wire you can see nearest the front of the car (left side of pic) pulls the bar connected to the other 2 cables and applies force to both hubs.
In the second picture you can see one of the 10mm nuts being removed that are holding the cables in place, these allow you to pull away the metal retainer as shown in picture 3.
Now ease the cable away as shown in the fourth picture
Note you should have the handbrake off for step 22!
Step 23 - Use a pry bar (or flatblade screwdriver) to pop the cable guides out, they simply slide out
Step 24 - Push the small black boot towards the front of the car so the equaliser bar can be shifted forwards to remove tension on the cable, then rotate the end of the cable from vertical to horizontal so that it slides out
Step 25 - Now the handbrake, prop, exhaust and suspension are detached, the subframe is about ready to come out. Remove the 2 14mm bolts in the cover plate as shown in the first picture.
Next, go for the 3/4" (19mm) larger nuts/bolts to free the entire front of the subframe
Step 26 - Note, when you do this to both sides the subframe will drop if you haven't supported it so you will want to get a jack under the diff before you finish removing the bolts from step 25
Step 27 - Locate the final two 3/4" bolts near the rear of the car that hold the subframe in place, remove both (note, these come with the metal disc as shown)
Step 28 - Now lower your jack under the diff and it should all drop away cleanly (and balance pretty well too)
Step 29 - Wheel your jack out and you're done
Step 30 - Crawl under the car and look at what you've left behind - there's the blasted fuel filter!
Now you have a lot of work disassembling the subframe!
