Your cam belt (or timing belt as it is also known) performs an important role - it basically keeps the top end of the engine in synch with the bottom. As the pistons are fired, they translate their movement through the rods to the crankshaft which rotates 2 complete revolutions for a combustion cycle (intake and compression are one revolution, combustion and exhaust are another).
The top end of the engine i.e. the cylinder head works twice as fast because valves may need to open for the rising stroke of a cycle then close again for the falling e.g. the exhaust valve will open on the exhaust stroke but then will need to close for the intake of fresh air. The cam belt maintains the precise timing required for the cylinder head and block to work in synch with each other.
The 7MGTE is a non-interference engine which means the valves can never normally hit the pistons. There are cut-outs in the piston crowns (top) which give enough clearance for a fully open valve to still avoid contact. This is great news in the case of a cam belt failure because it is very common for the valves and pistons to collide in other (interference) engines. Basically the Supra doesn't suffer any real side effects of a cam belt snap other than the need for a new belt.
The belt should be periodically renewed by either time or mileage. I believe the advised schedule is 60k miles or 4 years from Toyota.
NOTE: You will need to remove the crank pulley from the engine to do this so the crank pulley bolt will have to be removed too. This is VERY tight and I recommend you follow the instructions in the engine removal guide to crank this off with the starter motor before you do anything else - you have been warned!
Step 1 - Remove the spark plugs (see the guide for changing the plugs), this gets rid of a lot of pipework and also allows you to turn the engine over easily without pressure building in the cylinders
Step 2 - Sadly I'm working on an engine on a stand but for normal cam belt changes you need to remove the viscous fan, air con belt and fan belt. You will also need to remove the top hose to the radiator to reach the same stage my engine is at. There is also an air con bracket you may need to move as well as a power steering air pipe but nothing too dissimilar to the guide
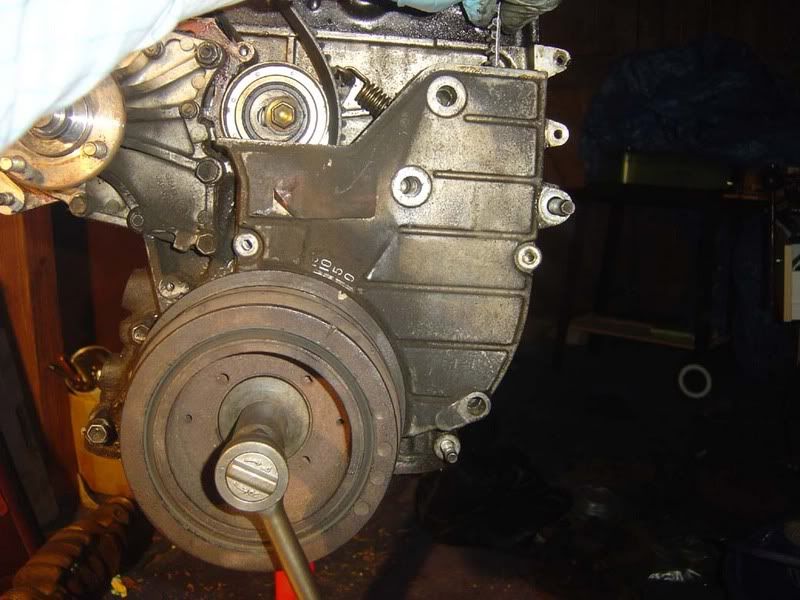
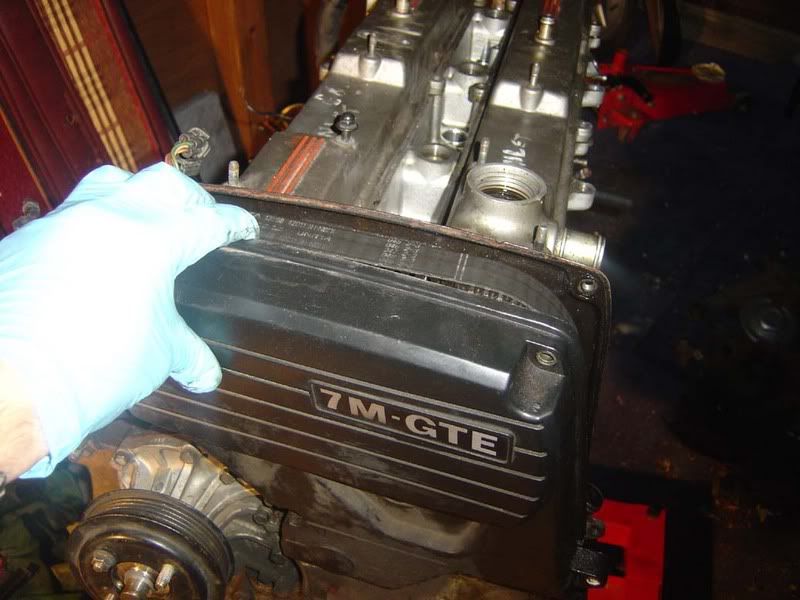
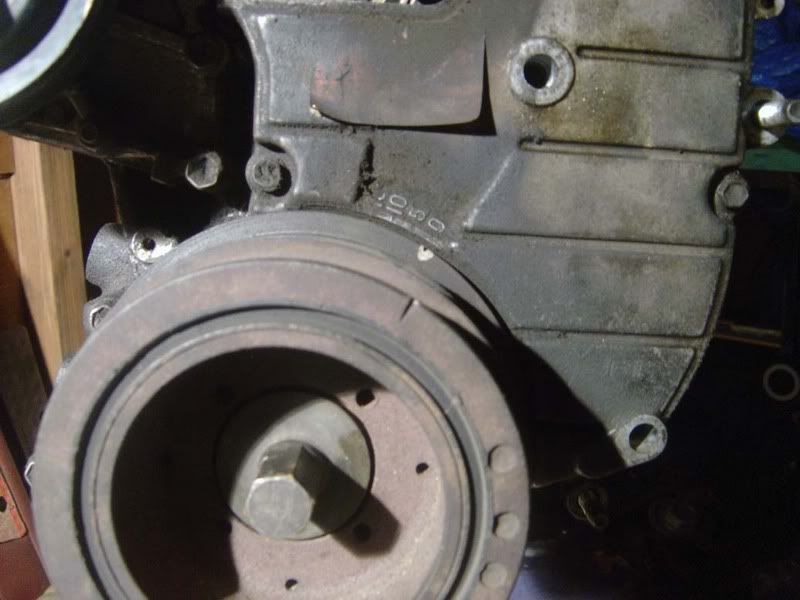
Step 3 - You need to remove 'number 3' timing belt cover which is the top one at the front of the engine. The picture shows all the nuts you need to remove, they are all 10mm
Step 4 - Before the cover can come off you need to remove the water outlet / thermostat housing which is simply another 2 10mm bolts. Once removed you can pull the housing clear by hand

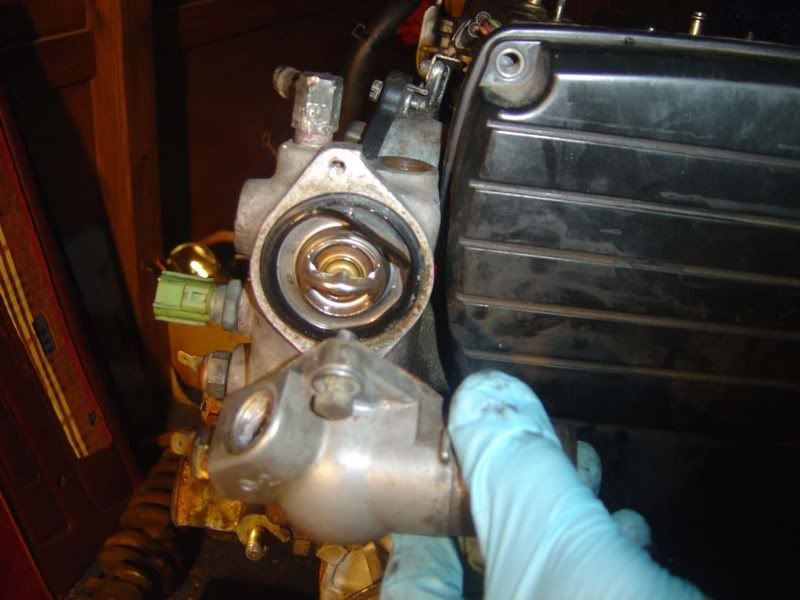
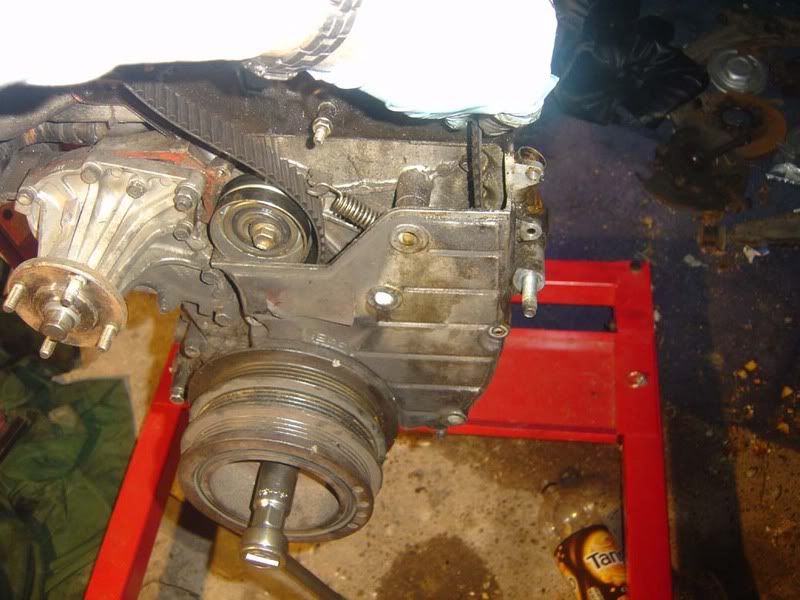
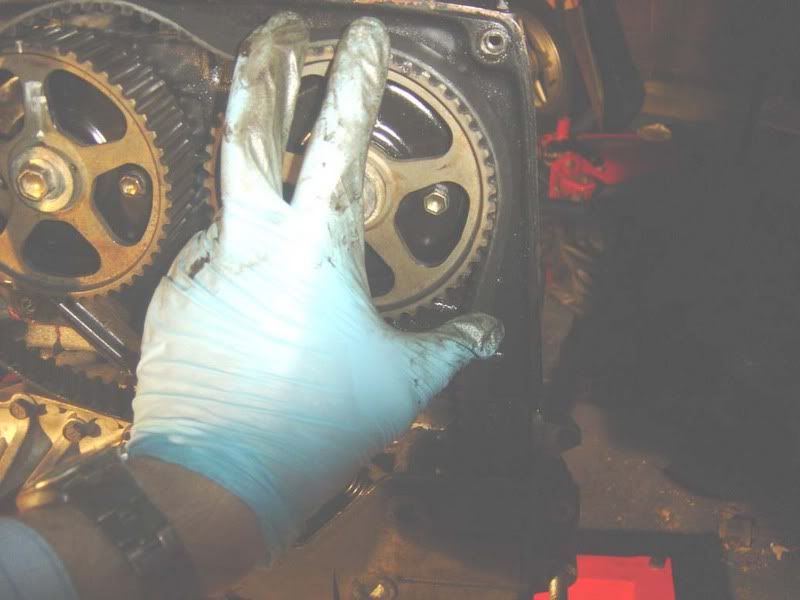
Step 5 - Now pull the timing belt cover clear of the engine. This may have sealant around it or a gasket, either way remove the cover and clean away any remnants of the previous seal
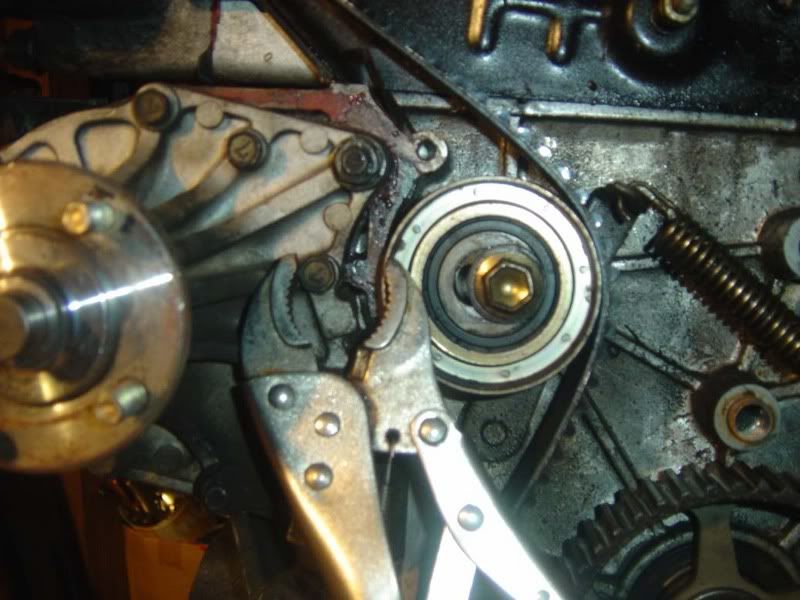
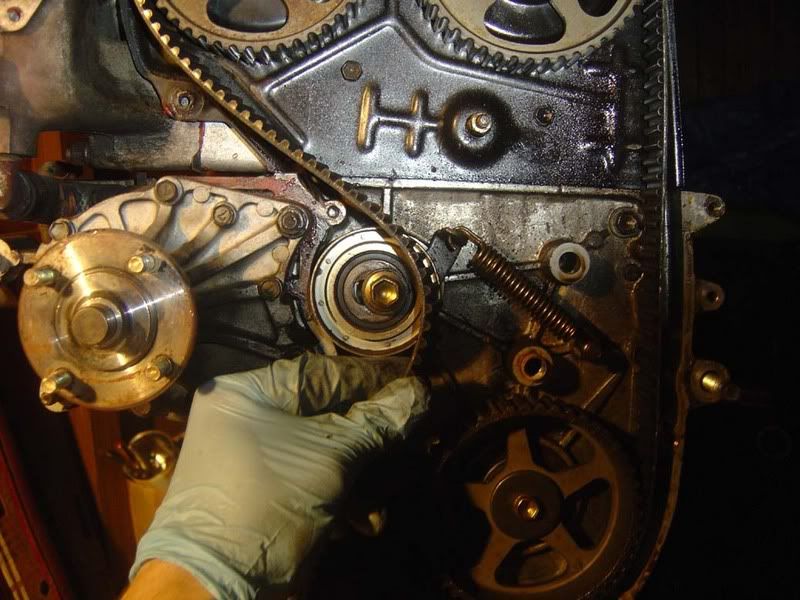
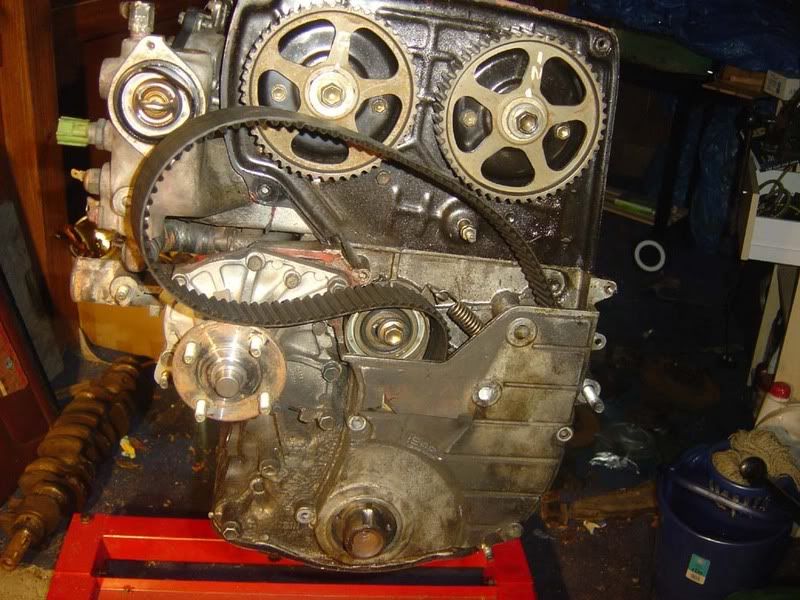
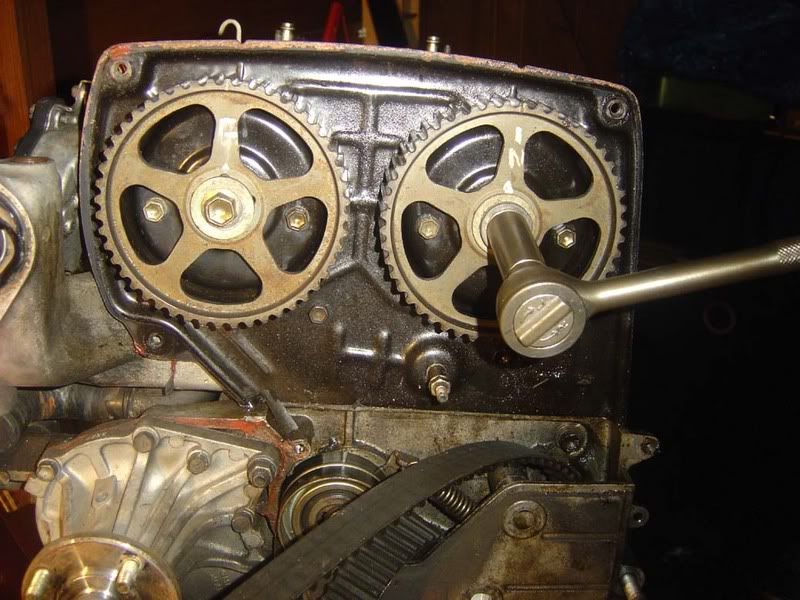
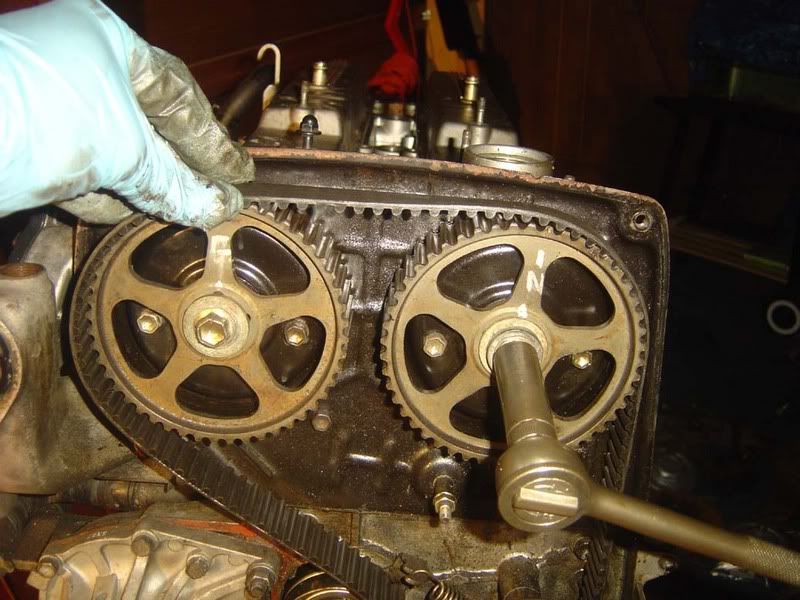
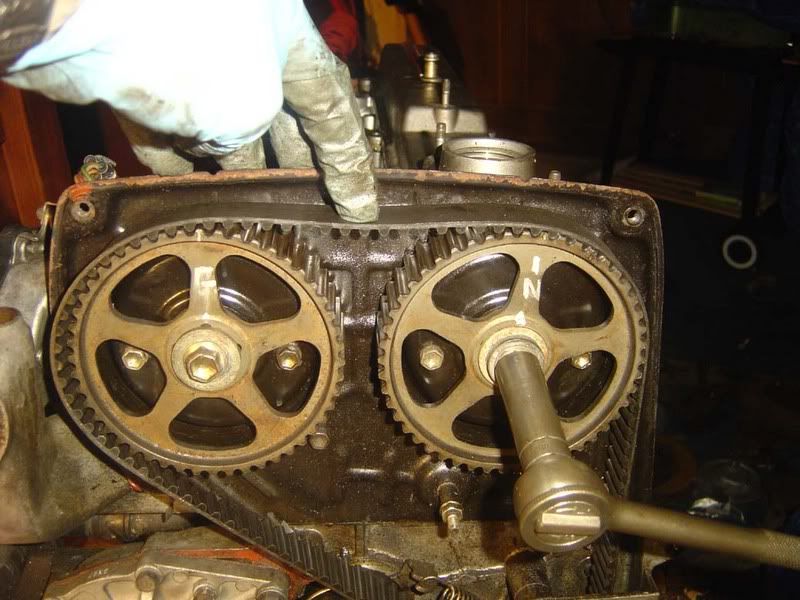
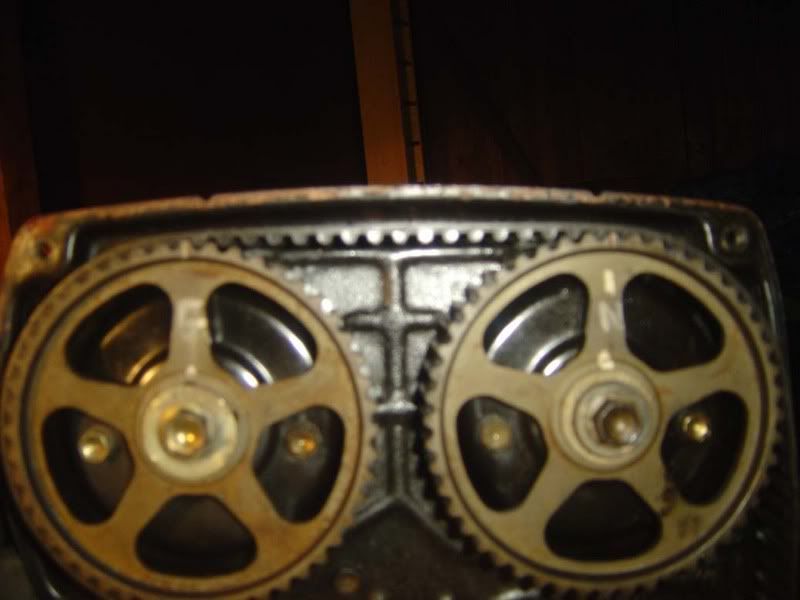
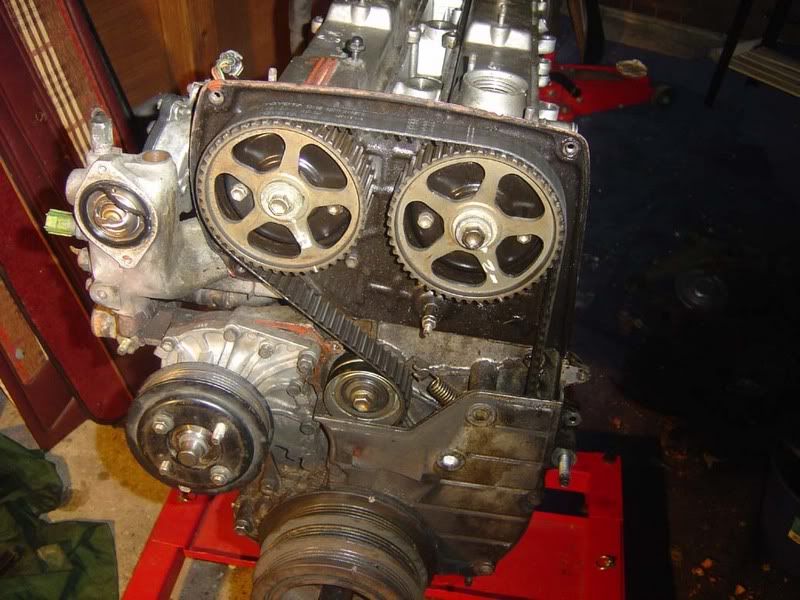
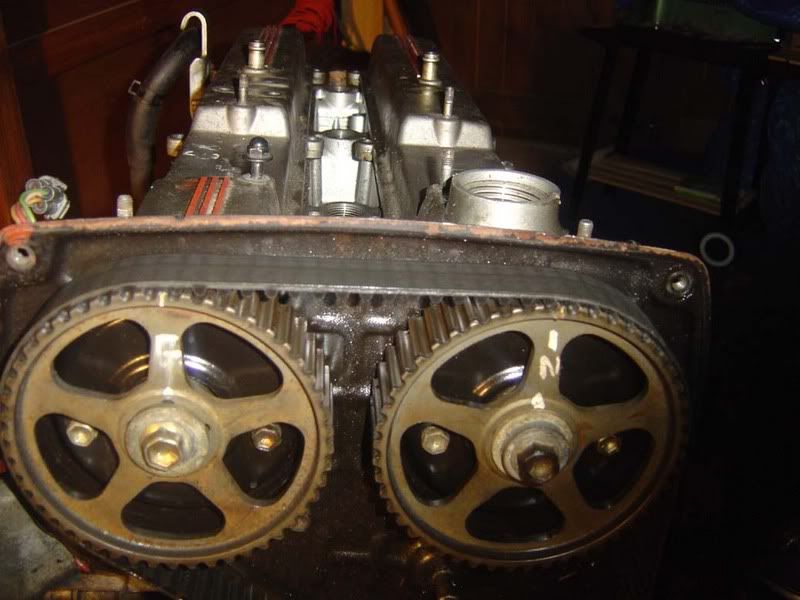
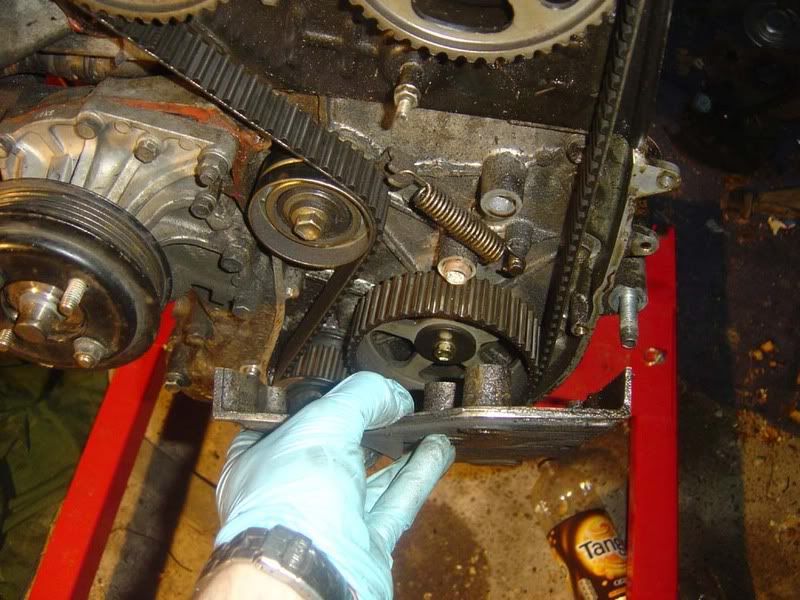
Step 6 - Now you should have a clear view of both cam shaft timing pulleys (cam pulleys). The inlet is the one on the right hand side as you face the engine (as if you didn't know!) and the exhaust is on the left. The pulley you can see underneath the two cam pulleys is the idler pulley which is used to tension the cam belt.
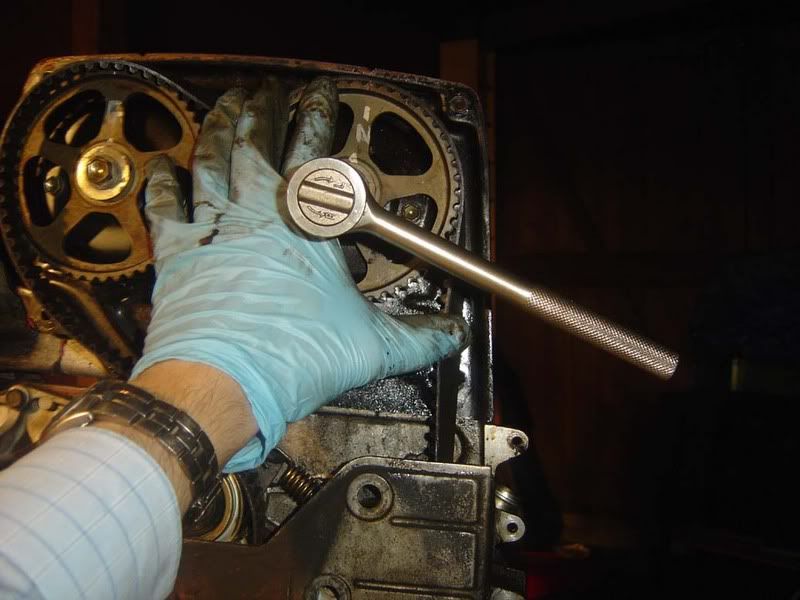
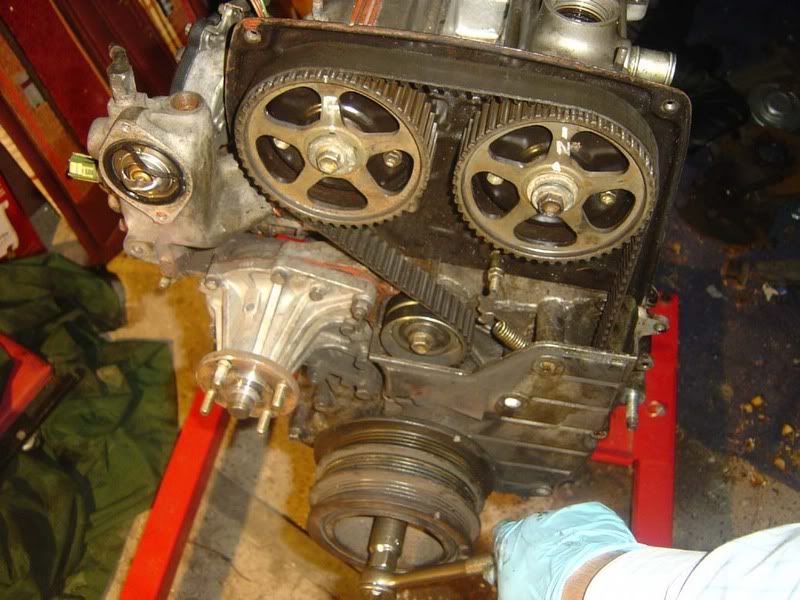
Step 7 - Fit a 19mm socket to the crankshaft and rotate it (clockwise) until all the notch on the pulley is at the 0 mark on the bottom (number 1) timing cover (top dead centre or tdc). The second picture shows the crank pulley aligned with the 0 mark - you will notice someone has put a dot of tipex/white paint on to make it clear where the mark on the pulley is, not a bad idea.
Note that at the start you were told to 'crack off' the crank pulley bolt, you should still be able to apply enough force to rotate the engine without tightening the bolt up much at all so don't worry about getting it off again
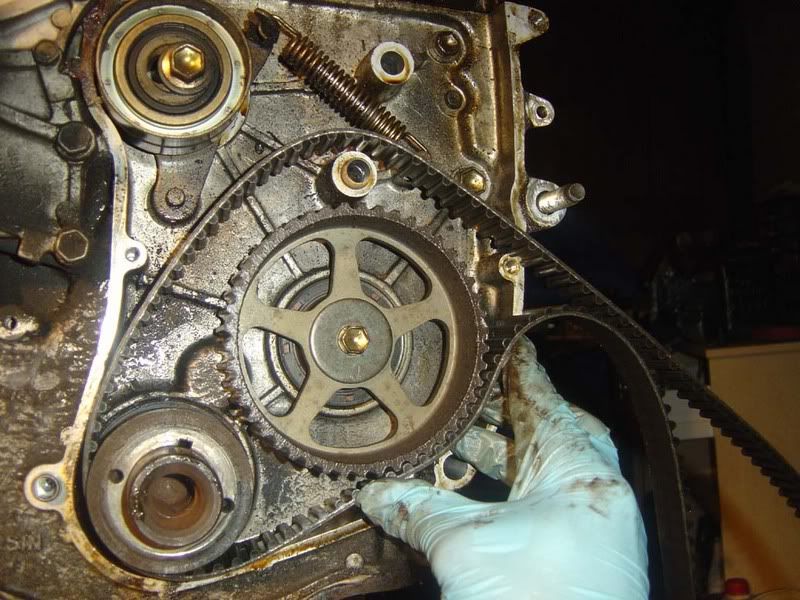
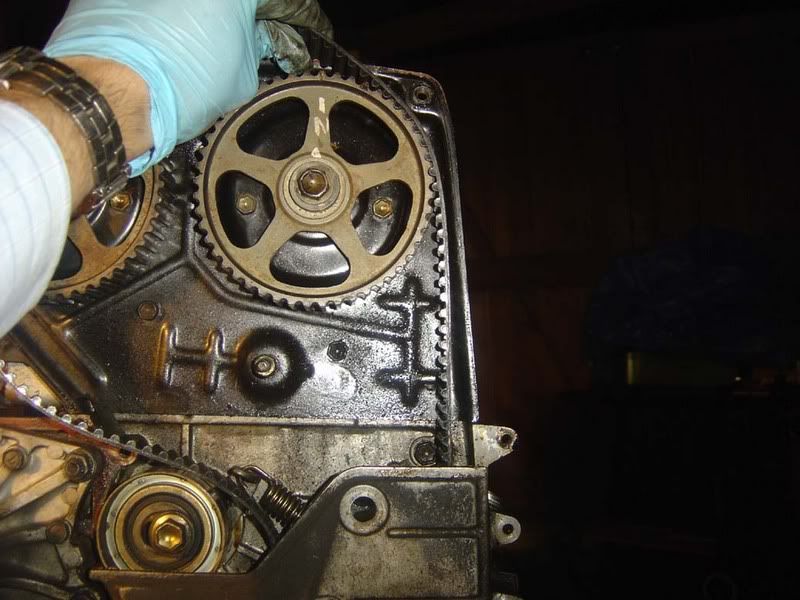
Step 8 - Check that the matchmarks on the cam pulleys are aligned. These are grooves in the pulleys which should be pointing straight up in alignment with the marking on the black metal backplate (timing belt cover #2 to give it the proper name!). If they are way out then you need to rotate the pulley a full 360 degrees because you are half way through the 4 stroke cycle
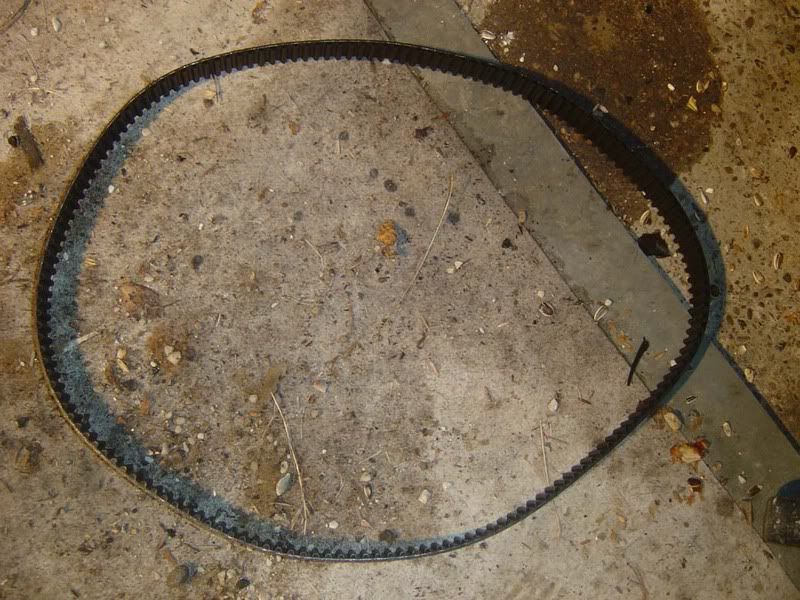
Step 9 - The belt is directional and usually has arrows on it. If you are removing it and for some reason will be refitting the belt then make sure you know the direction of rotation and mark it with a white pen/tipex to be sure.
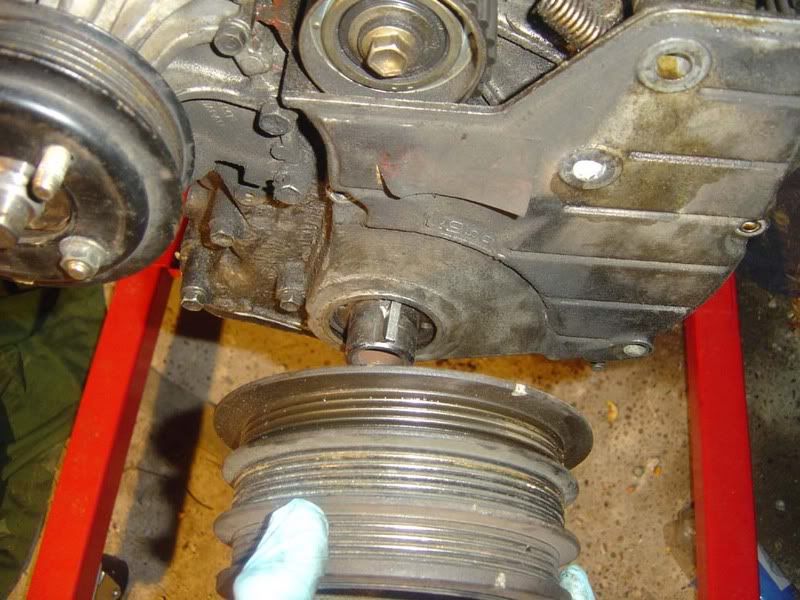
Onto the lower (number 1) timing belt cover next. Again, this is just 10mm bolts although one is behind the crank pulley - you did crack this off earlier didn't you?
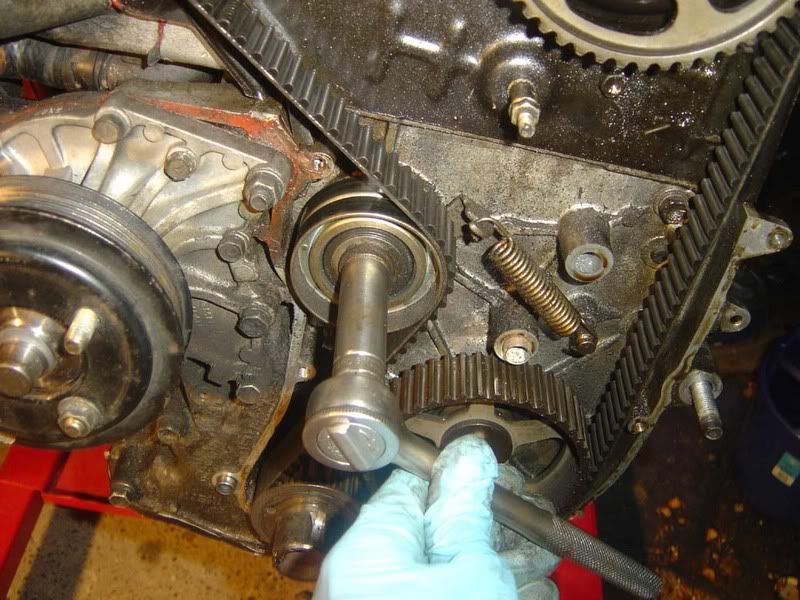
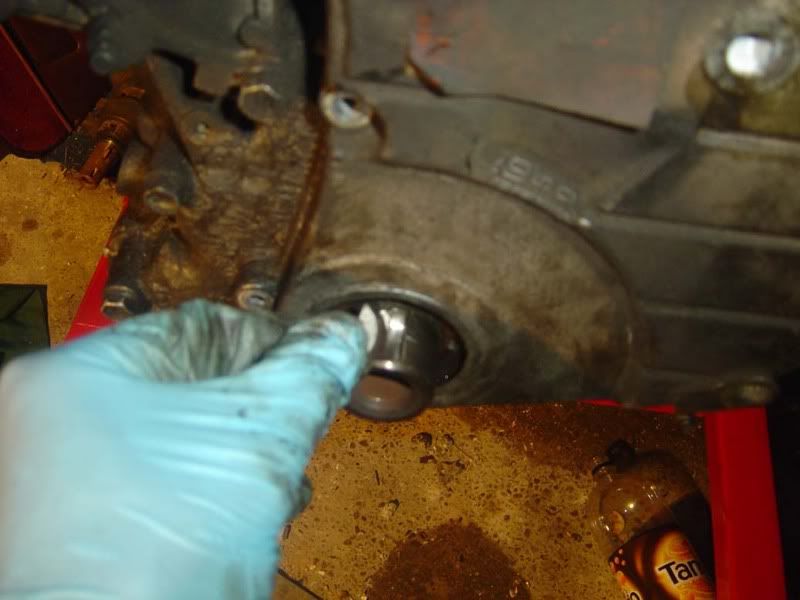
Step 10 - Remove the 19mm crank pulley bolt, this will be slightly tight after turning the engine using the pulley in step 7 but you should be able to just restrain the crank pulley in one hand and undo the nut with the other.
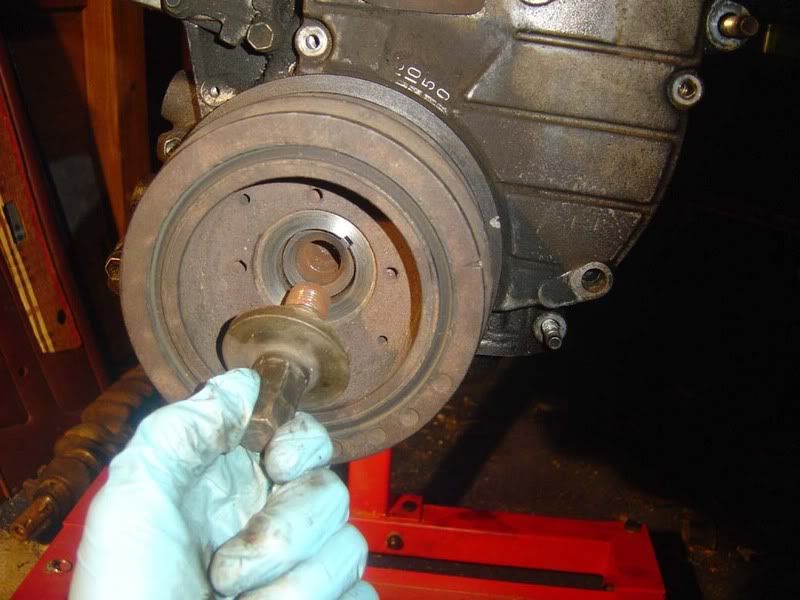
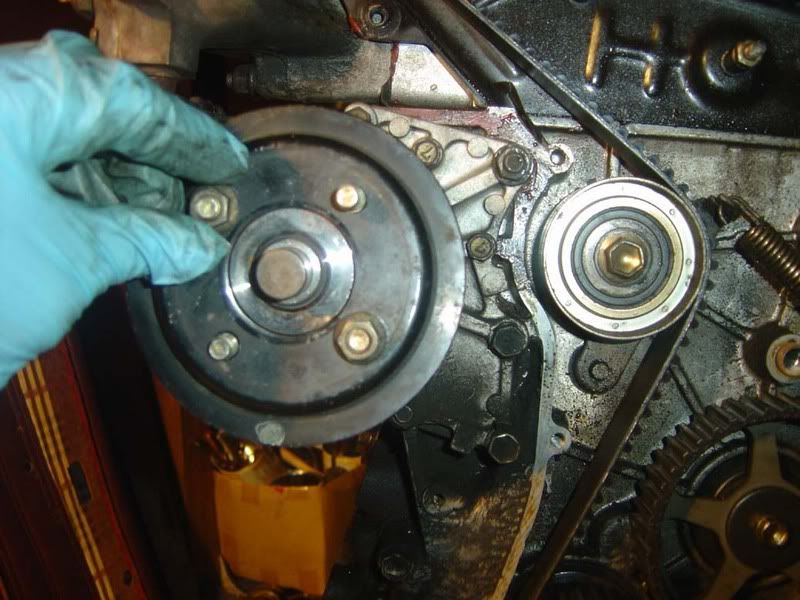
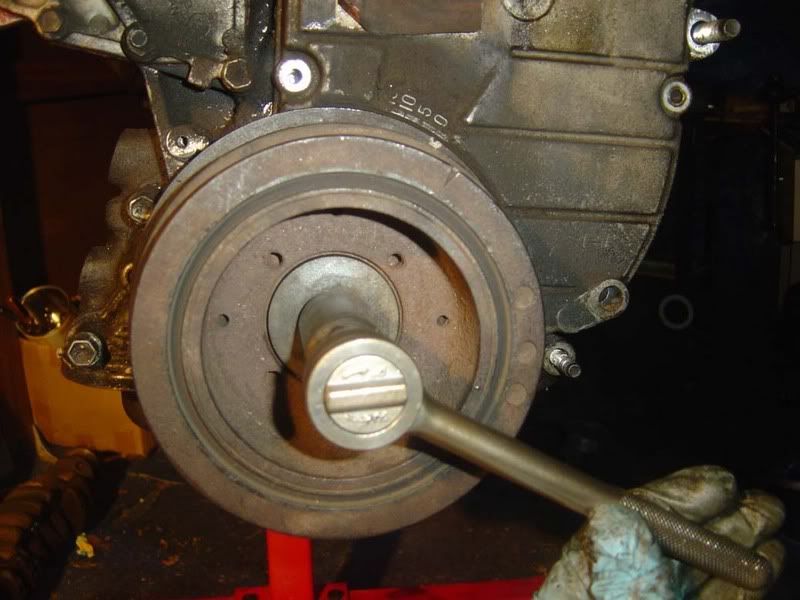
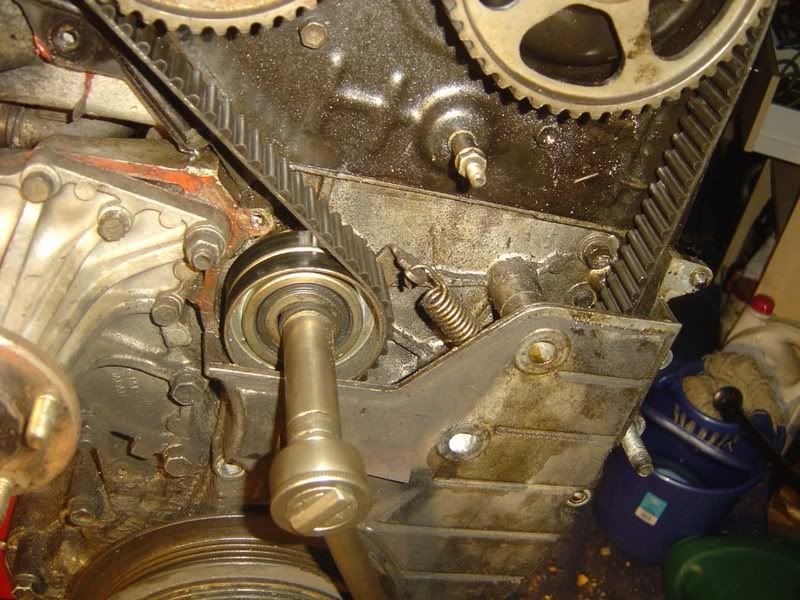
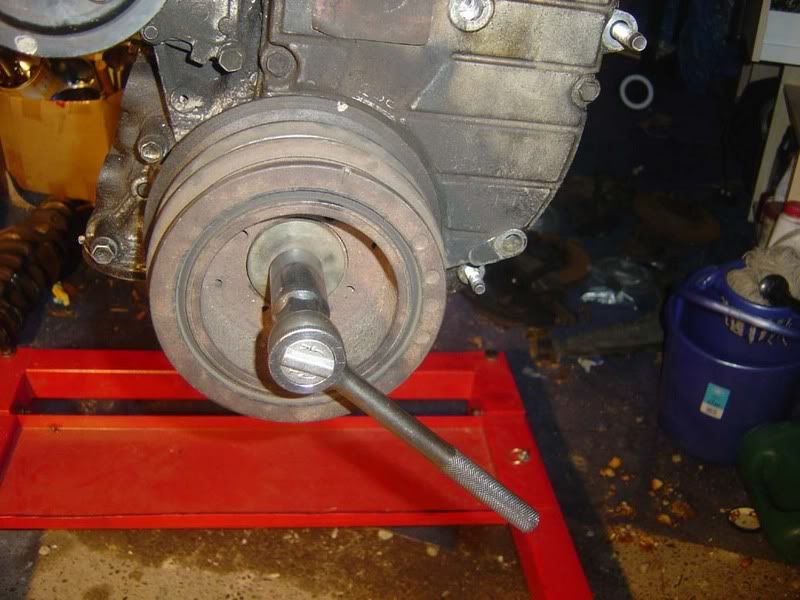
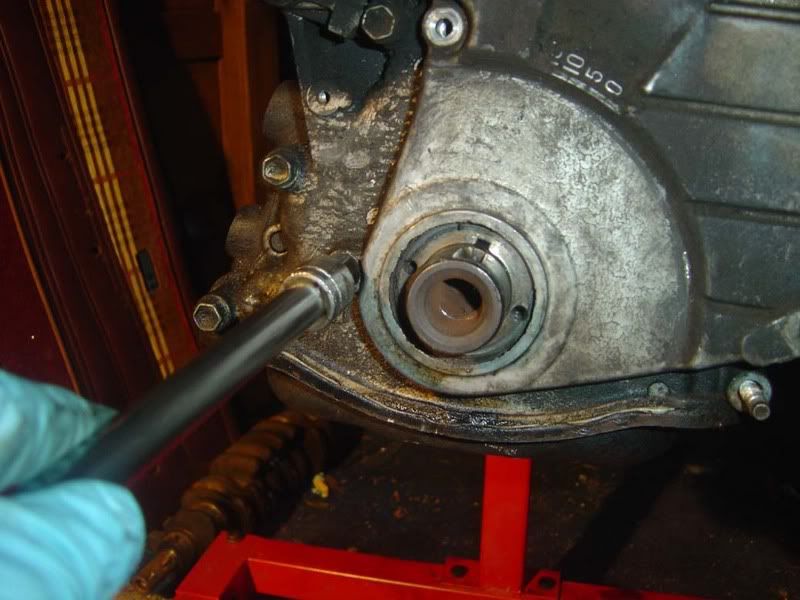
Step 11 - Now you have to get the pulley off. You can get special tools to remove this but with a bit of pulling (no puns!) you can remove it from the engine. It must come off square or you will stress the woodruff key that holds it on the crank (we'll look at that next so don't panic if you don't know what one is).
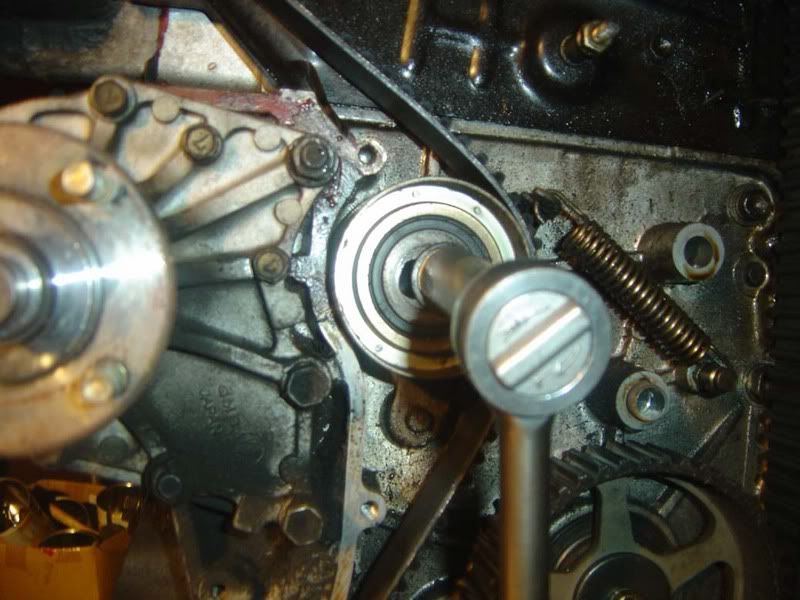
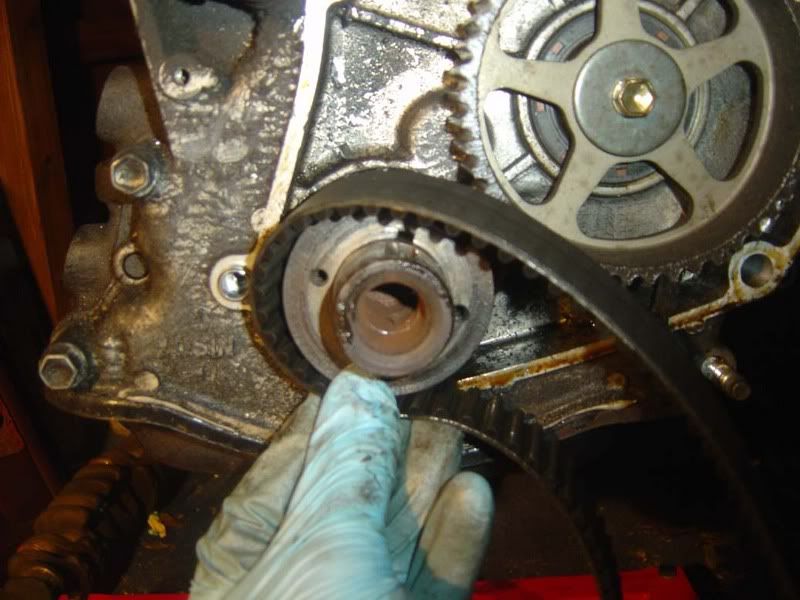
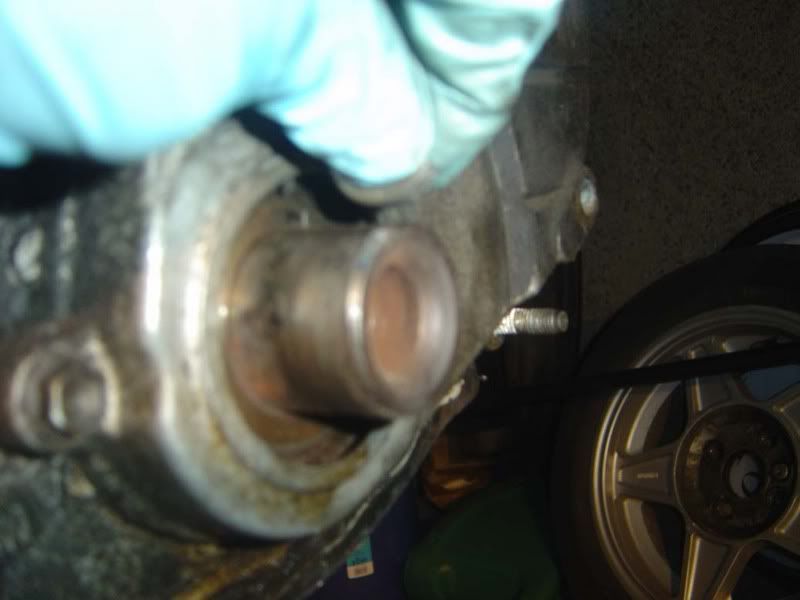
Step 12 - With the pulley removed you are looking at the nose of the crankshaft itself. You'll notice a funny piece of metal sticking out of the crank, this is the woodruff key. To ensure the pulley stays aligned with the crank and doesn't rotate at all, this very simple piece of metal is inserted. It's a semi-circle of metal that drops into a groove in the crank and then protrudes slightly as you can see from the first picture.
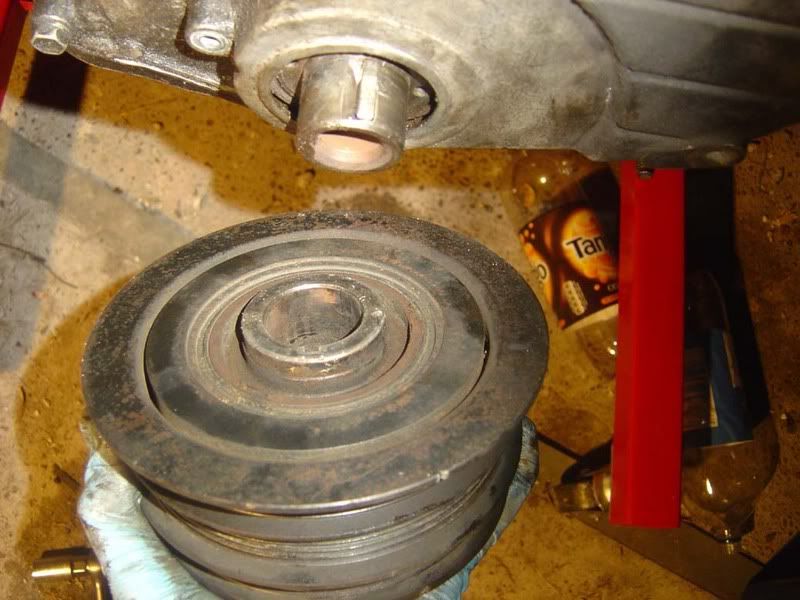
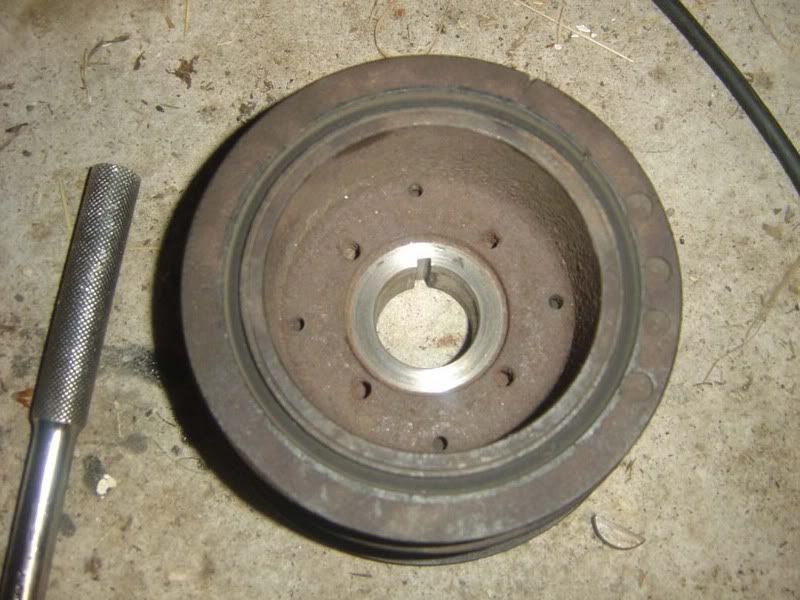
The crank pulley also has a groove cut out of it, this is shown in the second picture. The woodruff key slides into this groove and is locked in position.
Remove the woodruff key and place it somewhere safe - do not lose it!
Step 13 - Now you can get that final 10mm bolt for the lower cover and remove it (no gasket on this one)
The top end of the engine i.e. the cylinder head works twice as fast because valves may need to open for the rising stroke of a cycle then close again for the falling e.g. the exhaust valve will open on the exhaust stroke but then will need to close for the intake of fresh air. The cam belt maintains the precise timing required for the cylinder head and block to work in synch with each other.
The 7MGTE is a non-interference engine which means the valves can never normally hit the pistons. There are cut-outs in the piston crowns (top) which give enough clearance for a fully open valve to still avoid contact. This is great news in the case of a cam belt failure because it is very common for the valves and pistons to collide in other (interference) engines. Basically the Supra doesn't suffer any real side effects of a cam belt snap other than the need for a new belt.
The belt should be periodically renewed by either time or mileage. I believe the advised schedule is 60k miles or 4 years from Toyota.
NOTE: You will need to remove the crank pulley from the engine to do this so the crank pulley bolt will have to be removed too. This is VERY tight and I recommend you follow the instructions in the engine removal guide to crank this off with the starter motor before you do anything else - you have been warned!
Step 1 - Remove the spark plugs (see the guide for changing the plugs), this gets rid of a lot of pipework and also allows you to turn the engine over easily without pressure building in the cylinders
Step 2 - Sadly I'm working on an engine on a stand but for normal cam belt changes you need to remove the viscous fan, air con belt and fan belt. You will also need to remove the top hose to the radiator to reach the same stage my engine is at. There is also an air con bracket you may need to move as well as a power steering air pipe but nothing too dissimilar to the guide
Step 3 - You need to remove 'number 3' timing belt cover which is the top one at the front of the engine. The picture shows all the nuts you need to remove, they are all 10mm
Step 4 - Before the cover can come off you need to remove the water outlet / thermostat housing which is simply another 2 10mm bolts. Once removed you can pull the housing clear by hand
Step 5 - Now pull the timing belt cover clear of the engine. This may have sealant around it or a gasket, either way remove the cover and clean away any remnants of the previous seal
Step 6 - Now you should have a clear view of both cam shaft timing pulleys (cam pulleys). The inlet is the one on the right hand side as you face the engine (as if you didn't know!) and the exhaust is on the left. The pulley you can see underneath the two cam pulleys is the idler pulley which is used to tension the cam belt.
Step 7 - Fit a 19mm socket to the crankshaft and rotate it (clockwise) until all the notch on the pulley is at the 0 mark on the bottom (number 1) timing cover (top dead centre or tdc). The second picture shows the crank pulley aligned with the 0 mark - you will notice someone has put a dot of tipex/white paint on to make it clear where the mark on the pulley is, not a bad idea.
Note that at the start you were told to 'crack off' the crank pulley bolt, you should still be able to apply enough force to rotate the engine without tightening the bolt up much at all so don't worry about getting it off again
Step 8 - Check that the matchmarks on the cam pulleys are aligned. These are grooves in the pulleys which should be pointing straight up in alignment with the marking on the black metal backplate (timing belt cover #2 to give it the proper name!). If they are way out then you need to rotate the pulley a full 360 degrees because you are half way through the 4 stroke cycle
Step 9 - The belt is directional and usually has arrows on it. If you are removing it and for some reason will be refitting the belt then make sure you know the direction of rotation and mark it with a white pen/tipex to be sure.
Onto the lower (number 1) timing belt cover next. Again, this is just 10mm bolts although one is behind the crank pulley - you did crack this off earlier didn't you?
Step 10 - Remove the 19mm crank pulley bolt, this will be slightly tight after turning the engine using the pulley in step 7 but you should be able to just restrain the crank pulley in one hand and undo the nut with the other.
Step 11 - Now you have to get the pulley off. You can get special tools to remove this but with a bit of pulling (no puns!) you can remove it from the engine. It must come off square or you will stress the woodruff key that holds it on the crank (we'll look at that next so don't panic if you don't know what one is).
Step 12 - With the pulley removed you are looking at the nose of the crankshaft itself. You'll notice a funny piece of metal sticking out of the crank, this is the woodruff key. To ensure the pulley stays aligned with the crank and doesn't rotate at all, this very simple piece of metal is inserted. It's a semi-circle of metal that drops into a groove in the crank and then protrudes slightly as you can see from the first picture.
The crank pulley also has a groove cut out of it, this is shown in the second picture. The woodruff key slides into this groove and is locked in position.
Remove the woodruff key and place it somewhere safe - do not lose it!
Step 13 - Now you can get that final 10mm bolt for the lower cover and remove it (no gasket on this one)
")