Found this on my computer (orig. from Supra Central).
Dash removal 21 Steps
Procedure:
1. Remove 2 rear center console screws
2. Move driver's seat *all* the way back and raise windows
3. Disconnect neg. battery cable
4. Remove ashtray, driver's foot cover with the crotch vent, pass. foot cover,
and black part of dashboard (around radio, AC etc.)
5. Remove radio and A/C panel, remove glove compartment. Tilt Glove comp. to the
left to bring it out ( like this: / )
6. Remove Glove comp. upper cover (roof, black) top left corner comes out first
7. Remove fog light/coin box panel
8. Remove the black piece that goes above the gagues
9. Remove the gague cluster, each connector is different shape/color. Right side
comes out first (passenger side)
10. Remove the center console. There is a screw in the coinbox under the little
carpet.
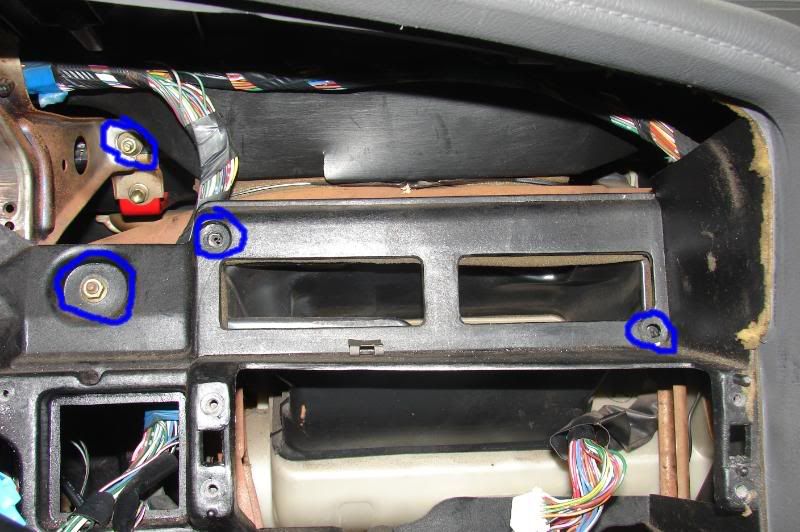
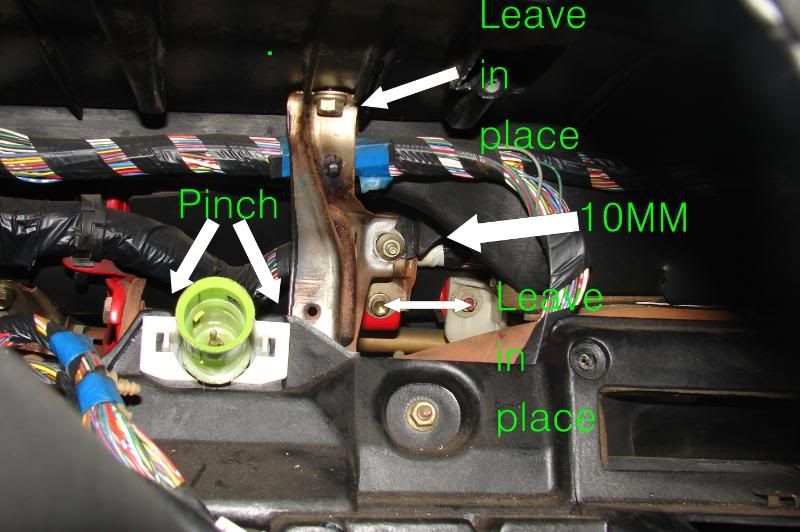
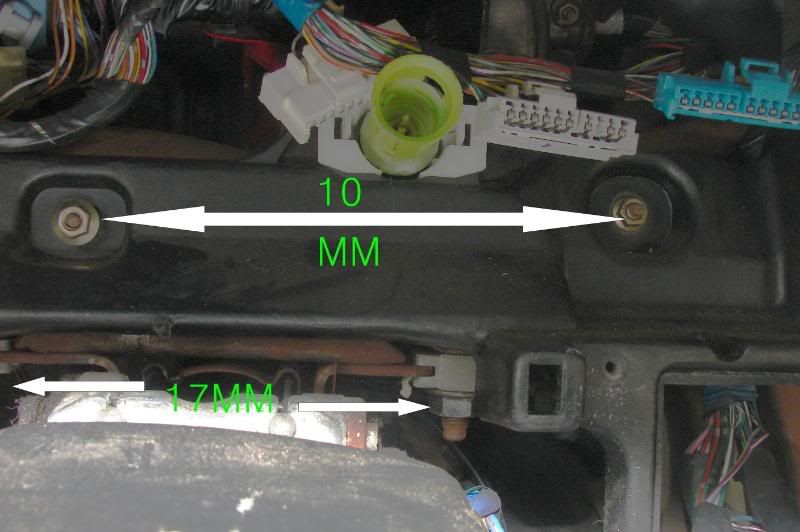
11. Remove all the screws, nuts, and bolts you can see holding the dashboard to
the car. Look EVERYWHERE as it'll make life simpler
12. Remove foot skids (the plastic holding the edges of the carpet along the
door opening) Also remove the side foot panels
13. Remove the steering wheel column cover (I forgot what for, but it helps)
14. Drop the steering wheel (telescope it all the way out, unbolt from the side
impact beam from the bottom, two bolts/nuts, set it on the edge of the seat, or
the floor if it clears the seat)
15. Remove the ECU and the ABS computers (if equipped w/ ABS) they're inside the
glove compartment hole
16. Disconnect EVERYTHING from the Fuse box. The connectors are also different
shape, don't remember if they're different colors, but you can't get them
confused
17. Unclip the speedo cable from the dasboard.
18. Remove the A-pillars (I didn't do this and ended up scratching them a bit,
spacewise it comes out fine without removing them though... I don't know how to
remove the A-pillars so if you need, I can look it up too)
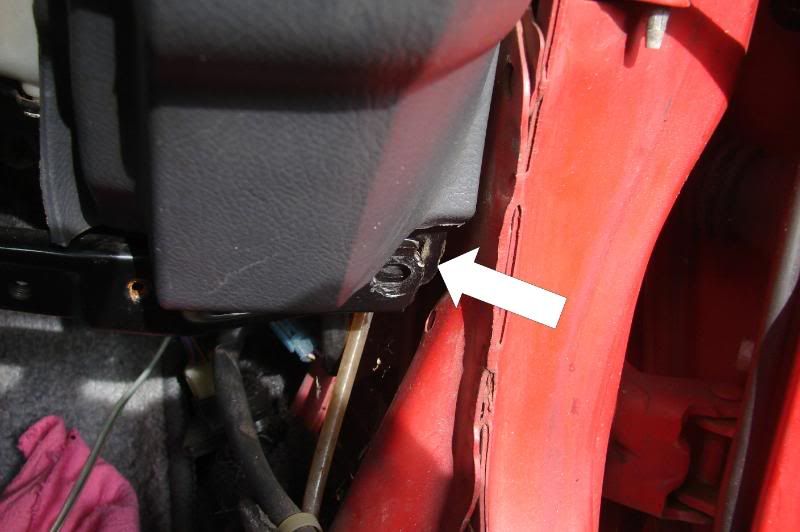
19. Just to make sure... again... see if there are any bolts holding the dash.
Some bolts are vertical (under the dash), and some are in plain view, others
might be behind a wiring harness move it out of the way to check. The wiring
harness comes out with the dashboard once you have disconnected it from the
fusebox.
Note: There is a little hose that leads from the interior thermostat which you
need to disconnect and make sure to reconnect if you want your auto AC to work
afterwards (the thermostat is to the left of the passenger side AC vents, behind
the little slits all the way on the left of that plastic piece) There is also (I
think) a little wiering harness that runs from the dashboard to somewhere around
the center console area. You need to unplug that, or you'll tear it out
20. Put the transmission in 4th gear, PULL!!!! BE CAREFUL, the plastic is *very*
sharp in some areas, I got a few cuts being careless.
Note 2: The dash pops out pretty easily. If any part of the dash is giving you
too much trouble, check for a bolt. When you go to pull it out, pull out the
passenger's side first and begin to tip the dashboard over so that the top of
the dashboard faces the back of the car, so you can clear the steering wheel.
Make sure you're not scratching it with the A-pillars. Depending on how you do
it, it'll seem to get stuck somewhere and not wanna go in or out easily but
don't worry, it'll come out. Pull out slowly and make sure there's no wires or
connections coming along with it. Once you have that done, you'll see the heater
core, and if anyone needs procedures for that, I can send them from the factory
repair manual. My car was an 88, but I don't think there's much difference in
it.
21. Installation is the exact reverse.


