
How to install 7M cap and A/C lines
Step 1: Replace the 1JZ cap with one from a 7M.
Step 2: Hook up A/C lines. The power steering bracket will interfere with the lines so it will have to have some metal taken off with a grinder.
Step 3: The stud for the A/C compressor bracket needs to be ground down or replaced with another bolt.
How to wire A/C for 1JZ the easy way
The general idea is the wire going into pin 9 on EA2 connects to the ac clutch magnet relay and replaces the blue wire on that plug.
Step 1: Remove battery.
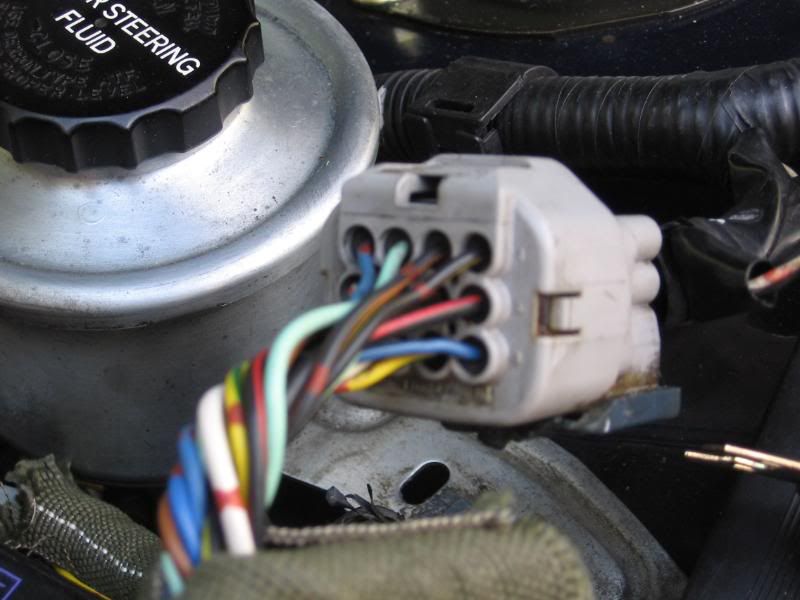
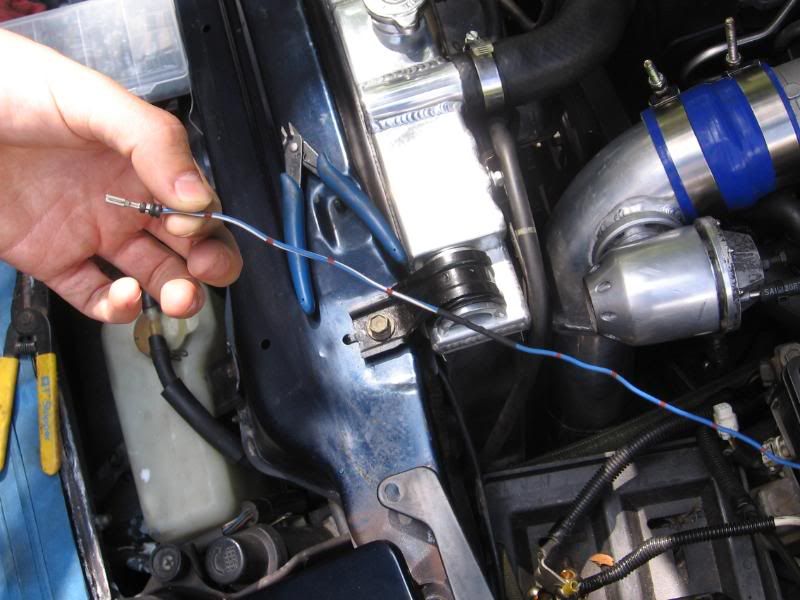
Step 2: Locate pin 9 on the male side of the EA2 connector. It should be a blue wire (possibly with red rings). You can be sure that it is the right side of the connector by noting the small “9” written next to the pin.
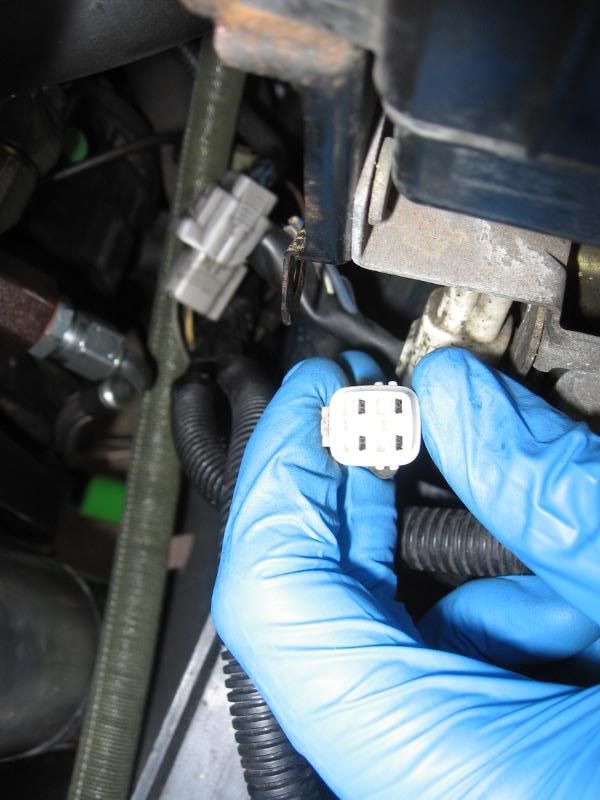
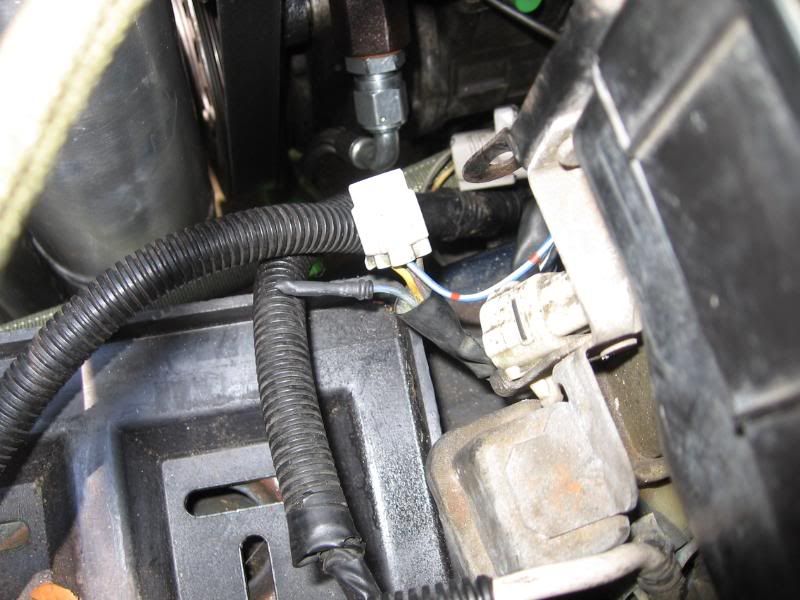
Step 3: Locate the connector underneath the A/C clutch magnet relay. This is below and on the motor side of the fuse box. The male side is 4 pins (blue-red, yellow-green, brown, and blue).
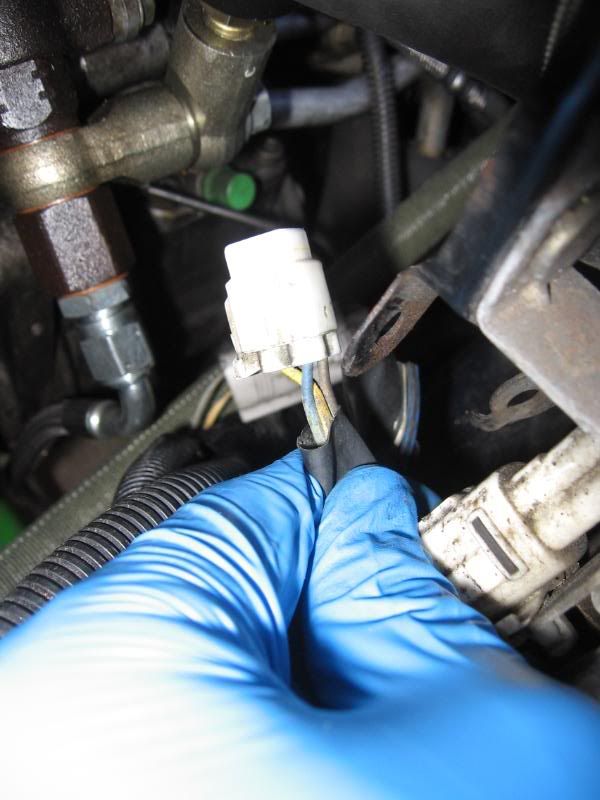
Step 4: De-pin the blue wire (not blue-red) and cover it up somehow. This wire is no longer needed.
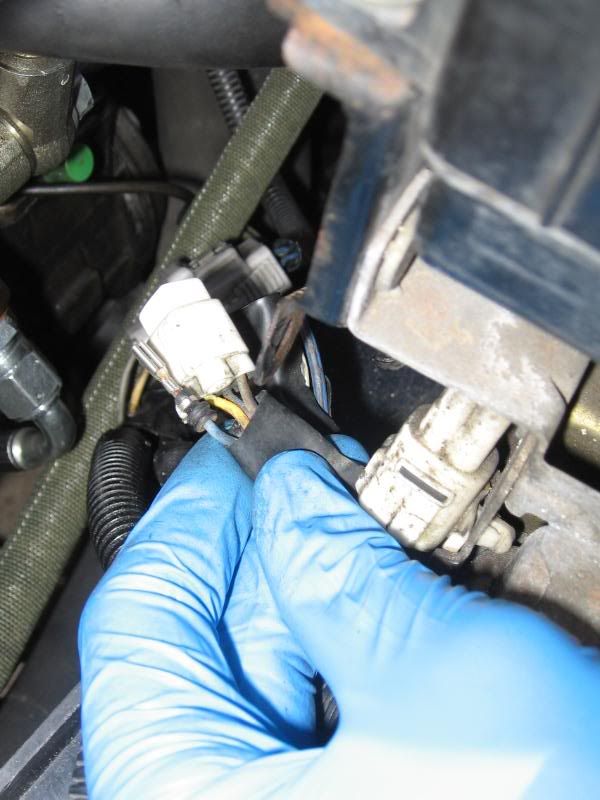
Step 5: Figure out where the wire from pin 9 on EA2 leads to. I assume that it will go nowhere, because on both the cars I have worked on this was the case. If it leads somewhere de-pin it from wherever it connects. If not, I just found an extra connector and soldered on a pin.
Step 6: Insert this pin into the empty slot on the connector from step 3 (there should be an empty pin because of step 4).
Step 7: Locate the ground coming off the compressor. Bolt the terminal to the hole in the red circle on the left.

That should be all you need to get it working. It is very simple. Good luck!
-Chris
Step 1: Replace the 1JZ cap with one from a 7M.
Step 2: Hook up A/C lines. The power steering bracket will interfere with the lines so it will have to have some metal taken off with a grinder.
Step 3: The stud for the A/C compressor bracket needs to be ground down or replaced with another bolt.
How to wire A/C for 1JZ the easy way
The general idea is the wire going into pin 9 on EA2 connects to the ac clutch magnet relay and replaces the blue wire on that plug.
Step 1: Remove battery.
Step 2: Locate pin 9 on the male side of the EA2 connector. It should be a blue wire (possibly with red rings). You can be sure that it is the right side of the connector by noting the small “9” written next to the pin.
Step 3: Locate the connector underneath the A/C clutch magnet relay. This is below and on the motor side of the fuse box. The male side is 4 pins (blue-red, yellow-green, brown, and blue).
Step 4: De-pin the blue wire (not blue-red) and cover it up somehow. This wire is no longer needed.
Step 5: Figure out where the wire from pin 9 on EA2 leads to. I assume that it will go nowhere, because on both the cars I have worked on this was the case. If it leads somewhere de-pin it from wherever it connects. If not, I just found an extra connector and soldered on a pin.
Step 6: Insert this pin into the empty slot on the connector from step 3 (there should be an empty pin because of step 4).
Step 7: Locate the ground coming off the compressor. Bolt the terminal to the hole in the red circle on the left.
That should be all you need to get it working. It is very simple. Good luck!
-Chris
Last edited:
