Valve seal replacement without removing the head

SupraTrbo89

Member
Sep 21, 2006
233
5
18
West Chester, PA
So I am going to attempt to replace the valve seals using the rope trick without removing the head as the head has been recently shaved and torqued down with ARP studs. I was a moron by not having the valve seals replaced while the head was off. So rather than paying a mechanic $800 to do this I am going to attempt it myself. I found a great thread on this forum which has a link to a well written write up from supras.com:

http://www.supras.com/06/techcenter/display.php?QID=5

Here is a list of what I am going to buy before I get started next week. If anyone can think of anything else I am missing please let me know.
From Driftmotion - valve seals, 2 camshaft seals, cps seal, 12 new bolts and washer to replace phillips bolts (not going to purchase valve cover seals as they were just replaced 2k miles ago when the head was done).
From Amazon - 14MM hex key, CTA Tools 2205 Valve Stem Seal Pliers, OTC 6613 Variable Pin Spanner Wrench, Lisle 36050 Valve Keeper Remover and Installer Kit
Other - rope, assembly lube, new coolant, oil to lubricate valve seals prior to install, white paint for match marks

A few questions -
1. Does anyone have a guess as to the length of rope used for each cylinder?
2. What all should be lubed during reassemble: cam shafts?
3. I noticed the guy who did the write up on supras.com also listed RTV silicon as something he purchased but, makes no mention of using it during the write up?
4. If everything is put back exactly how it was removed will I need to adjust timing when I'm finished?
5. I assume I can find the correct order to loosen the bearing caps in the TSRM? (I plan on reading this over prior to doing the replacement)
6. Is the best way to compress the springs using 3/4" pvc with a 1/2" plunger piece inside? and the best way to seat the valve seals is using a 1/4" piece of pvc?

I think that's everything I can think of and if anyone has any additional input regarding anything else I should buy please let me know. I would like to order the parts ASAP and possibly start the job Sunday.

Thanks in advance
 

JDMMA70

Active Member
Dec 4, 2006
2,550
0
36
Houston
SupraTrbo89;2032360 said:
So I am going to attempt to replace the valve seals using the rope trick without removing the head as the head has been recently shaved and torqued down with ARP studs. I was a moron by not having the valve seals replaced while the head was off. So rather than paying a mechanic $800 to do this I am going to attempt it myself. I found a great thread on this forum which has a link to a well written write up from supras.com:

http://www.supras.com/06/techcenter/display.php?QID=5

Here is a list of what I am going to buy before I get started next week. If anyone can think of anything else I am missing please let me know.
From Driftmotion - valve seals, 2 camshaft seals, cps seal, 12 new bolts and washer to replace phillips bolts (not going to purchase valve cover seals as they were just replaced 2k miles ago when the head was done).
From Amazon - 14MM hex key, CTA Tools 2205 Valve Stem Seal Pliers, OTC 6613 Variable Pin Spanner Wrench, Lisle 36050 Valve Keeper Remover and Installer Kit
Other - rope, assembly lube, new coolant, oil to lubricate valve seals prior to install, white paint for match marks

A few questions -
1. Does anyone have a guess as to the length of rope used for each cylinder?
I didnt use rope when I did mine. I used air, but Id guess 50ft should be plenty. However its not a bad idea to have more than you need.
2. What all should be lubed during reassemble: cam shafts?
Cam bearing surfaces.
3. I noticed the guy who did the write up on supras.com also listed RTV silicon as something he purchased but, makes no mention of using it during the write up?
Its used when reinstalling the No1 cam bearing cap as well as sealing the front of the valve covers.
4. If everything is put back exactly how it was removed will I need to adjust timing when I'm finished?
Unless youre the definition of perfection yes.
5. I assume I can find the correct order to loosen the bearing caps in the TSRM? (I plan on reading this over prior to doing the replacement)
Yes.
6. Is the best way to compress the springs using 3/4" pvc with a 1/2" plunger piece inside? and the best way to seat the valve seals is using a 1/4" piece of pvc?
I borrowed a frinds ToyoTool valve keeper removal tool. I really didnt need any extensions. However if persuasion is needed, a soft mallet will do the trick.

I think that's everything I can think of and if anyone has any additional input regarding anything else I should buy please let me know. I would like to order the parts ASAP and possibly start the job Sunday.

Thanks in advance
 

SupraTrbo89

Member
Sep 21, 2006
233
5
18
West Chester, PA
JDM - Thanks for the feedback. I am going to purchase all the parts/tools today and hopefully get started on this in the next few days. I am sure I will have questions as I go.
 

SideWinderGX

Member
Aug 8, 2007
733
0
16
35
Syracuse, New York, United States
I've used the cheapo jaw compression tool with a piece of 3/4" PVC pipe and it is a gigantic pain in the ass. That toyotool is $85 from their website, if I ever need to do the keepers again I'd definitely buy that even if I used it once.
 

SupraTrbo89

Member
Sep 21, 2006
233
5
18
West Chester, PA
Yea I ordered the Lisle 36050 Valve Keeper Remover and Installer Kit which is the one discussed in the write-up so hopefully this makes thing easier. I have taken apart everything so far and am at the point where I need to remove the cam gears. I am just waiting on the spanner wrench I ordered to get here. I am expecting it today or tomorrow.
 

SupraTrbo89

Member
Sep 21, 2006
233
5
18
West Chester, PA
Quick question...so I cracked the bolts lose on the cam gears and removed the cam gear and the instructions say to mark the position of the match pin in the cam shaft before removing the match pin....not sure exactly what I'm marking? Am I marking the pin to the # 2 timing cover? The pin goes in the center hole of the 3 and the pin points to the notch in the #2 timing cover so why would I need to mark this. Also how does the match pin come out...does it simply pull out?

Side note: I already marked the cam gear with white paint which aligns with the match pin, mark on the cam gear from the factory and the mark on the #2 timing cover. When I go to reassemble I would put the match pin in the center hole, and put the cam gear on the match pin so the mark on the cam gear points to the mark on the #2 timing cover.

Just want to make sure I fully understand before removing the match pins
 

hvyman

Dang Dude! No Way Man.
Staff member
Apr 17, 2007
12,568
1
0
Fullerton,CA
the pin to which hole it lies out of the 3. Leave them in the center.

If they dont come out easily dont bother removing them. Just make sure they stay in there when moving the cams around.
 

SupraTrbo89

Member
Sep 21, 2006
233
5
18
West Chester, PA
I removed the 7 bearing caps on both cam shafts but the cam shafts seem to be stuck as Im not able to pull them out....I tried putting the cam gear bolt back in the front of the shaft to help me pull a little but no luck. I did notice the ass end of each cam shaft lift up a little when bearing cap #7 was removed (closest to the firewall) so maybe its pinching it up front. Ill try pressing the rear back down a little and lifting on the front. Any suggestions would be appreciated.
 
Last edited:

SupraTrbo89

Member
Sep 21, 2006
233
5
18
West Chester, PA
The instructions say to remove the cam position sensor....is this necessary?....I don't see how it's in the way of the lifters and shims.

Edit: I thought about it and I'm sure its necessary for when I go to install the cam shaft bc the CPS cant be in when I put the cam shaft back in.
 
Last edited:

super51fan

New Member
Jul 28, 2010
497
0
0
Indianapolis
Make sure that you lubricate the inner part of valve seals, where the valves slides up and down. It is also important to properly seat the seals on the guides. I use a 10mm deep socket 1/4" drive and about 6" extension. I push firmly onto guide and give it a few light taps with small 8oz hammer. IMO this is what works for me. Good luck.
 

SupraTrbo89

Member
Sep 21, 2006
233
5
18
West Chester, PA
One valve seal replaced....23 to go......I hope to hell my rope doesn't tangle on the way out. Also, I noticed a really tiny/thin seal on the underside of the retainer when I pulled it....it was like paper thin.....is that normal?

Also it was a pain in the ass getting the valve seal out....I 1st ripped off the rubber part then bent up the metal ring pretty good before I got it out...I even have valve stem plyers. I cleaned the area with a q-tip before reinstalling the new seal.

I don't know how people would do the job without the valve stem remove and installer tool??? Everything went real smooth with the tool giving a quick wack with a hammer on removal and install. So far so good. I'll resume in the morning. Time to drink beer.
 

Suprapowaz!(2)

New Member
Apr 10, 2006
2,870
0
0
50
San Antonio, Tx.
My rope tangled up on me when I tried to pull it out. My suggestion is to pull it slow and keep an eye on it.
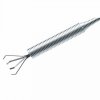
When mine tangled I pulled the knot up to the top near the spark plug hole. I then reached through the hole with a long thin blade and sawed the knot in two. I continued to pulled the part that was already sticking out of the head. I then took a pick up tool, reached in the chamber, and pulled out the rest.
draper-claw-pick-up-tool-610mm.jpg


BTW, you can stuff equal lengths of rope in two cylinders at a time. 1 & 6, 2 & 5, 3 & 4. Those pairing go up/down at the same time. This is also an excellent time to upgrade valve springs and retainers since they have to go back in after the stem seal job. I did Comp Cams BBC inner springs. They work good.
 

Attachments

  • draper-claw-pick-up-tool-610mm.jpg
    draper-claw-pick-up-tool-610mm.jpg
    18.2 KB · Views: 3

SupraTrbo89

Member
Sep 21, 2006
233
5
18
West Chester, PA
two questions....im guessing the springs are not directional?......Also im having a hell of a time removing the valve stems.....I tried for like 15 min with my valve stem plyers but no luck. They just slip off the metal casing. I also have a pair of needle nose vice grips but they cant fit down in the hole and grab the seal. I am going to see if I can get a longer skinnier pair of vice grips or a different pair of plyers.

Suprapowaz......ill def keep that in mind if my rope gets tangled and will also start doing rope two cylinders at a time
 

Suprapowaz!(2)

New Member
Apr 10, 2006
2,870
0
0
50
San Antonio, Tx.
I used a pair of needle nose. I grabbed the seal, and began twisting left and right before pulling up on it. I did have a couple separate, but managed to get all of it out easy enough.
 

SupraTrbo89

Member
Sep 21, 2006
233
5
18
West Chester, PA
yea I just picked up a pair of needle nose and things are going much smoother......1st cylinder is done and the rope is out. I hope to finish the valve seal replacement today or tomorrow.
 

SupraTrbo89

Member
Sep 21, 2006
233
5
18
West Chester, PA
I just did the EF and ER valve seals on cylinder #6 and put the keepers/retainers back in.......when I go to put the shims/buckets back on both are giving me some resistance......I could probably tap them on with a small hammer and protect it with some tape...should these slide on smooth?........the 1st four buckets in cylinder #1 slid on pretty smooth
 

Suprapowaz!(2)

New Member
Apr 10, 2006
2,870
0
0
50
San Antonio, Tx.
Do not tap them in. You should be putting the same buckets in the same bore. Make sure the bore & buckets are clean, and oiled. If the bucket is not dropping in right away keep rotating it and try to push it in with just your fingers. It will eventually drop in. I had a couple of stubborn ones that didn't plop in the first time. I patiently worked them in by slowly spinning them and forcing them in with must my pointer and thumb digits.