Part One:
I have been restoring it for a few months now, and have just completed my first stage resto/mods.
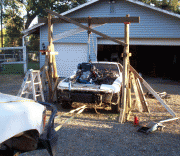
I picked the car up back in May for $350, and it sat until August. This is what it looked like when I got it home. Since then I have put about another $1700 into and and probably 100 hours of my time.
Before
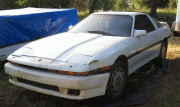
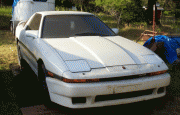
This is what it looks like now.


I couldn't find white pearl fenders and mirror, so I had to paint the gray ones I did get. I did shoot a coat of white paint w/ a metallic clear coat in a cheap attempt to match the oem pearl, but the white was to bright. It doesn't look too bad in the pics, but it isn't a good enough match. I am not sure if I want to paint the entire thing white metallic, or redo the oem white pearl, or another color completely, like a deep blue metallic. Black would be nice, but it doesn't really go w/a blue interior.
I am not sure if I like the bra or not yet, but will likely run it until I paint it and decide if I am going to run a body kit or not. For now it helps to draw attention from the difference in the paint.
In August I finally found the type of rims I was after for a price that I thought was fair, or about as fair as I was going to find. They are 18" SSR's and are staggered 9" front 10" rear. After see it with the rims on it, I got motivated enough to start the rebuild.
I started with the interior, why people don't take care of the interior of their cars better is beyond me. Anyways I gutted it , cleaned and fixed everything that has needed work so far(I think I have found everything) and located most of the parts I couldn't fix. I still need a few items, and depending on how the vinyl repair on the door panels goes I may need to locate clean ones, or try to recover them.
When I started the interior was in the same condition as the carpet.
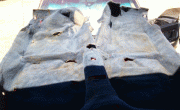 , only I didn't bother to take before pics.
I recovered the arm rest, made new shifter and e-brake boots, and made a cover for the e-brake handle.

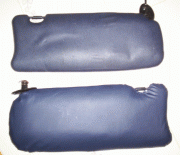
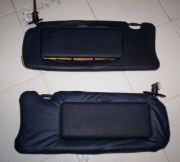
I also recovered the sun visors
Before/After
After cleaning the rear hatch out, I put in some new carpet , made a tire hold down.
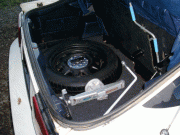 I still have to make some hold downs for the jack and lug wrench.
I then made a new hard cover and covered it w/a cloth w/foam backing, similar to cloth headliner. To keep it from making noise, the handle screws into a bolt welded to one of the oem supports.
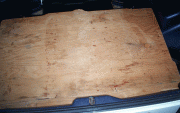 . material)
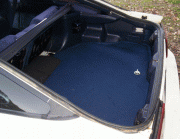
I didn't cover the section near the rear seats, that is where I will be mounting an amp once I start on the stereo installation.
I have been restoring it for a few months now, and have just completed my first stage resto/mods.
I picked the car up back in May for $350, and it sat until August. This is what it looked like when I got it home. Since then I have put about another $1700 into and and probably 100 hours of my time.
Before


This is what it looks like now.


I couldn't find white pearl fenders and mirror, so I had to paint the gray ones I did get. I did shoot a coat of white paint w/ a metallic clear coat in a cheap attempt to match the oem pearl, but the white was to bright. It doesn't look too bad in the pics, but it isn't a good enough match. I am not sure if I want to paint the entire thing white metallic, or redo the oem white pearl, or another color completely, like a deep blue metallic. Black would be nice, but it doesn't really go w/a blue interior.
I am not sure if I like the bra or not yet, but will likely run it until I paint it and decide if I am going to run a body kit or not. For now it helps to draw attention from the difference in the paint.
In August I finally found the type of rims I was after for a price that I thought was fair, or about as fair as I was going to find. They are 18" SSR's and are staggered 9" front 10" rear. After see it with the rims on it, I got motivated enough to start the rebuild.
I started with the interior, why people don't take care of the interior of their cars better is beyond me. Anyways I gutted it , cleaned and fixed everything that has needed work so far(I think I have found everything) and located most of the parts I couldn't fix. I still need a few items, and depending on how the vinyl repair on the door panels goes I may need to locate clean ones, or try to recover them.
When I started the interior was in the same condition as the carpet.
 , only I didn't bother to take before pics.
I recovered the arm rest, made new shifter and e-brake boots, and made a cover for the e-brake handle.

I also recovered the sun visors
Before/After


After cleaning the rear hatch out, I put in some new carpet , made a tire hold down.
 I still have to make some hold downs for the jack and lug wrench.
I then made a new hard cover and covered it w/a cloth w/foam backing, similar to cloth headliner. To keep it from making noise, the handle screws into a bolt welded to one of the oem supports.
 . material)

I didn't cover the section near the rear seats, that is where I will be mounting an amp once I start on the stereo installation.
Last edited:

