Ok just like the title says, I did my walbro 255 pump today. Maybe it was just me but It just seemed like no good info was about this nor pics. I know why now that I have done it. Its because it was soo eazy. Really I had a lift and air tools, most people don't have. but this is doable on the ground. I will post up every thing I used and things that I wish I had. Keep in mind that I swapped out my tank too bec I was leaking from somewhere. I didn't find it when I got the tank out but I found alota dirt in the tank. I did not do the 12v wire up at this time. I was working and had other cars to work on at the same time lol.
OK first make sure you have the right tools and parts. SAFETY GLASSES!!!! a shit ton of dirt will fall out of your car. I don't care how clean or low mileage it is. Plz try to have 1/4 tank of gas at this time.
Fuel pump {make sure its not a knock off from ebay or other bs.} if your unsure just spend the extra.
The wire adepter kit that goes with it. {pics posted lower} I clipped mine and soldered it in. you could crimp yours in.
Tools:
deep 17 mm socket
something to take your right rear wheel off.
8mm socket
10mm socket
a 3in to 6in extension to fit your sockets
Philips screwdriver
flat screw driver mid length.
hammer {may not need it}
pliers {slip joint cheepos work fine}
14mm LINE WRENCH. {yes LINE WRENCH if you don't have one buy one, if you round off that fuel line it will suck and suck bad to do this or to fix}
19mm wrench { i would say good quality kinda long if your a little guy like me.}
PB blaster or some type of liquid lube to help break loose the bolts.
fuel filter {I didn't replace mine at the time bec I thought it was in a different place. Mine is right by the diff and i didn't know it} If yours ins in the same spot plz just replace it at the same time save your self from having to do it again.
Ok first pop your hatch and unscrew the plate covering the fuel sender unit assuming that you don't have the wood or the carpet in there still.
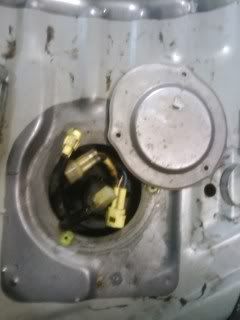
unplug the 2 connectors becarfull they are old.
Pop your gas tank lid open take off the cap and lift your car. If you have a lift this will be ez but if your on the ground then it may be a lil harder. {if on the ground do it right use jack stands and a good jack not some cheep ass set your aunt got you bec you said you like to work on cars.} they may work but I just don't trust that stuff in my older age now.
Take off the right rear wheel; use the 8mm socket to take out the screws that hold the plastic cover that cover the filler neck, should pop right out. Once again be careful this is old plastic.
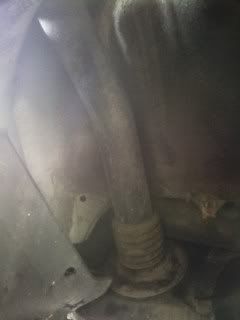
Inside the gas door take out the 4 Philips head screws that hold the plastic thing around the filler neck, you may have to use the flat head to pry this off. Be careful and act slow, its really eazy to chip your paint or scratch your car.
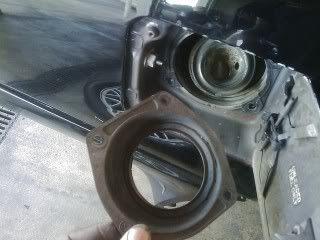
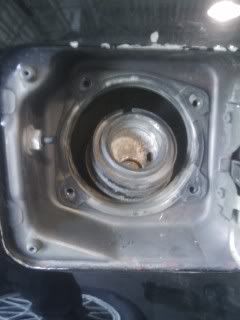
Now is a good time to start spraying the strap bolts and the metal fuel line with pb blaster or lube.
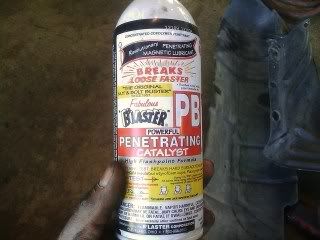
Dont use it and this may happen.
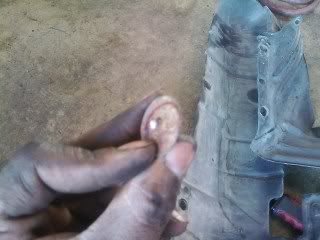
Now uses the pliers to take off the two rubber fuel lines. Some fuel may come out watch your eyes and mouth.
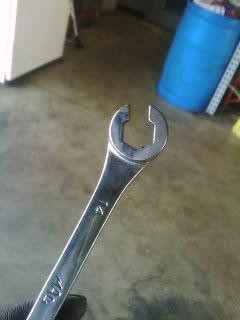
Grab the 14mm line wrench and the 19 and take off the metal fuel line. Remember the 19 will be doing all the turning and the 14 is there just to hold the line from snapping off. This is a big step with out this your not dropping the tank.
This is what a line wrench looks like.
this is were it goes.
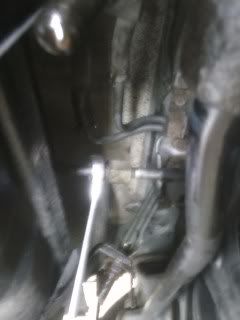
lefty loosy righty tighty so think about it and then act. Fuel May come out so watch your eyes and mouth and cig if your smoking at this point.
I hope your take is empty or close to it.
Grab the 17mm deep socket and take off the tank straps that hold it up and lower the tank. Move it to a clean clear area with good air flow.
Take the 8mm socket and take out the bolts that hold in the fuel pump {its the one that the larger opening with metal lines.
Once the pump is out it should look like this. that's the new pump next to it.
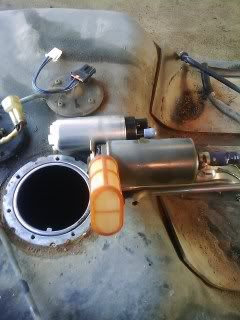
The adepter connector is above the new pump I wont show my ase skills but make sure you note what is positive and what is ground ok.
Clean the area around the openings trying not to get any dirt in the tank
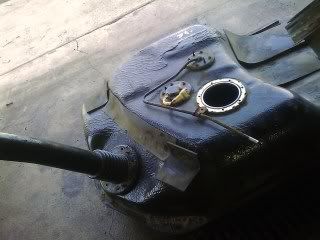
All right now all ya gotta do is put it all back together just the way it was. YES EVERY NUT AND BOLT back on. unless your like me and I had a 3/4 full tank so i was not gonna waist gas and have to refuel my new tank with gas. :nervous:
so i had to find a way to transfer it. I had alota dirt in my tank and I'm sure that's the cause of some problems.
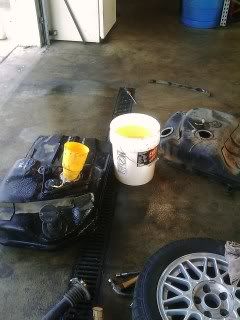
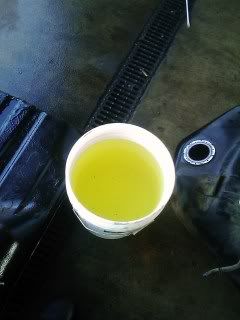
and just like that your all done your car may run rich so I would recommend a tune but that's all on you. If I forgot something or said something wrong by all means I will go back an edit this. Hopes this helps just even one person
OK first make sure you have the right tools and parts. SAFETY GLASSES!!!! a shit ton of dirt will fall out of your car. I don't care how clean or low mileage it is. Plz try to have 1/4 tank of gas at this time.
Fuel pump {make sure its not a knock off from ebay or other bs.} if your unsure just spend the extra.
The wire adepter kit that goes with it. {pics posted lower} I clipped mine and soldered it in. you could crimp yours in.
Tools:
deep 17 mm socket
something to take your right rear wheel off.
8mm socket
10mm socket
a 3in to 6in extension to fit your sockets
Philips screwdriver
flat screw driver mid length.
hammer {may not need it}
pliers {slip joint cheepos work fine}
14mm LINE WRENCH. {yes LINE WRENCH if you don't have one buy one, if you round off that fuel line it will suck and suck bad to do this or to fix}
19mm wrench { i would say good quality kinda long if your a little guy like me.}
PB blaster or some type of liquid lube to help break loose the bolts.
fuel filter {I didn't replace mine at the time bec I thought it was in a different place. Mine is right by the diff and i didn't know it} If yours ins in the same spot plz just replace it at the same time save your self from having to do it again.
Ok first pop your hatch and unscrew the plate covering the fuel sender unit assuming that you don't have the wood or the carpet in there still.

unplug the 2 connectors becarfull they are old.
Pop your gas tank lid open take off the cap and lift your car. If you have a lift this will be ez but if your on the ground then it may be a lil harder. {if on the ground do it right use jack stands and a good jack not some cheep ass set your aunt got you bec you said you like to work on cars.} they may work but I just don't trust that stuff in my older age now.
Take off the right rear wheel; use the 8mm socket to take out the screws that hold the plastic cover that cover the filler neck, should pop right out. Once again be careful this is old plastic.

Inside the gas door take out the 4 Philips head screws that hold the plastic thing around the filler neck, you may have to use the flat head to pry this off. Be careful and act slow, its really eazy to chip your paint or scratch your car.


Now is a good time to start spraying the strap bolts and the metal fuel line with pb blaster or lube.

Dont use it and this may happen.

Now uses the pliers to take off the two rubber fuel lines. Some fuel may come out watch your eyes and mouth.
Grab the 14mm line wrench and the 19 and take off the metal fuel line. Remember the 19 will be doing all the turning and the 14 is there just to hold the line from snapping off. This is a big step with out this your not dropping the tank.
This is what a line wrench looks like.

this is were it goes.

lefty loosy righty tighty so think about it and then act. Fuel May come out so watch your eyes and mouth and cig if your smoking at this point.
I hope your take is empty or close to it.
Grab the 17mm deep socket and take off the tank straps that hold it up and lower the tank. Move it to a clean clear area with good air flow.
Take the 8mm socket and take out the bolts that hold in the fuel pump {its the one that the larger opening with metal lines.
Once the pump is out it should look like this. that's the new pump next to it.

The adepter connector is above the new pump I wont show my ase skills but make sure you note what is positive and what is ground ok.
Clean the area around the openings trying not to get any dirt in the tank

All right now all ya gotta do is put it all back together just the way it was. YES EVERY NUT AND BOLT back on. unless your like me and I had a 3/4 full tank so i was not gonna waist gas and have to refuel my new tank with gas. :nervous:
so i had to find a way to transfer it. I had alota dirt in my tank and I'm sure that's the cause of some problems.


and just like that your all done your car may run rich so I would recommend a tune but that's all on you. If I forgot something or said something wrong by all means I will go back an edit this. Hopes this helps just even one person
